Android
 Desktop
 Download MouthCAM Android App
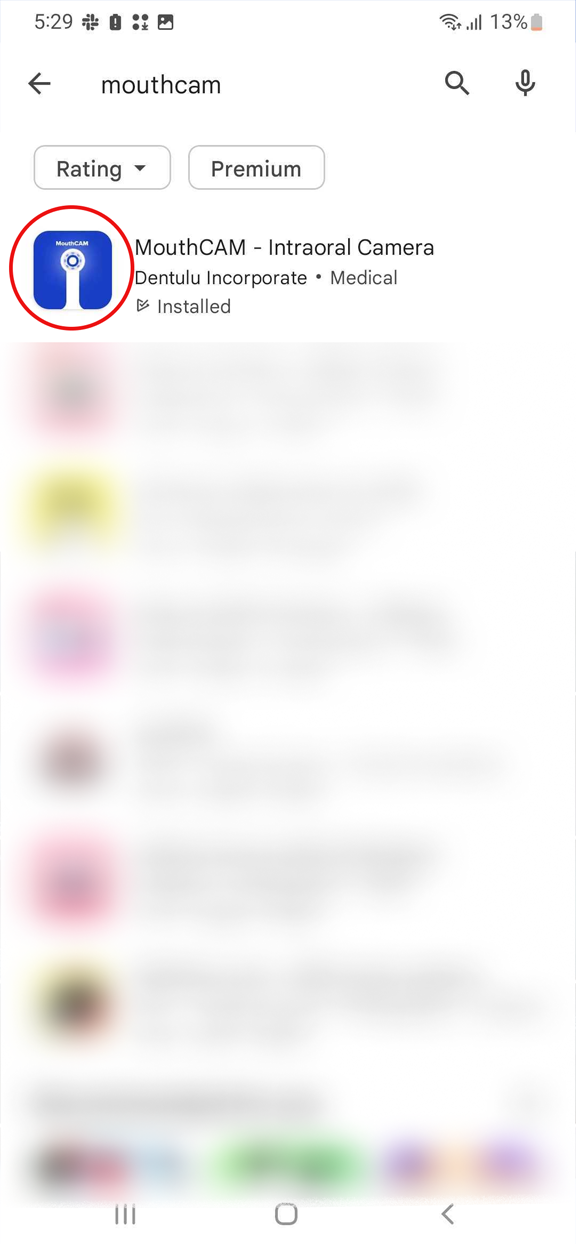
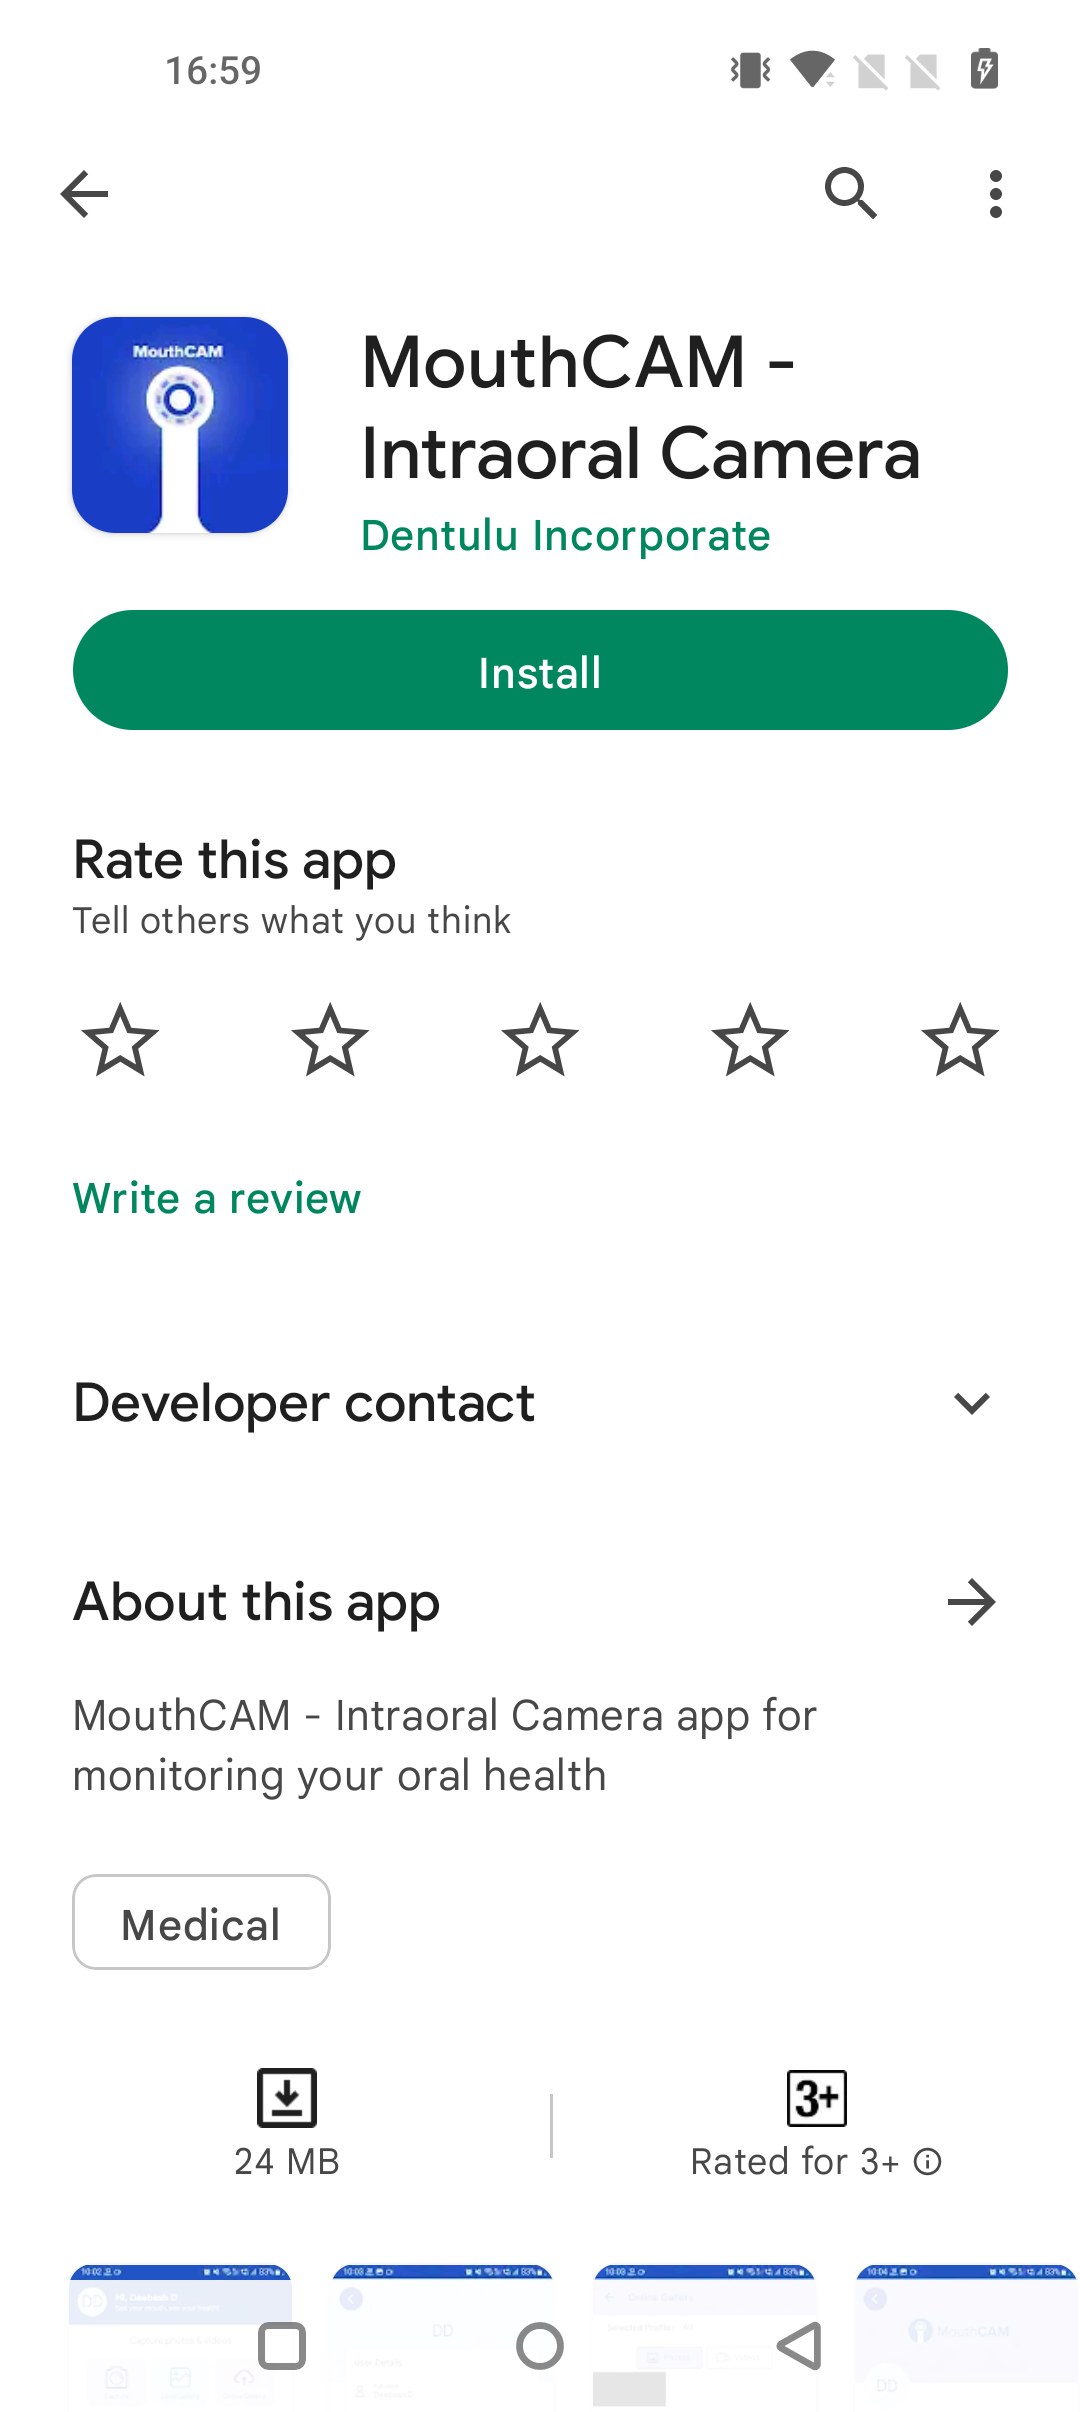
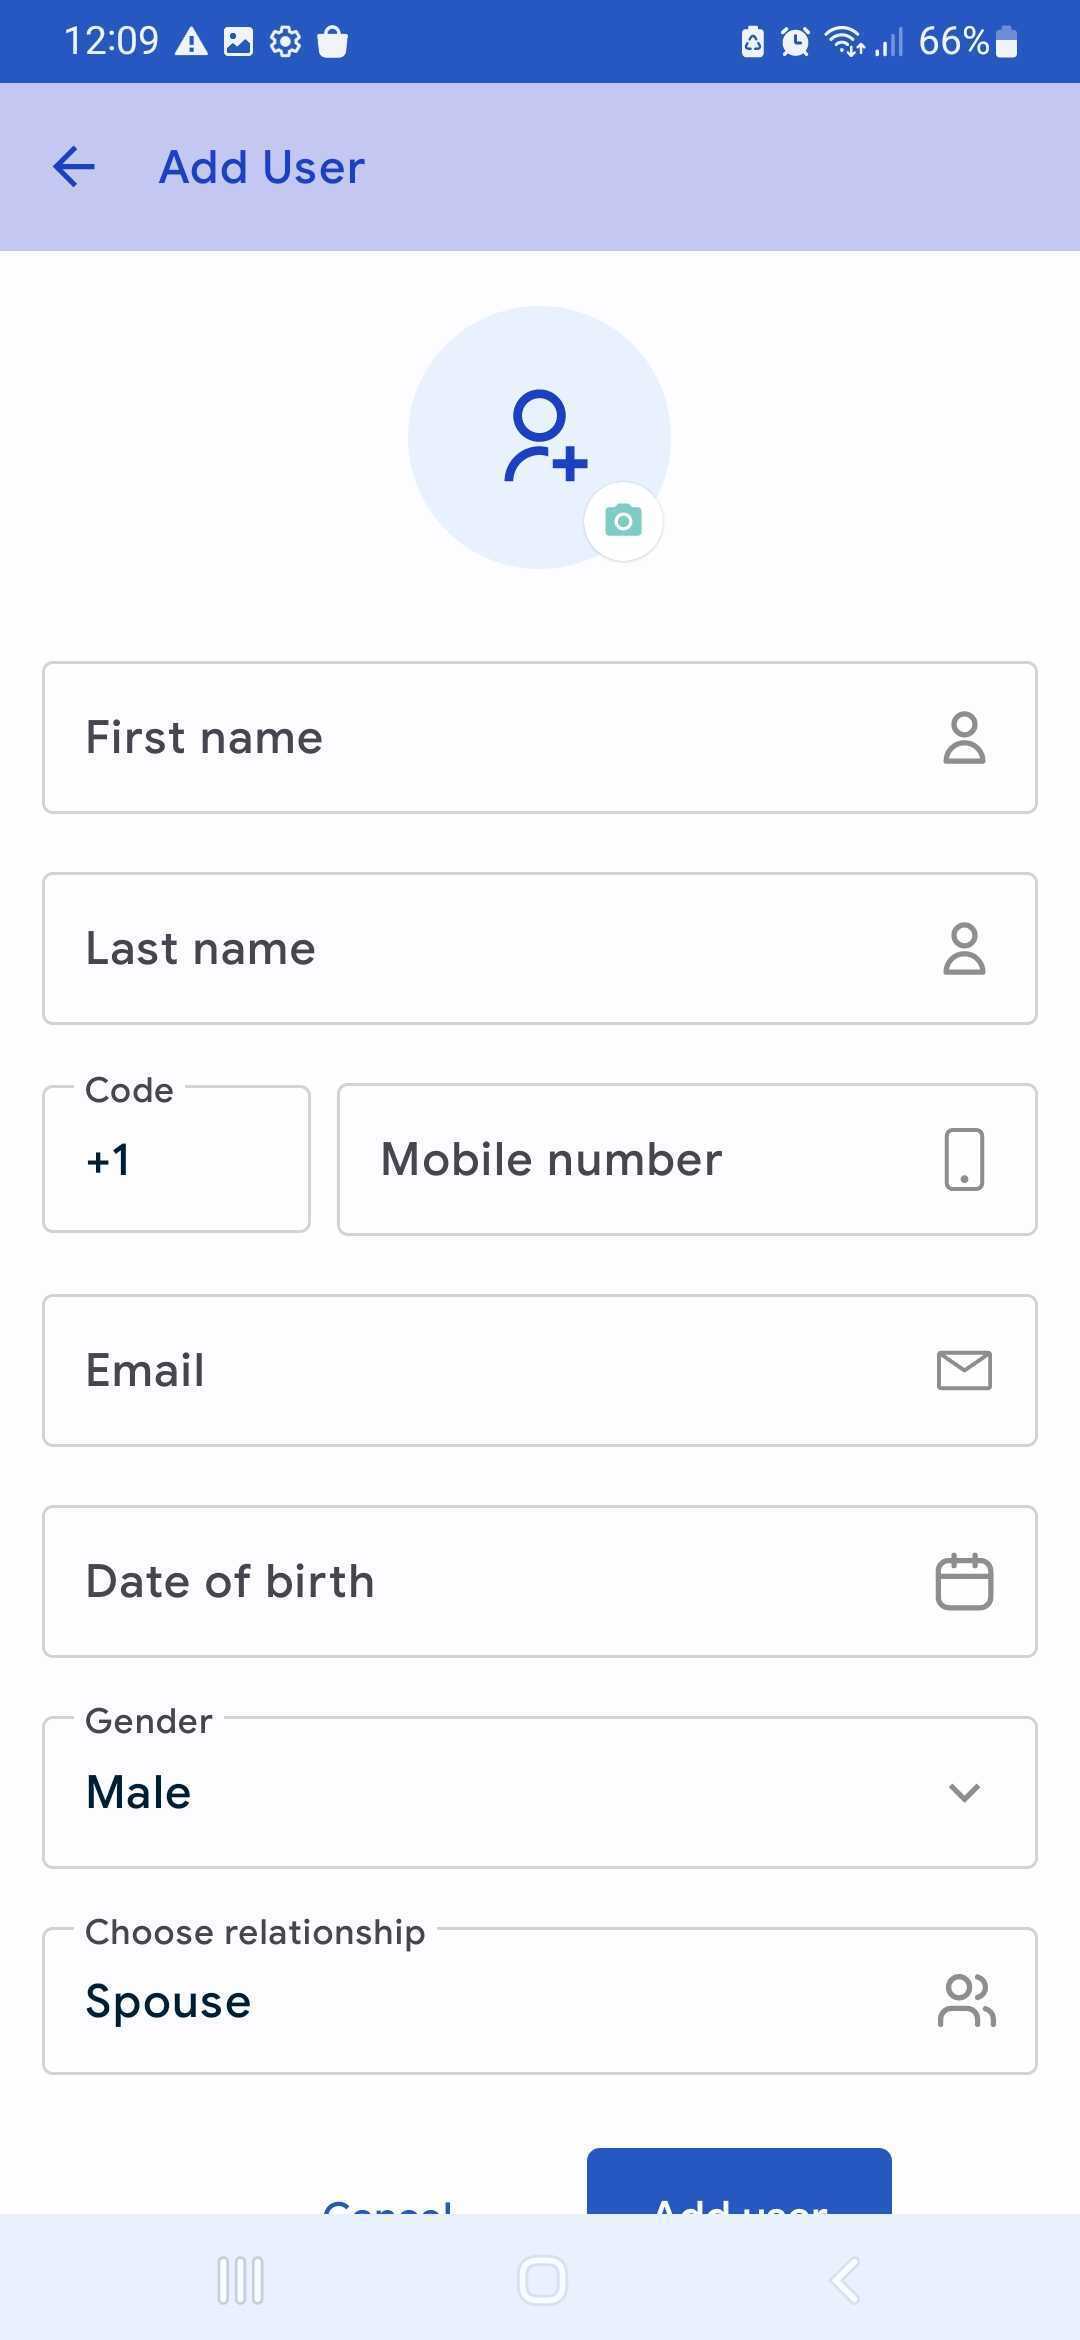
Create new profile
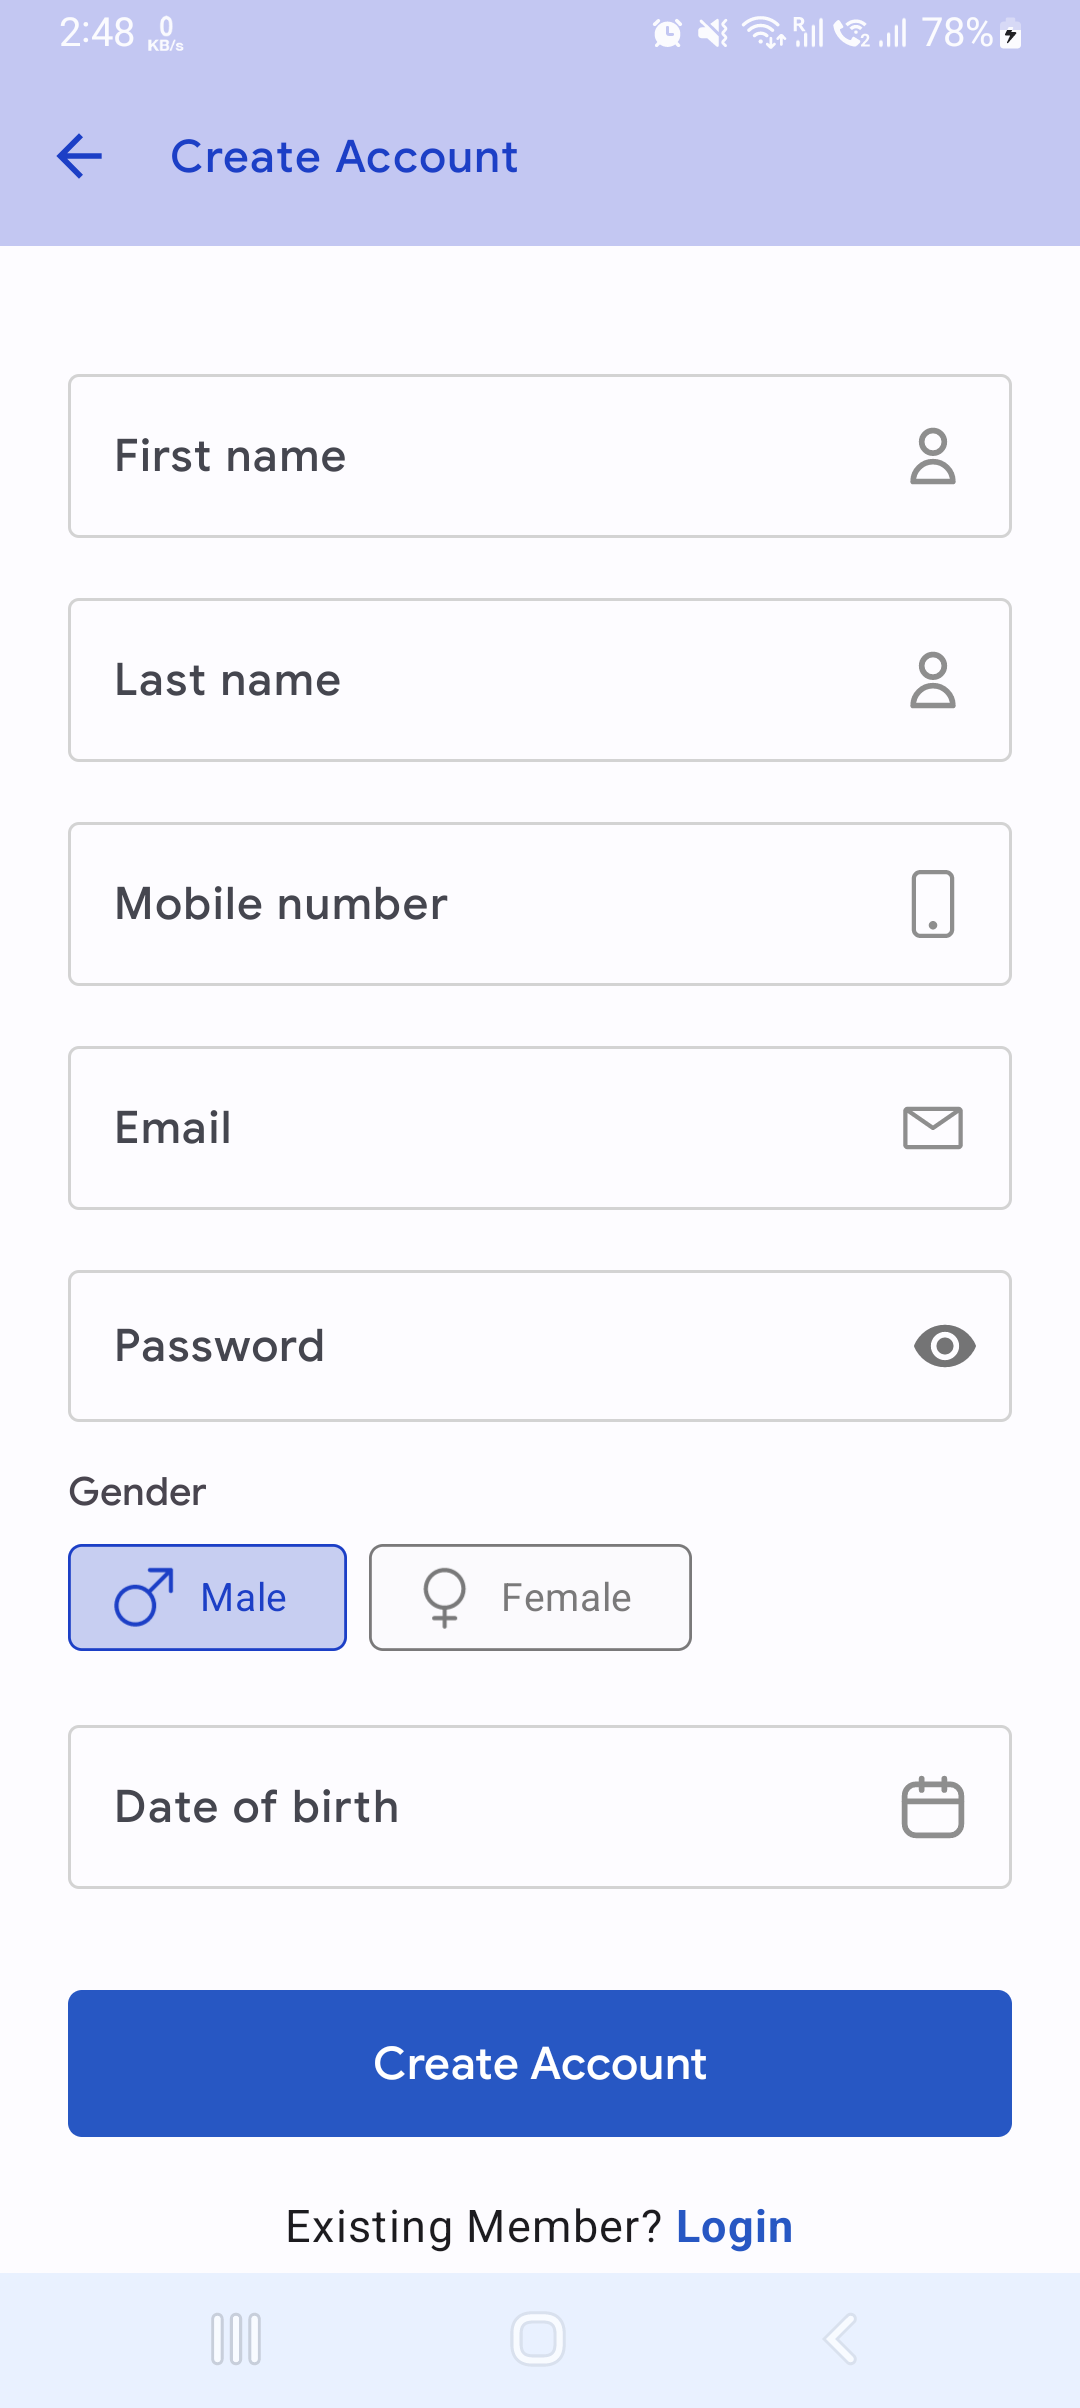
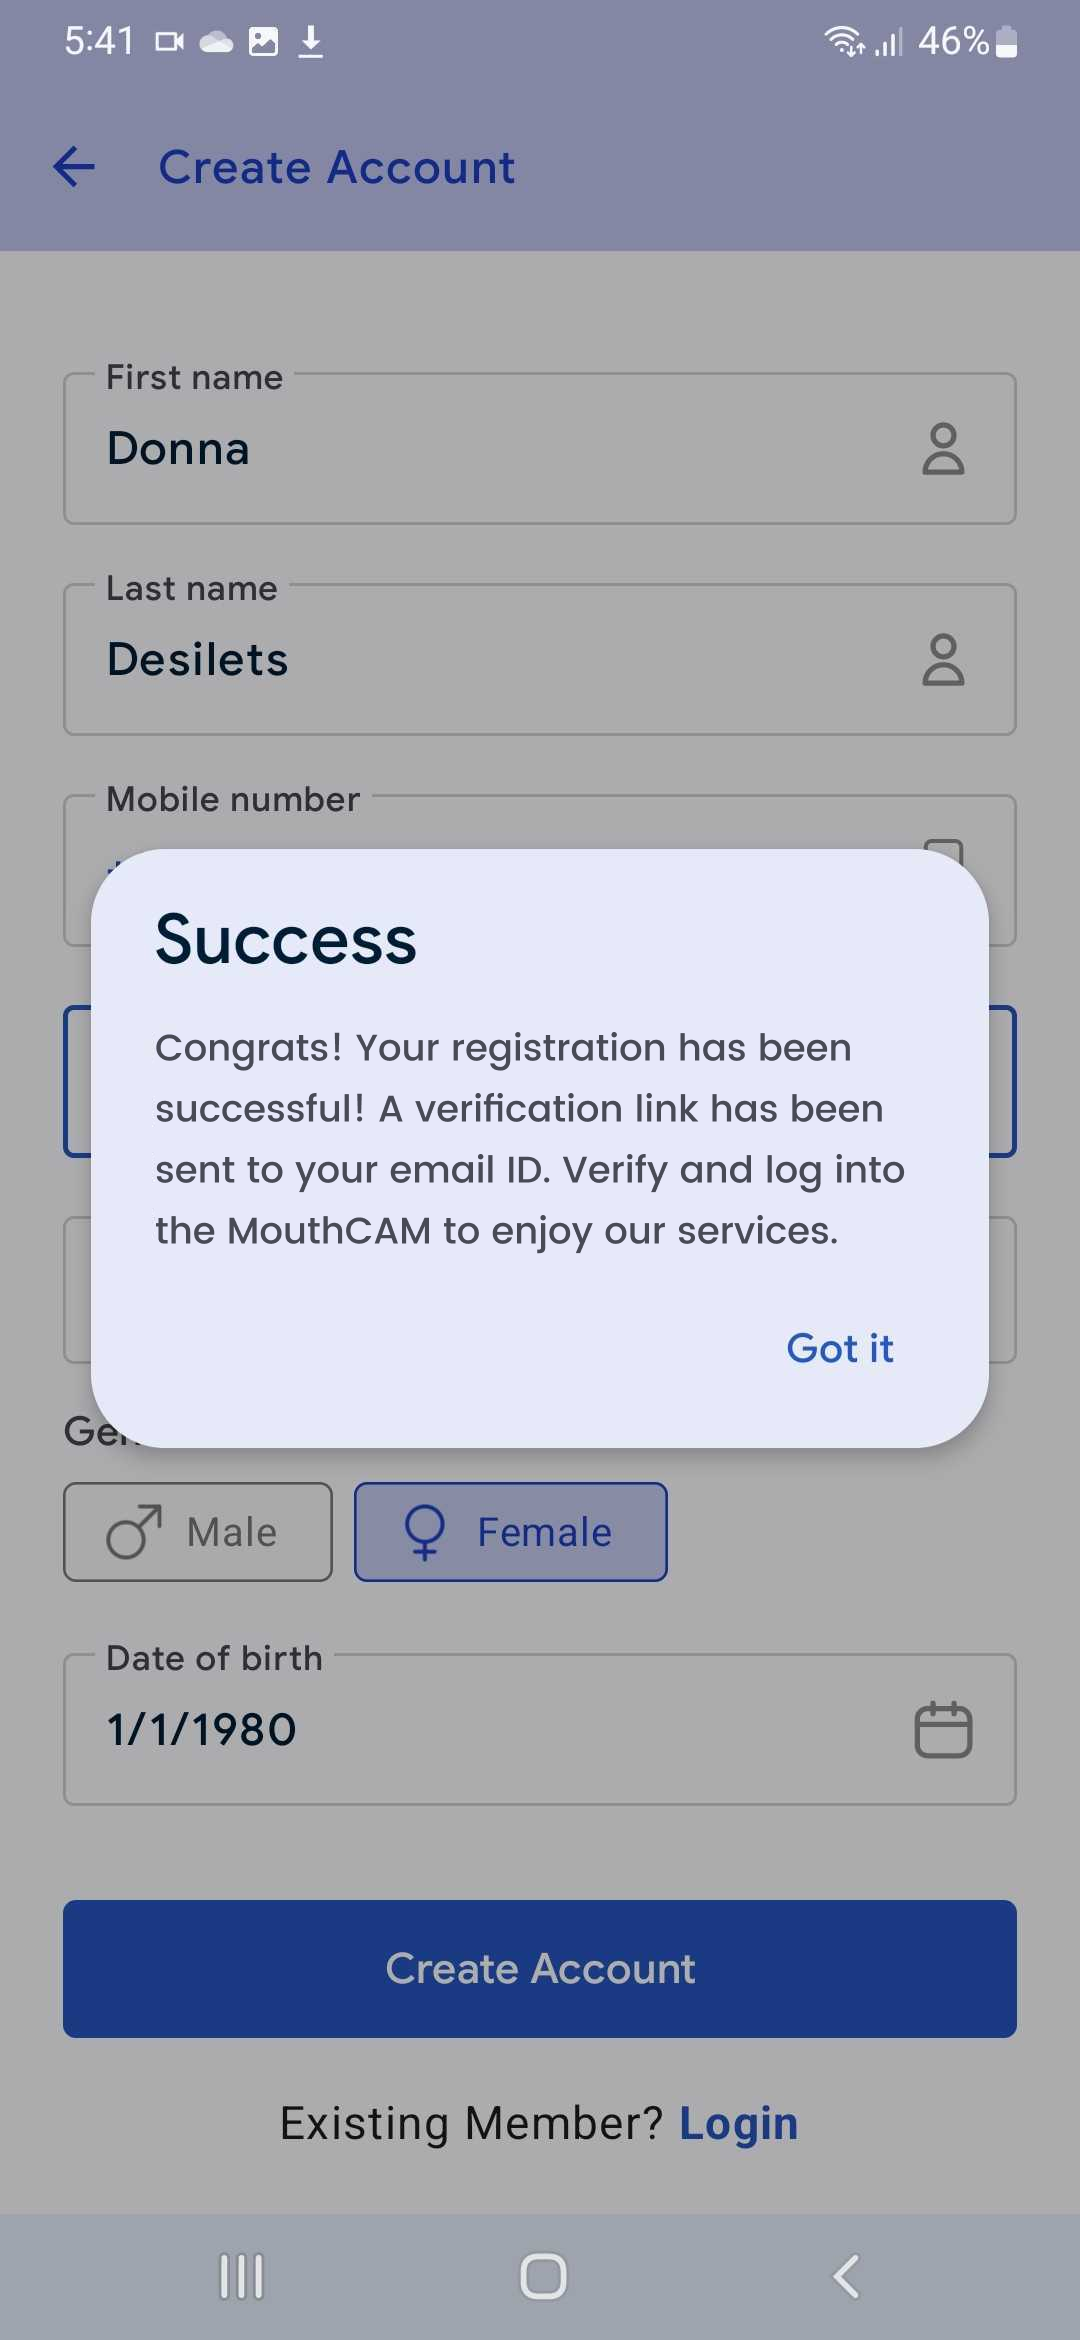
Step 1:Create a new account by providing your First name, Last name, Mobile number, Email, Password, Gender, DOB
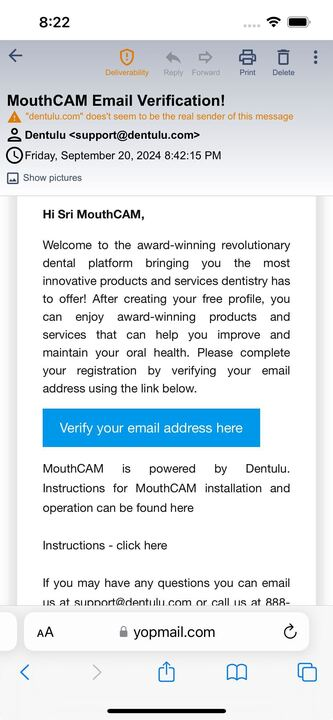
Verify Your Email Address
Step 2:Check your email inbox to find the verification email with the activation link. Click the activation link to verify your email
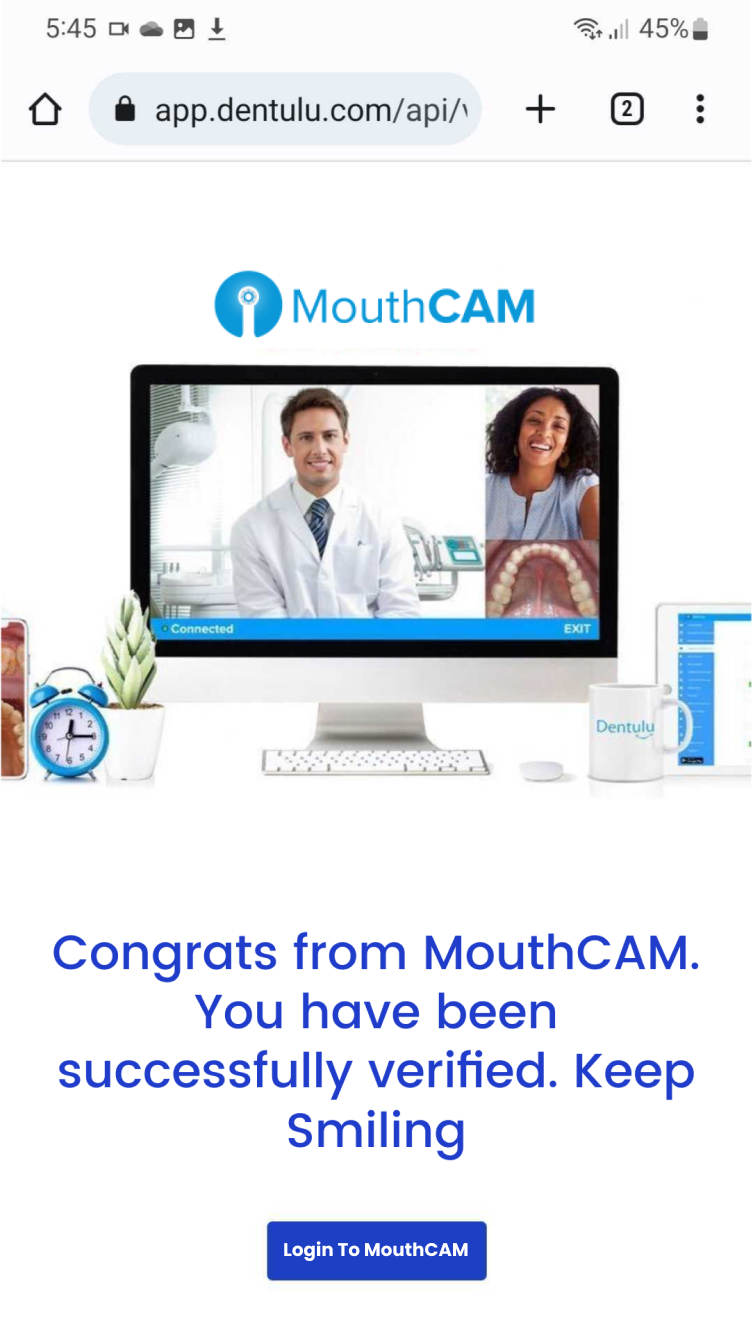
After clicking the link and verifying your email address, you will be redirected to the app.
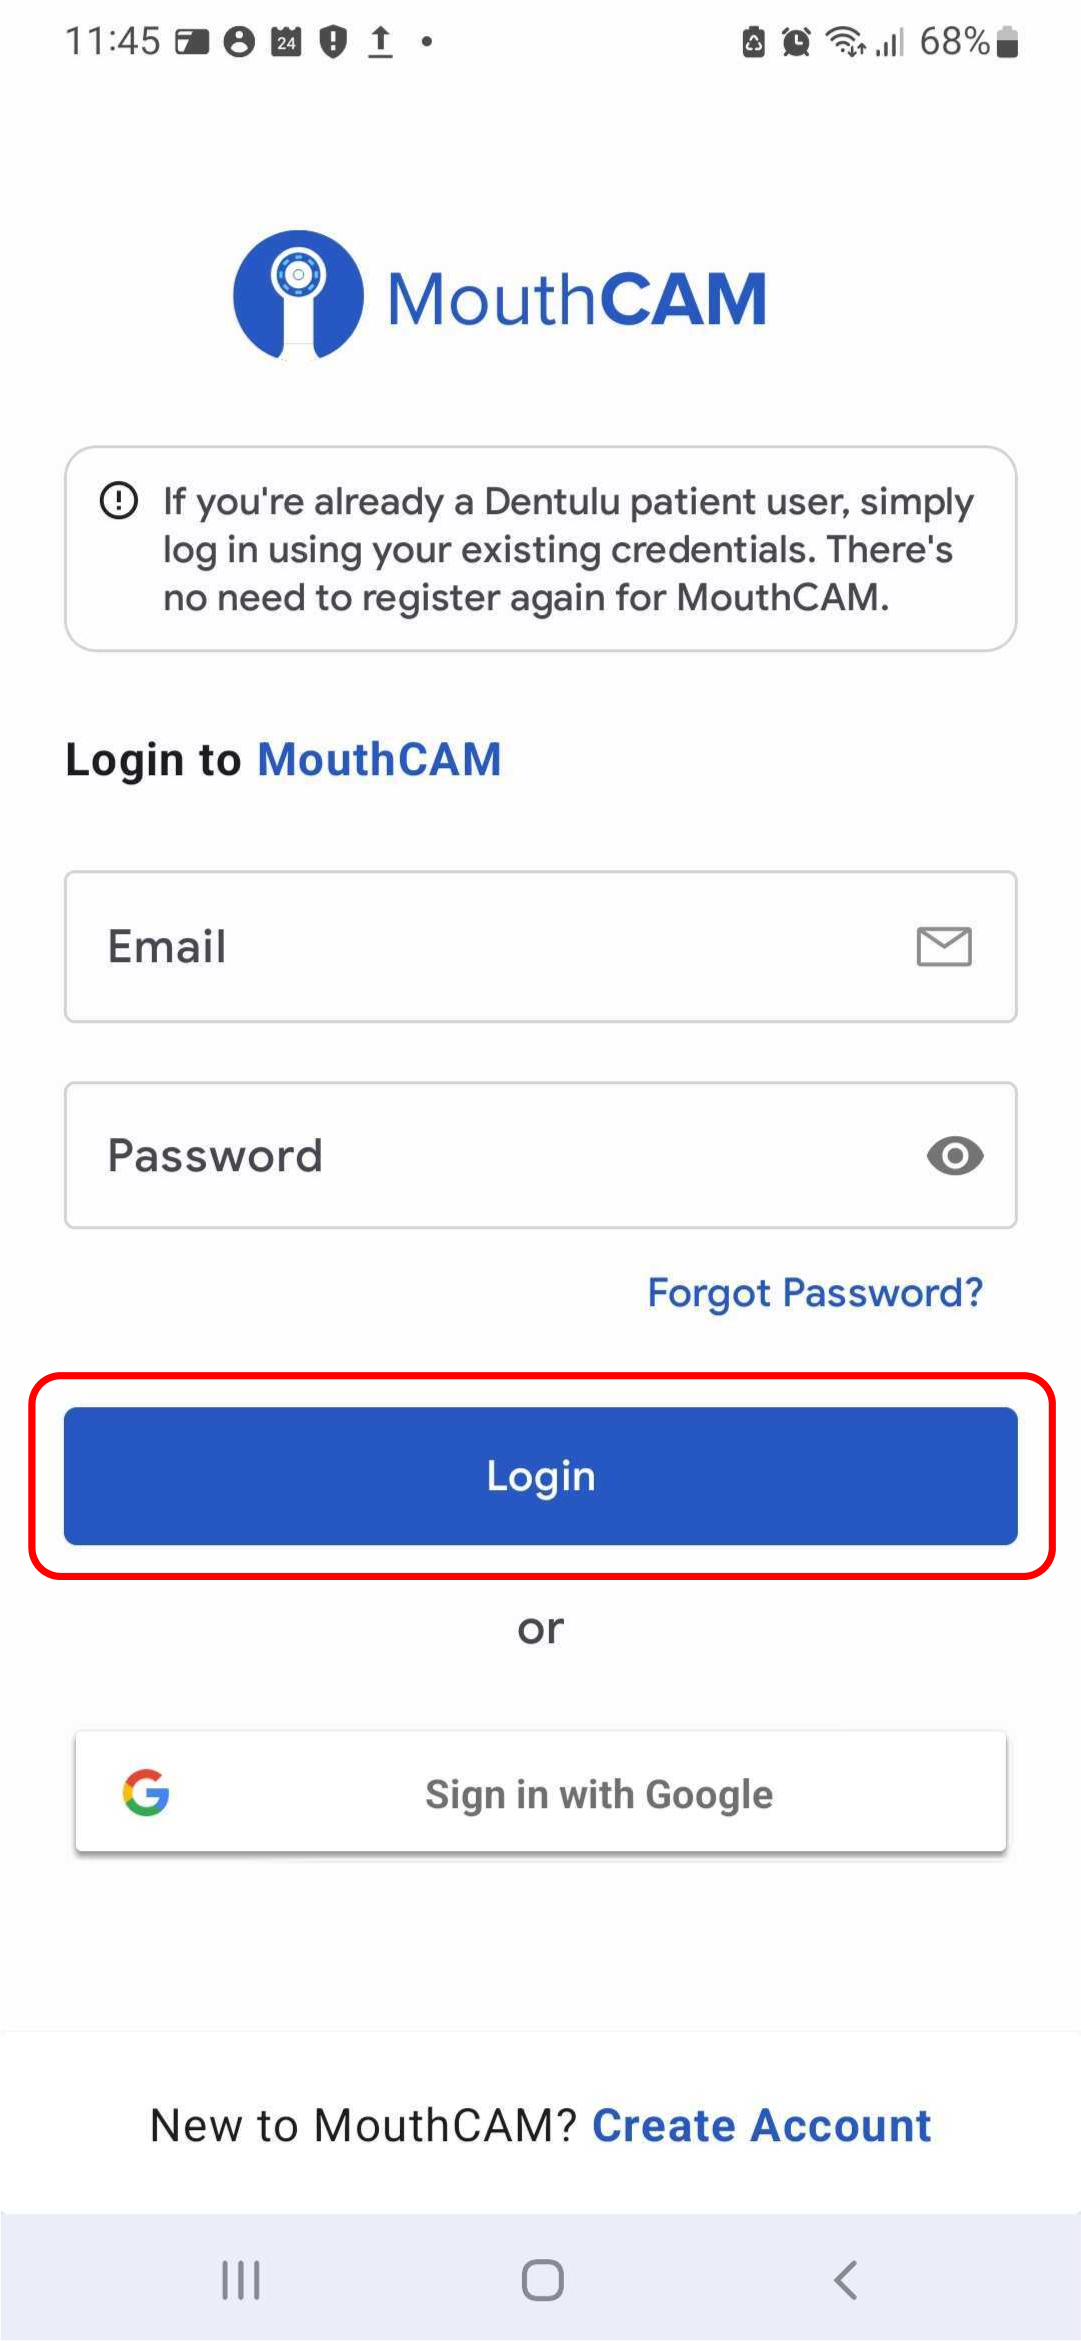
Login to Your Account
Step 3:Use the registered email and password to log in
Connecting Your USB Camera
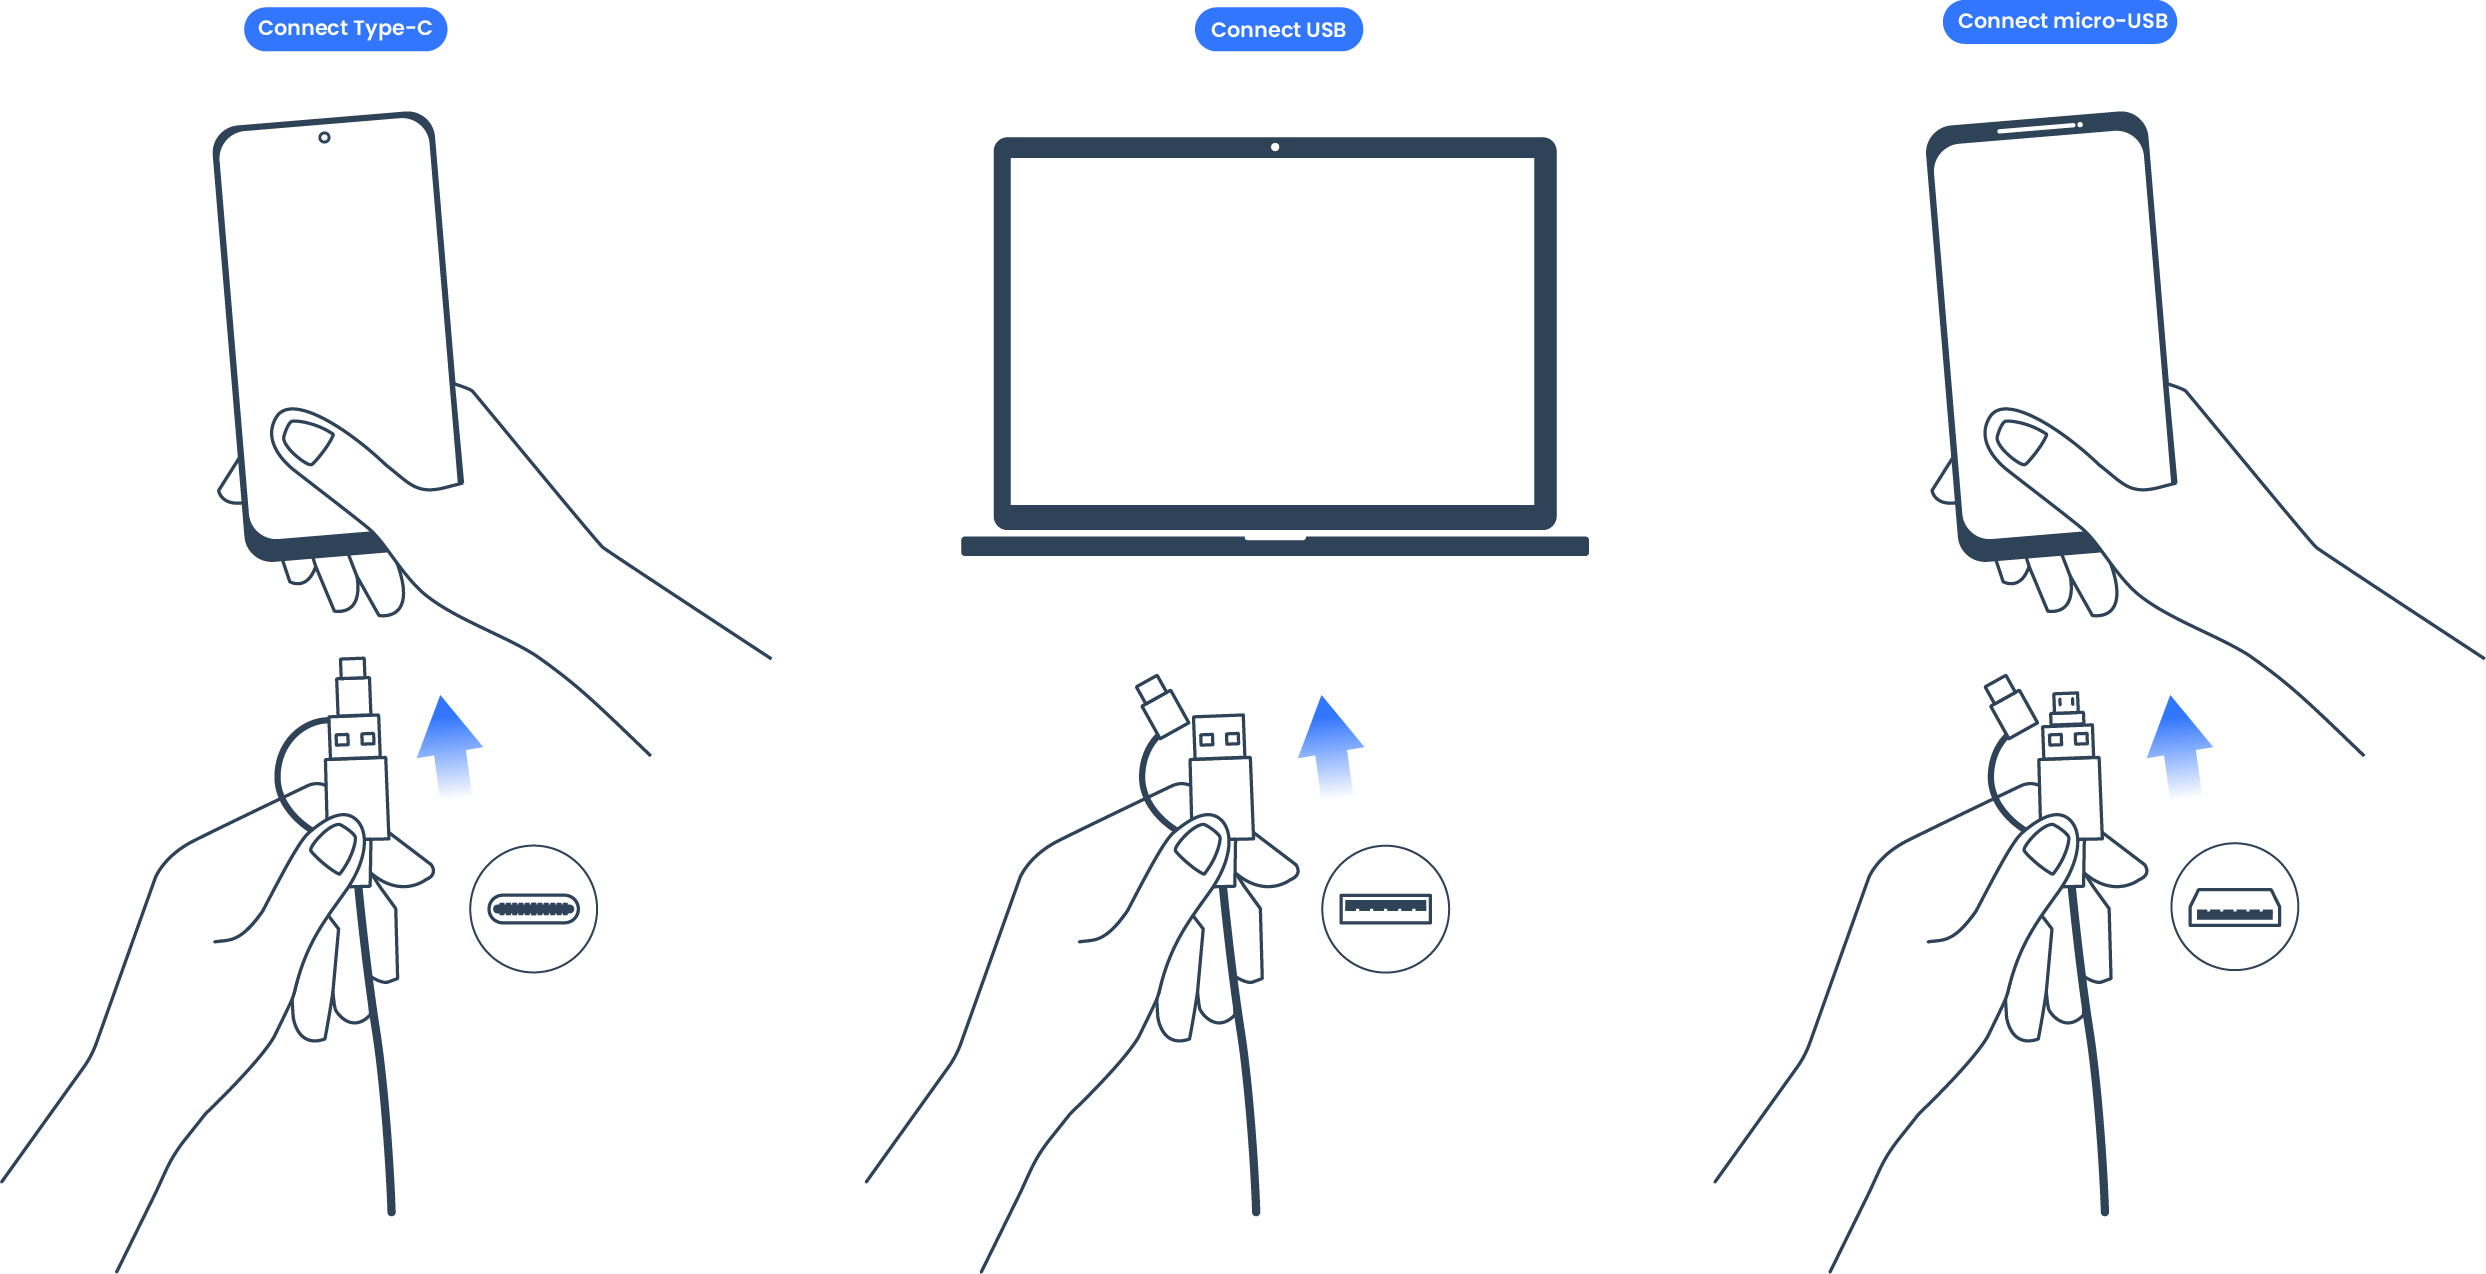
Step 1: Connect your MouthCAM device to your smart device (Use Type C or micro USB for android mobile devices, use USB for laptops and computer systems). *PLEASE NOTE THAT THIS DEVICE IS NOT COMPATIBLE WITH IPHONE.
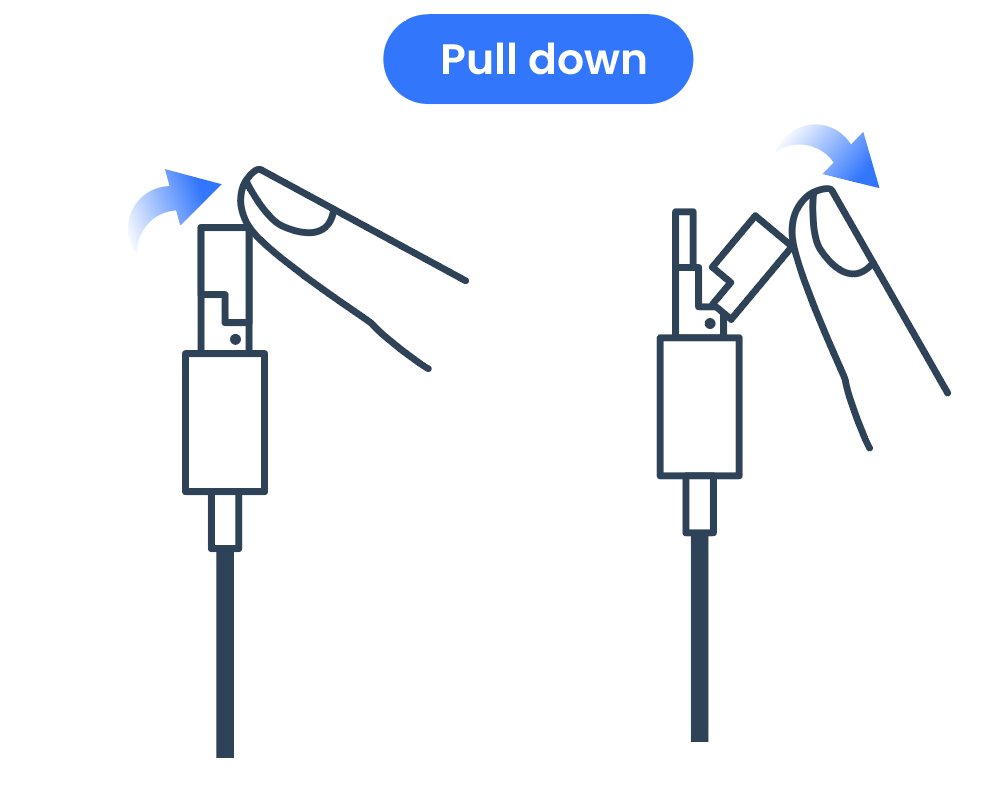
Step 2: In case if you are connecting your device with micro USB, pull down the pin as shown in the image below.
Step 3: We have light on wired camera to make sure that MouthCAM is connected
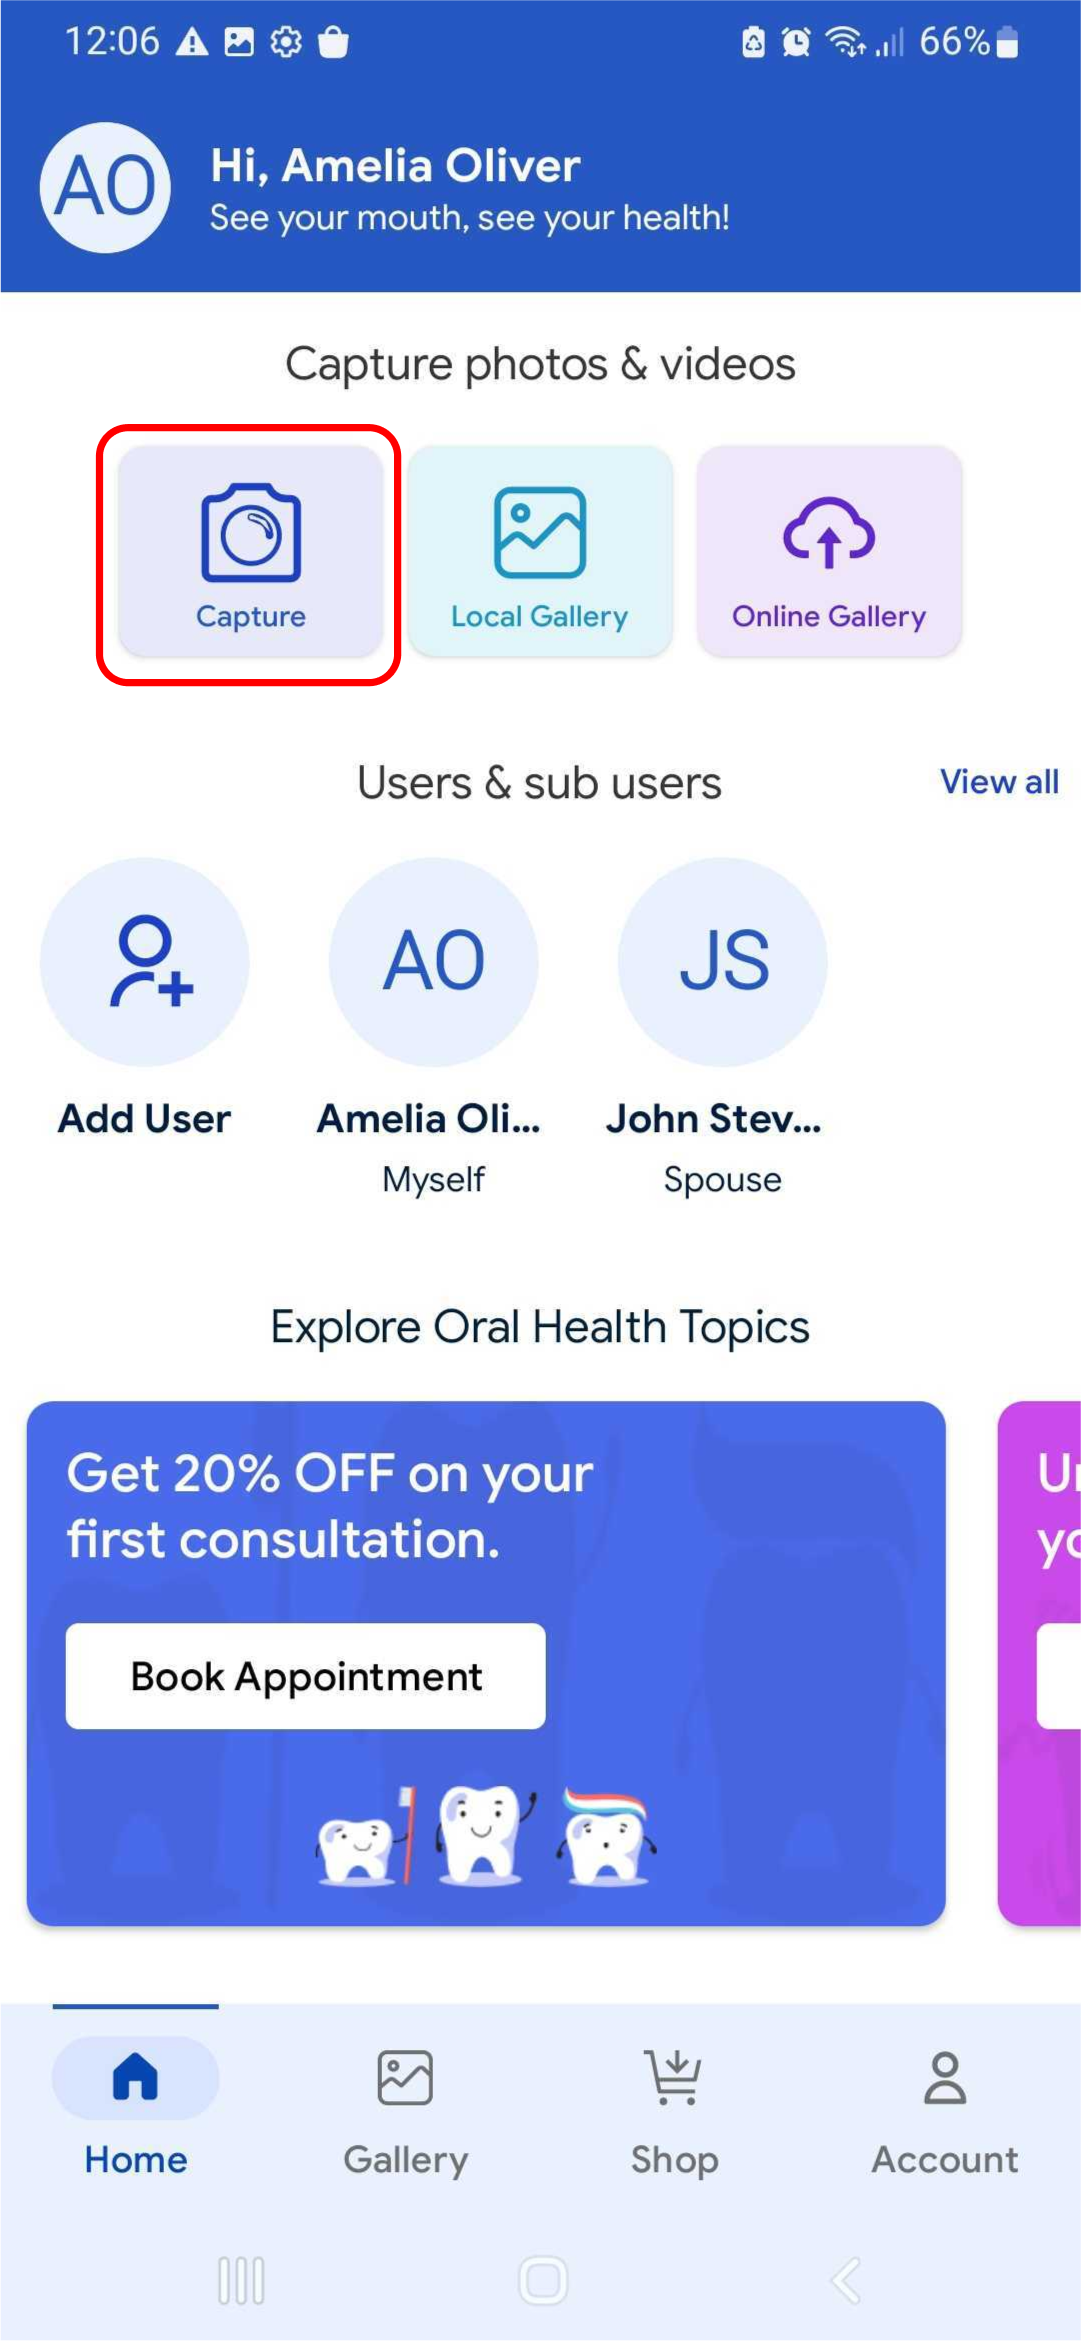
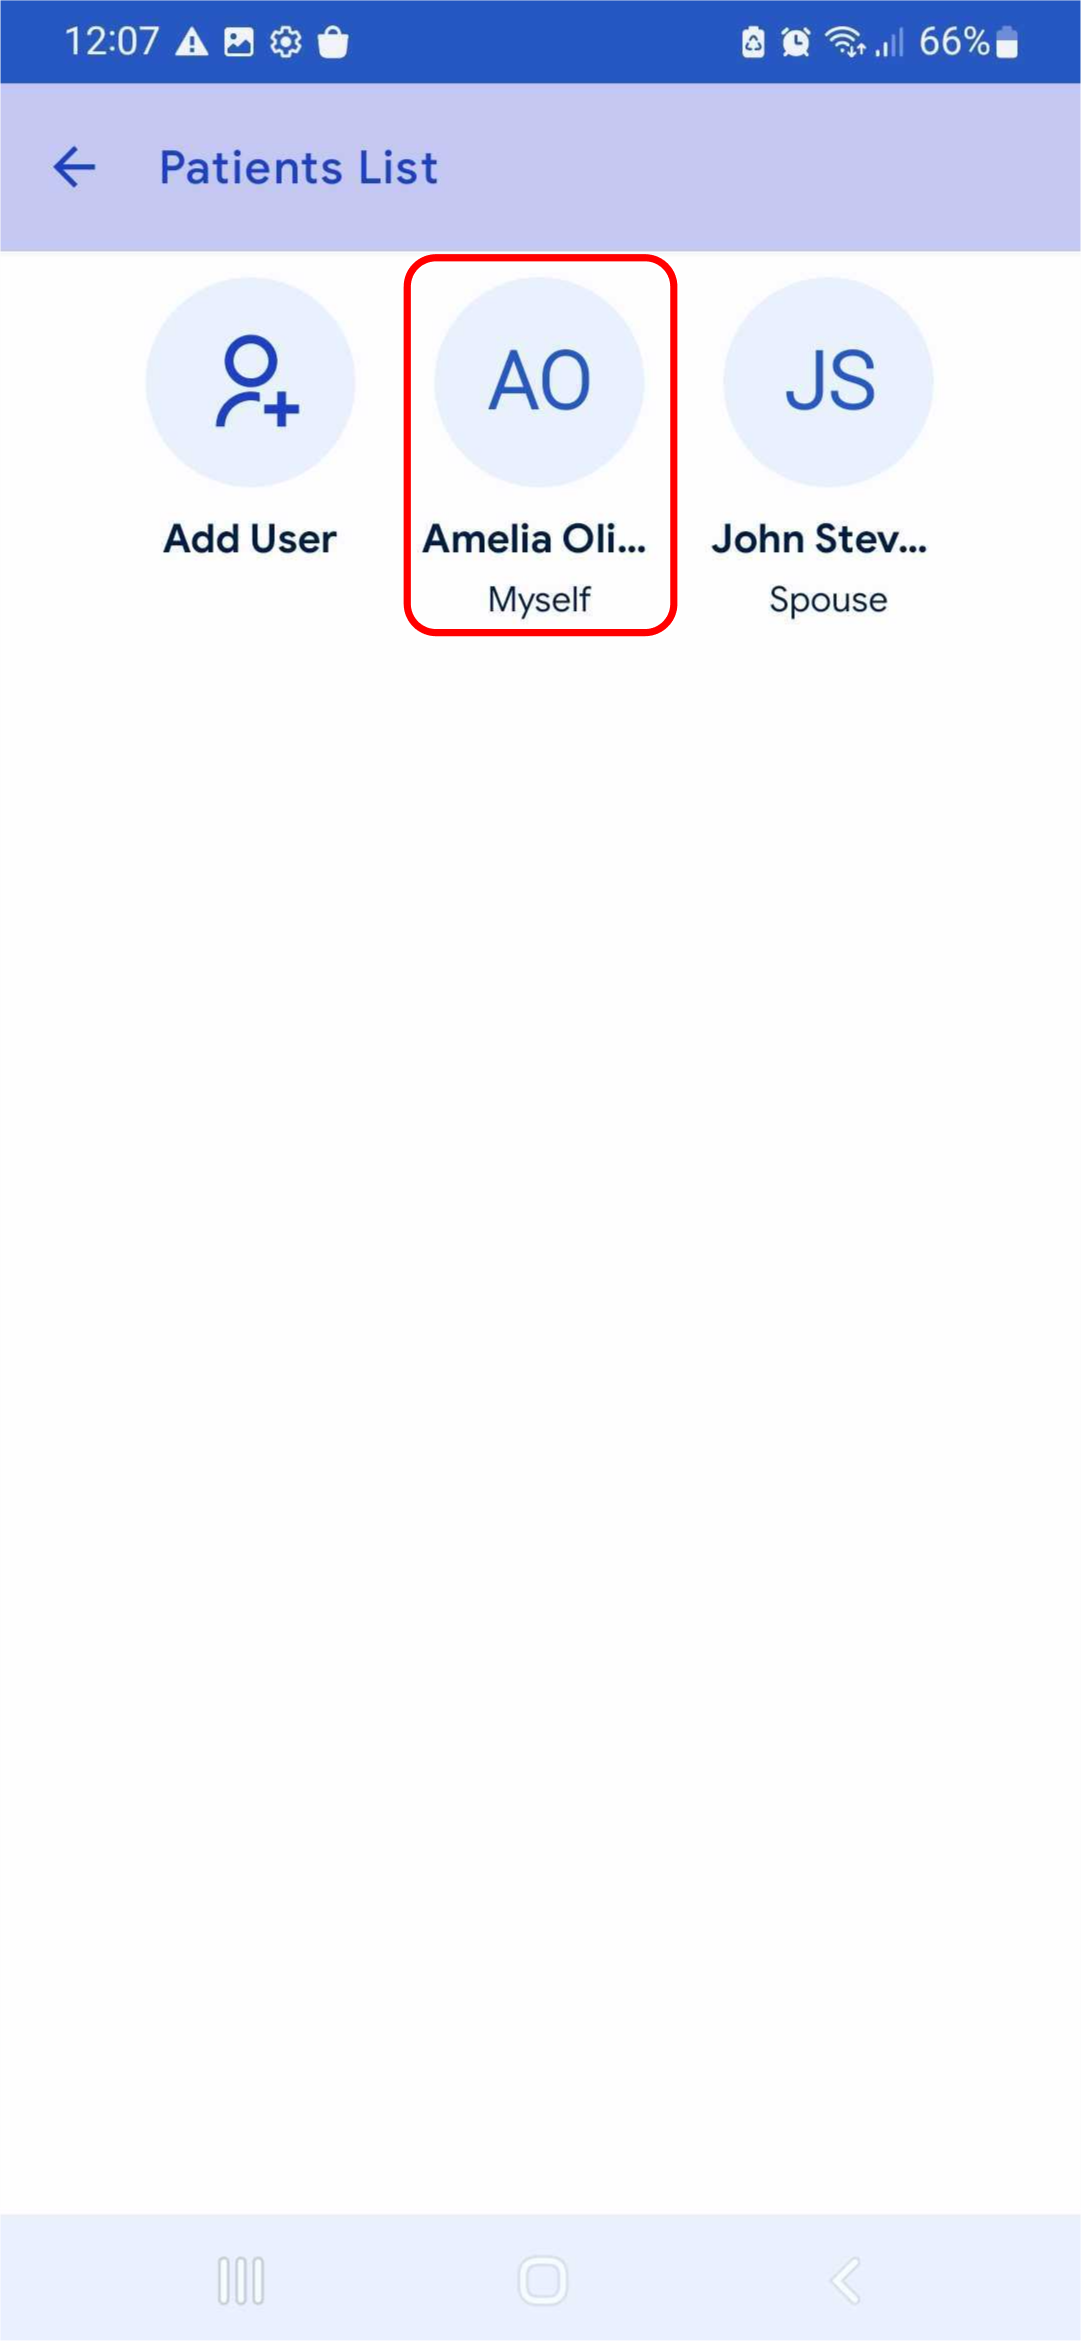
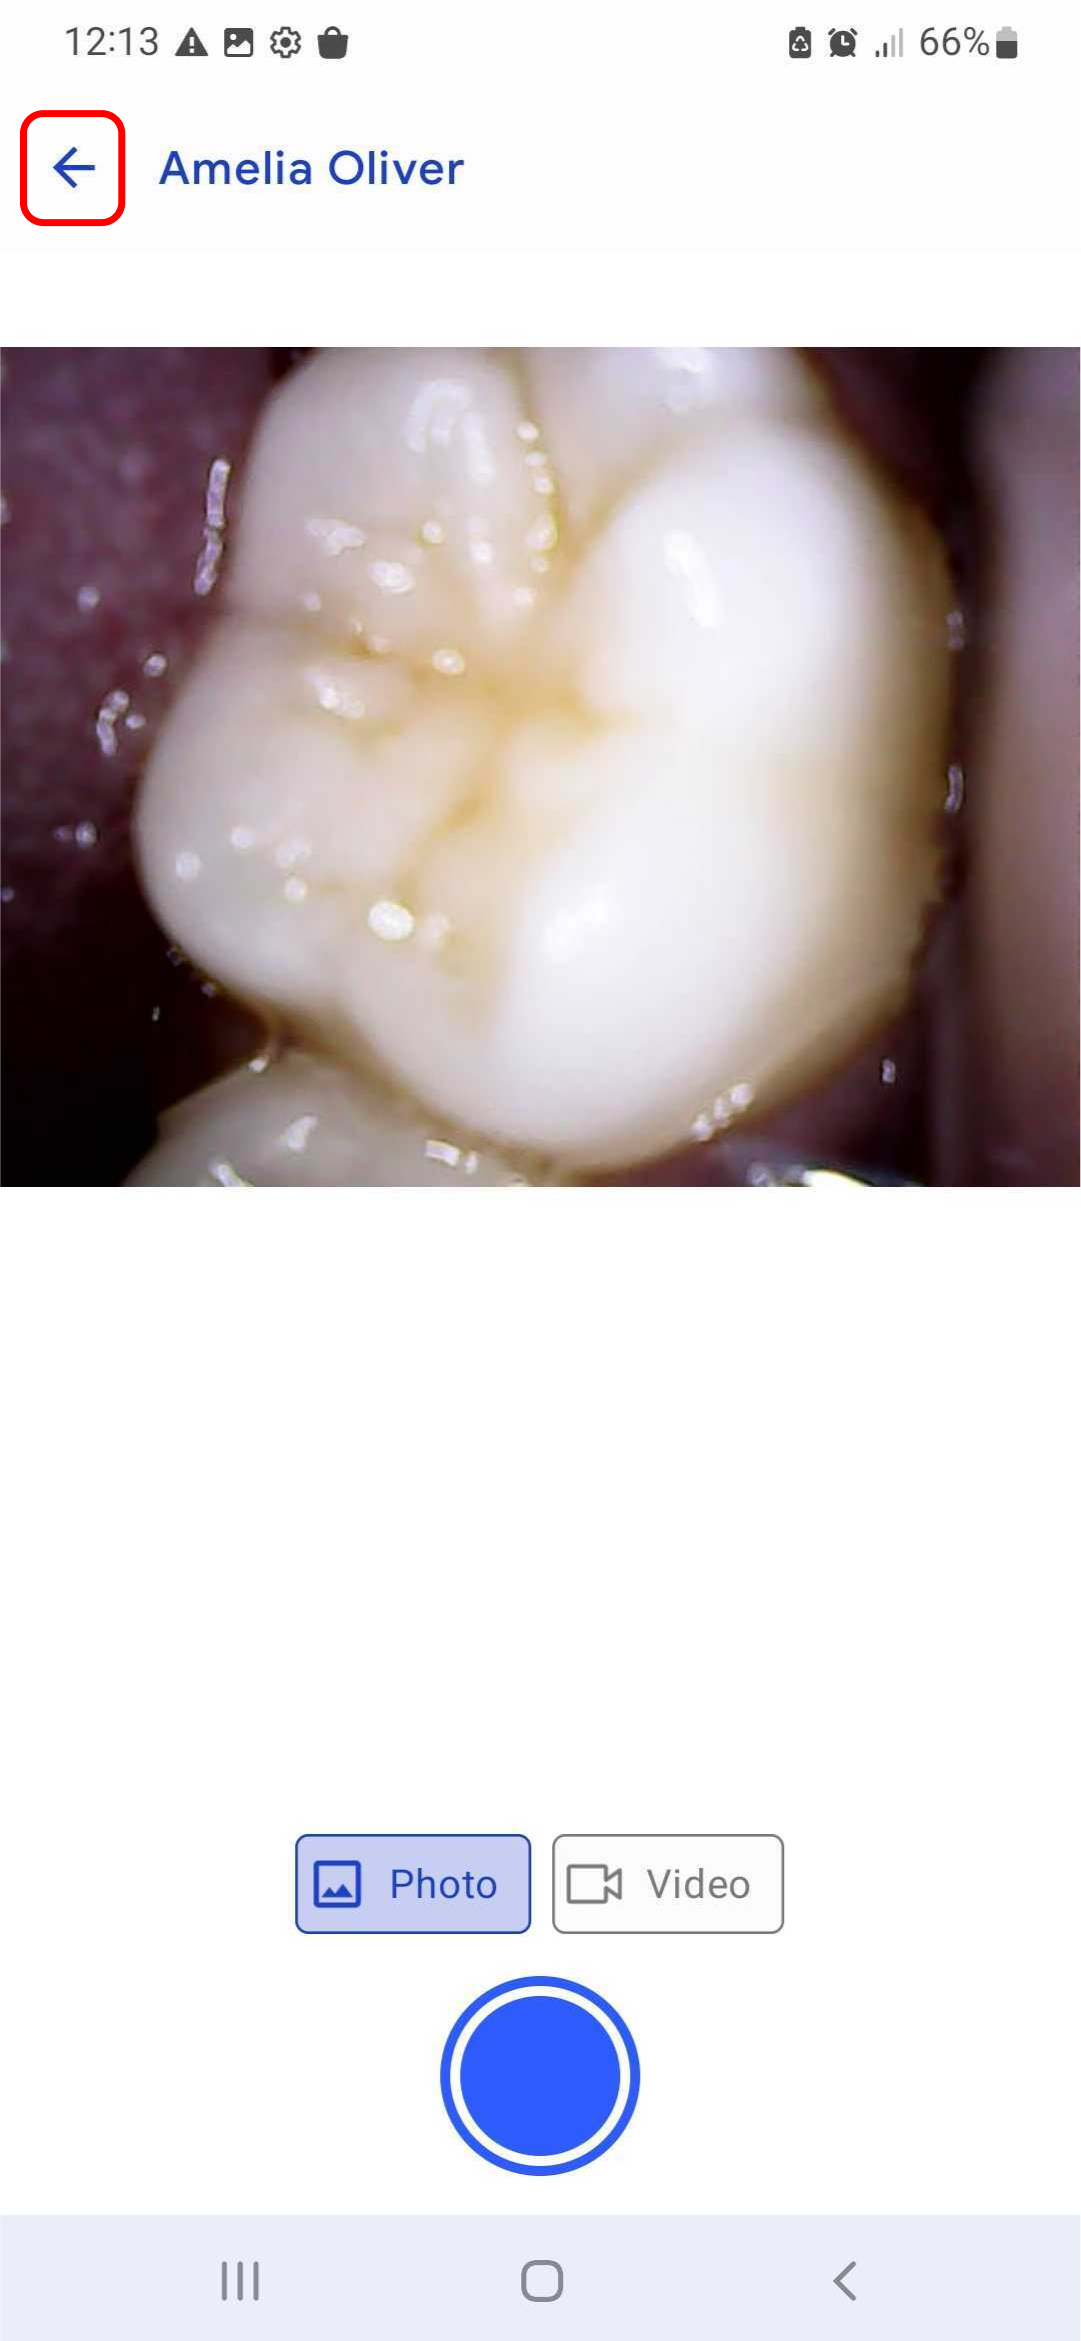
Step 4: On the dashboard, locate the capture button and tap it. You will be prompted to select an existing user profile or create a new one. This will ensure that all captured images and videos are saved under the chosen profile.
Once a profile is selected or created, you will be directed to the connection screen.
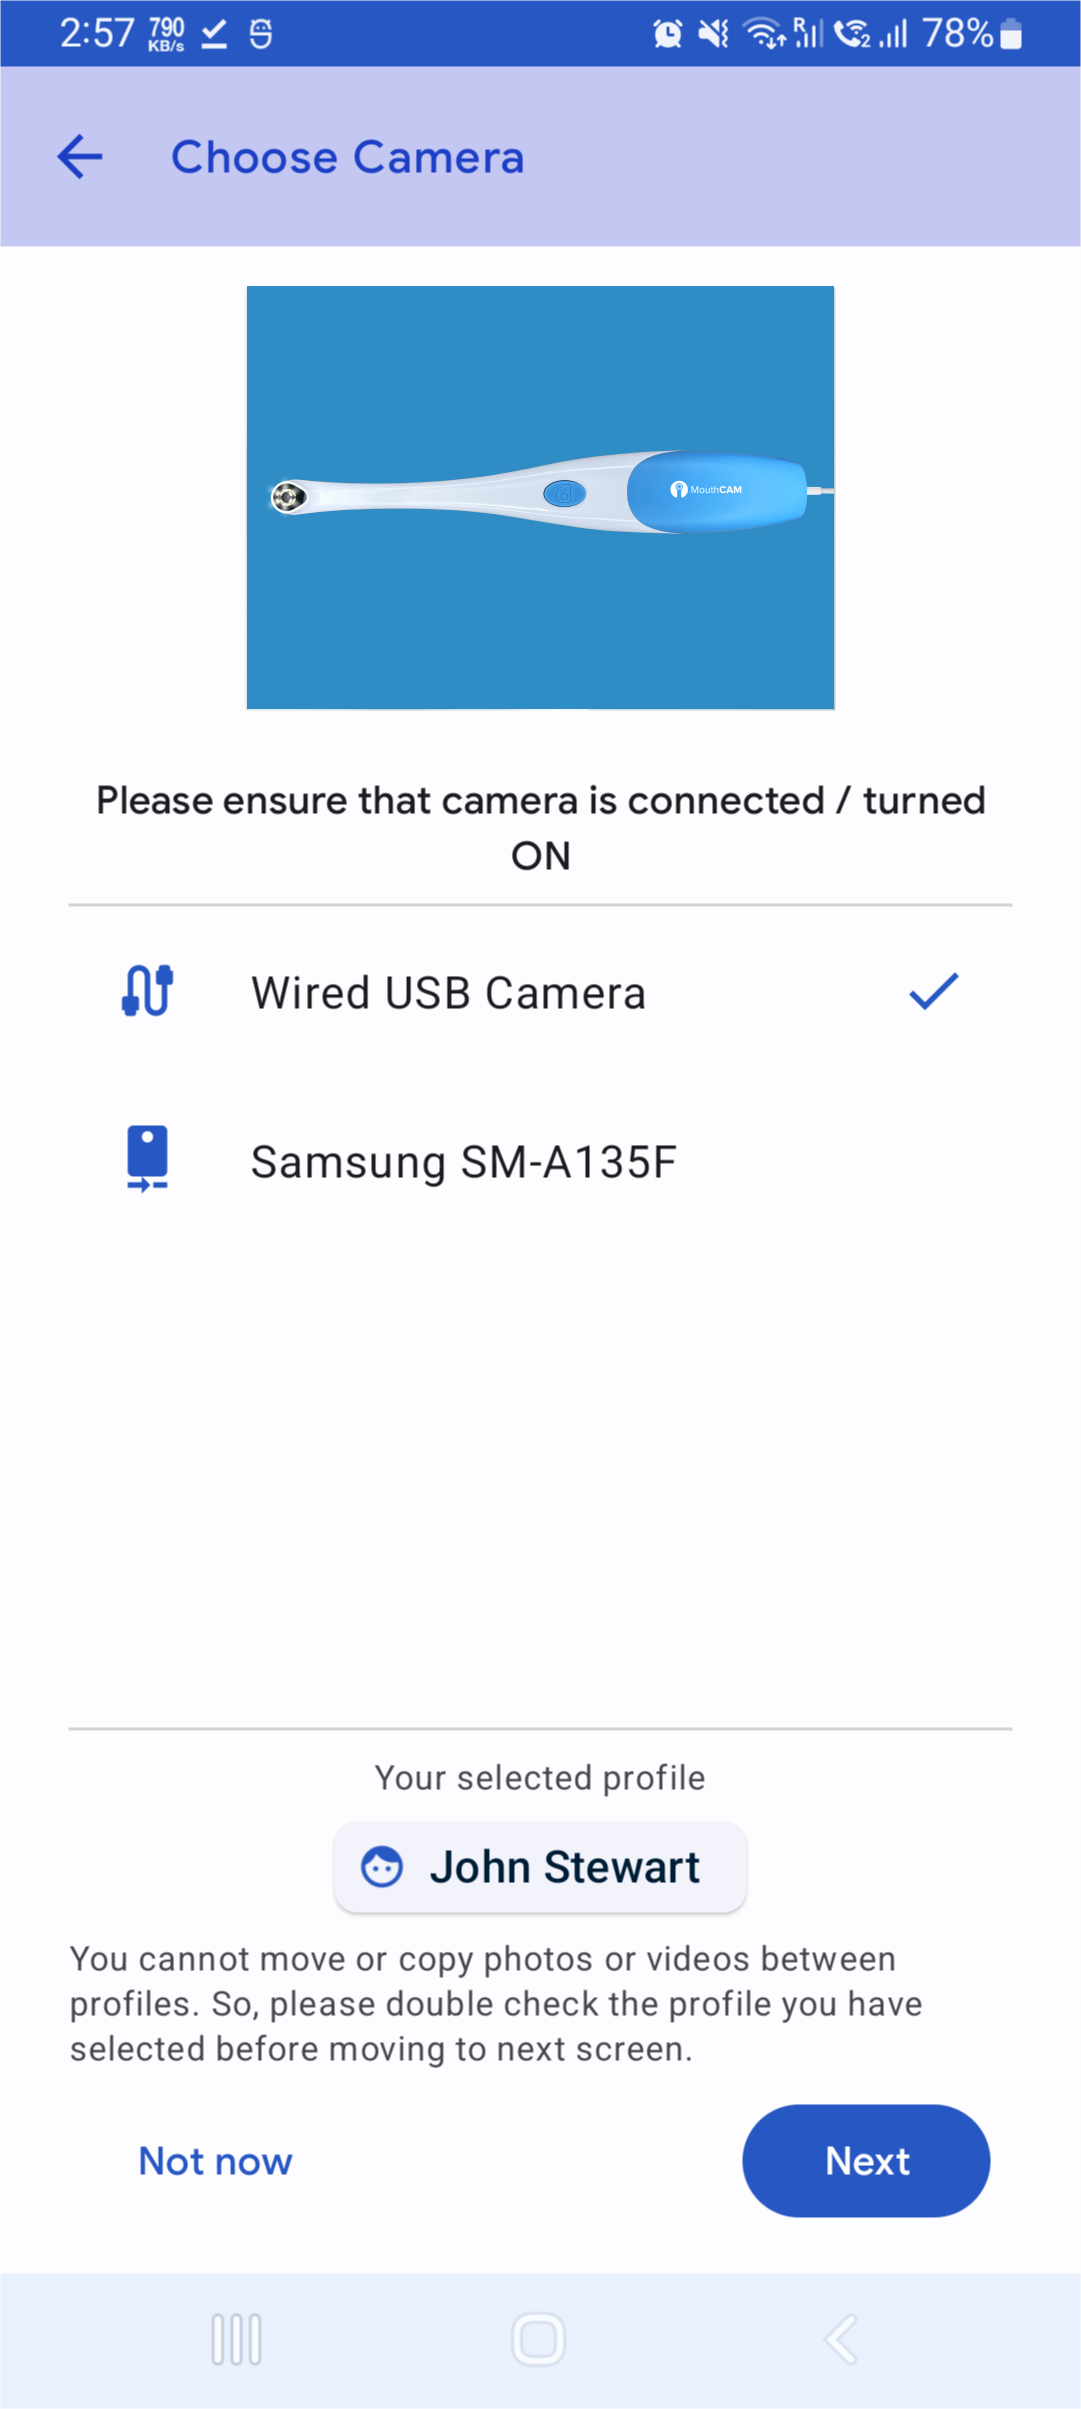
Step 5: Please check for the USB camera on the list as shown in the image below, select the wired USB camera and click on ‘Next’ to begin capturing images or videos.
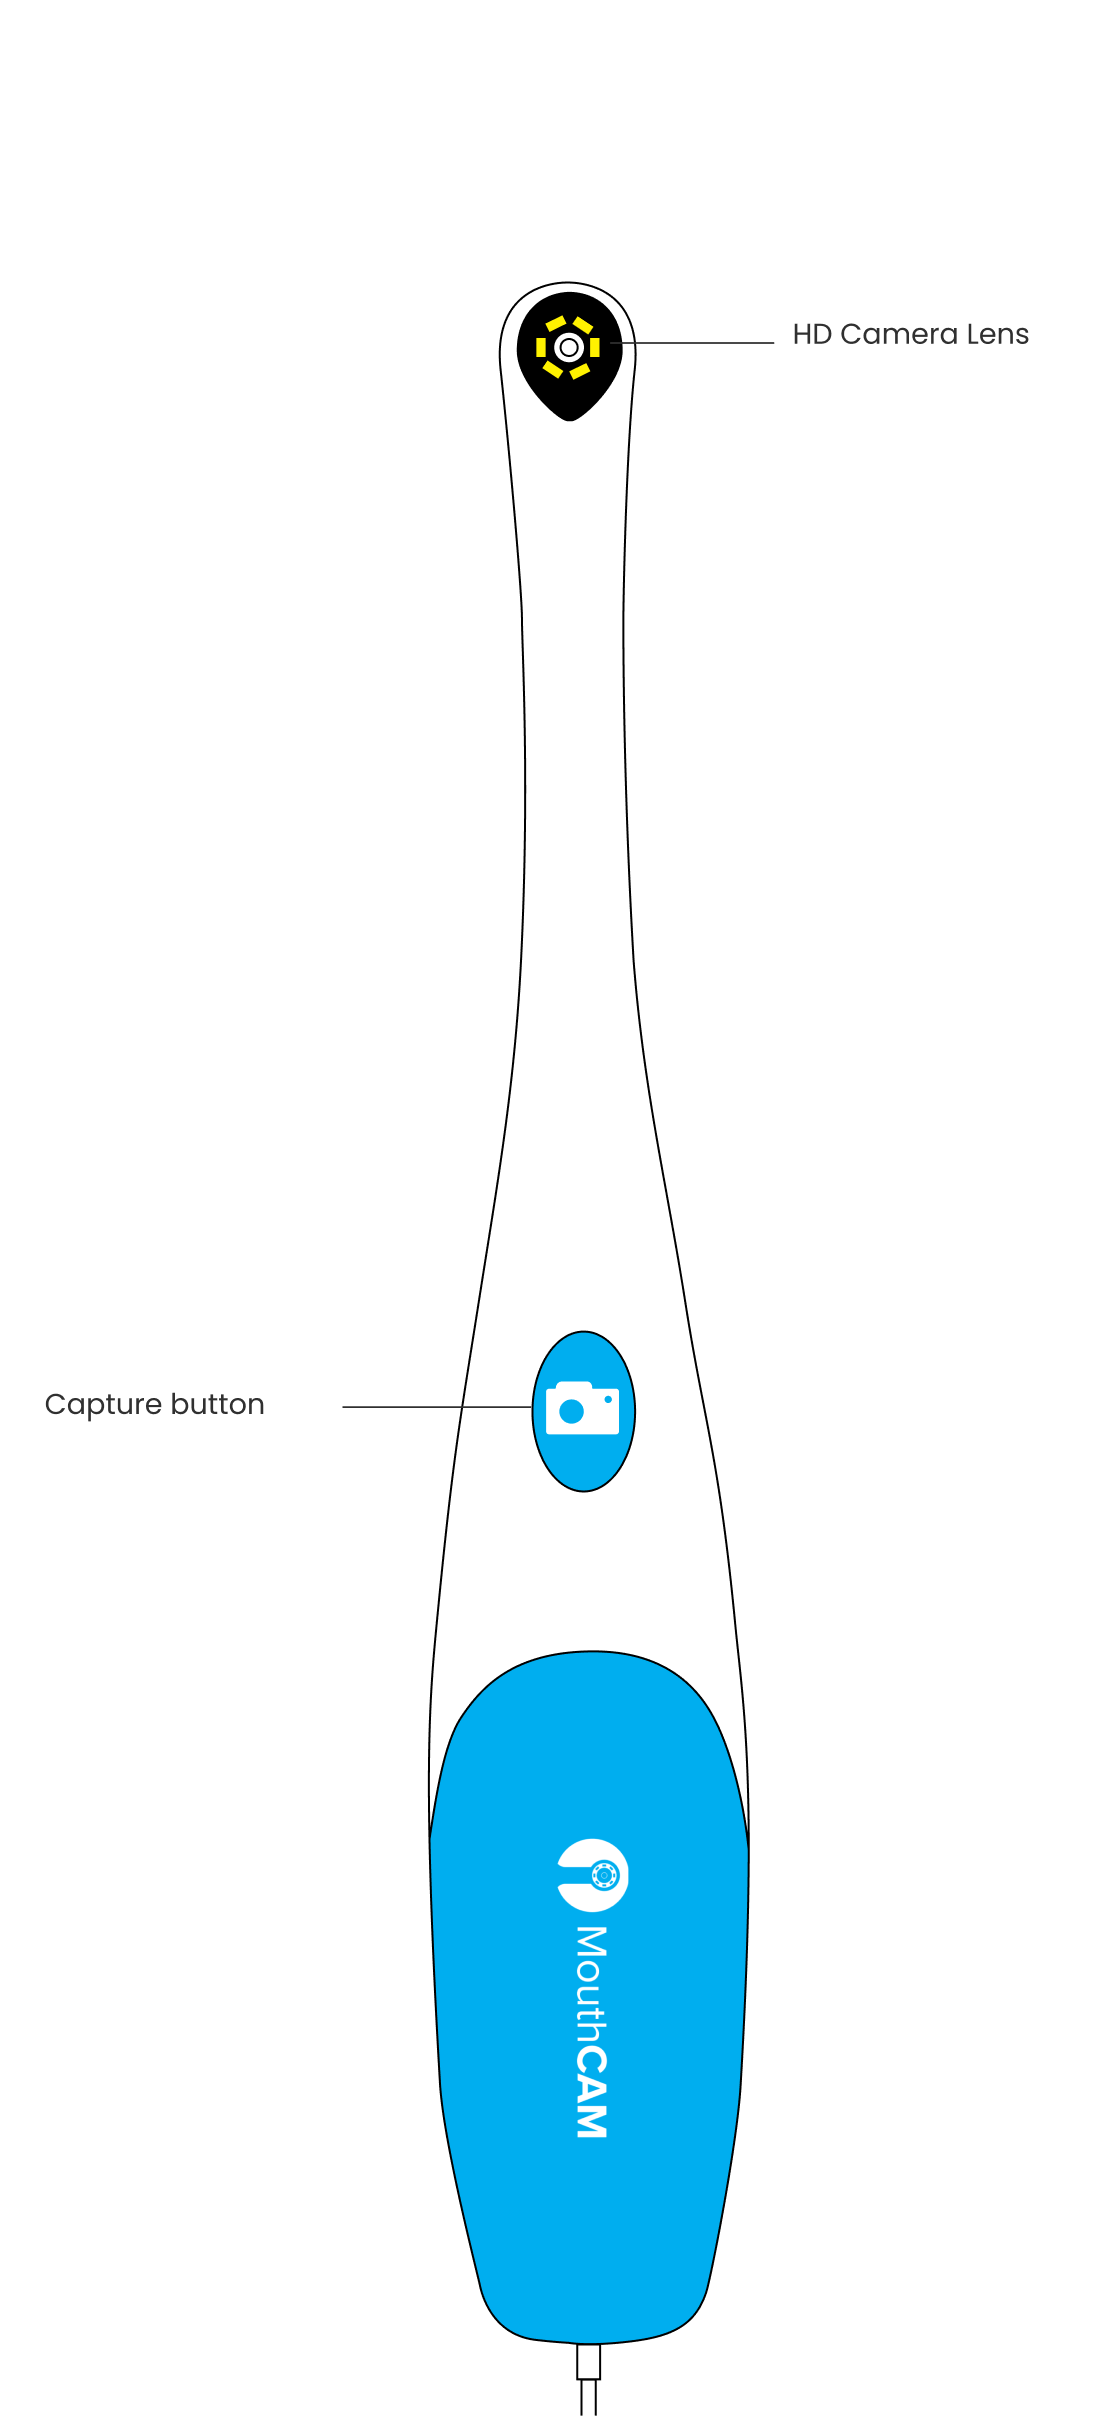
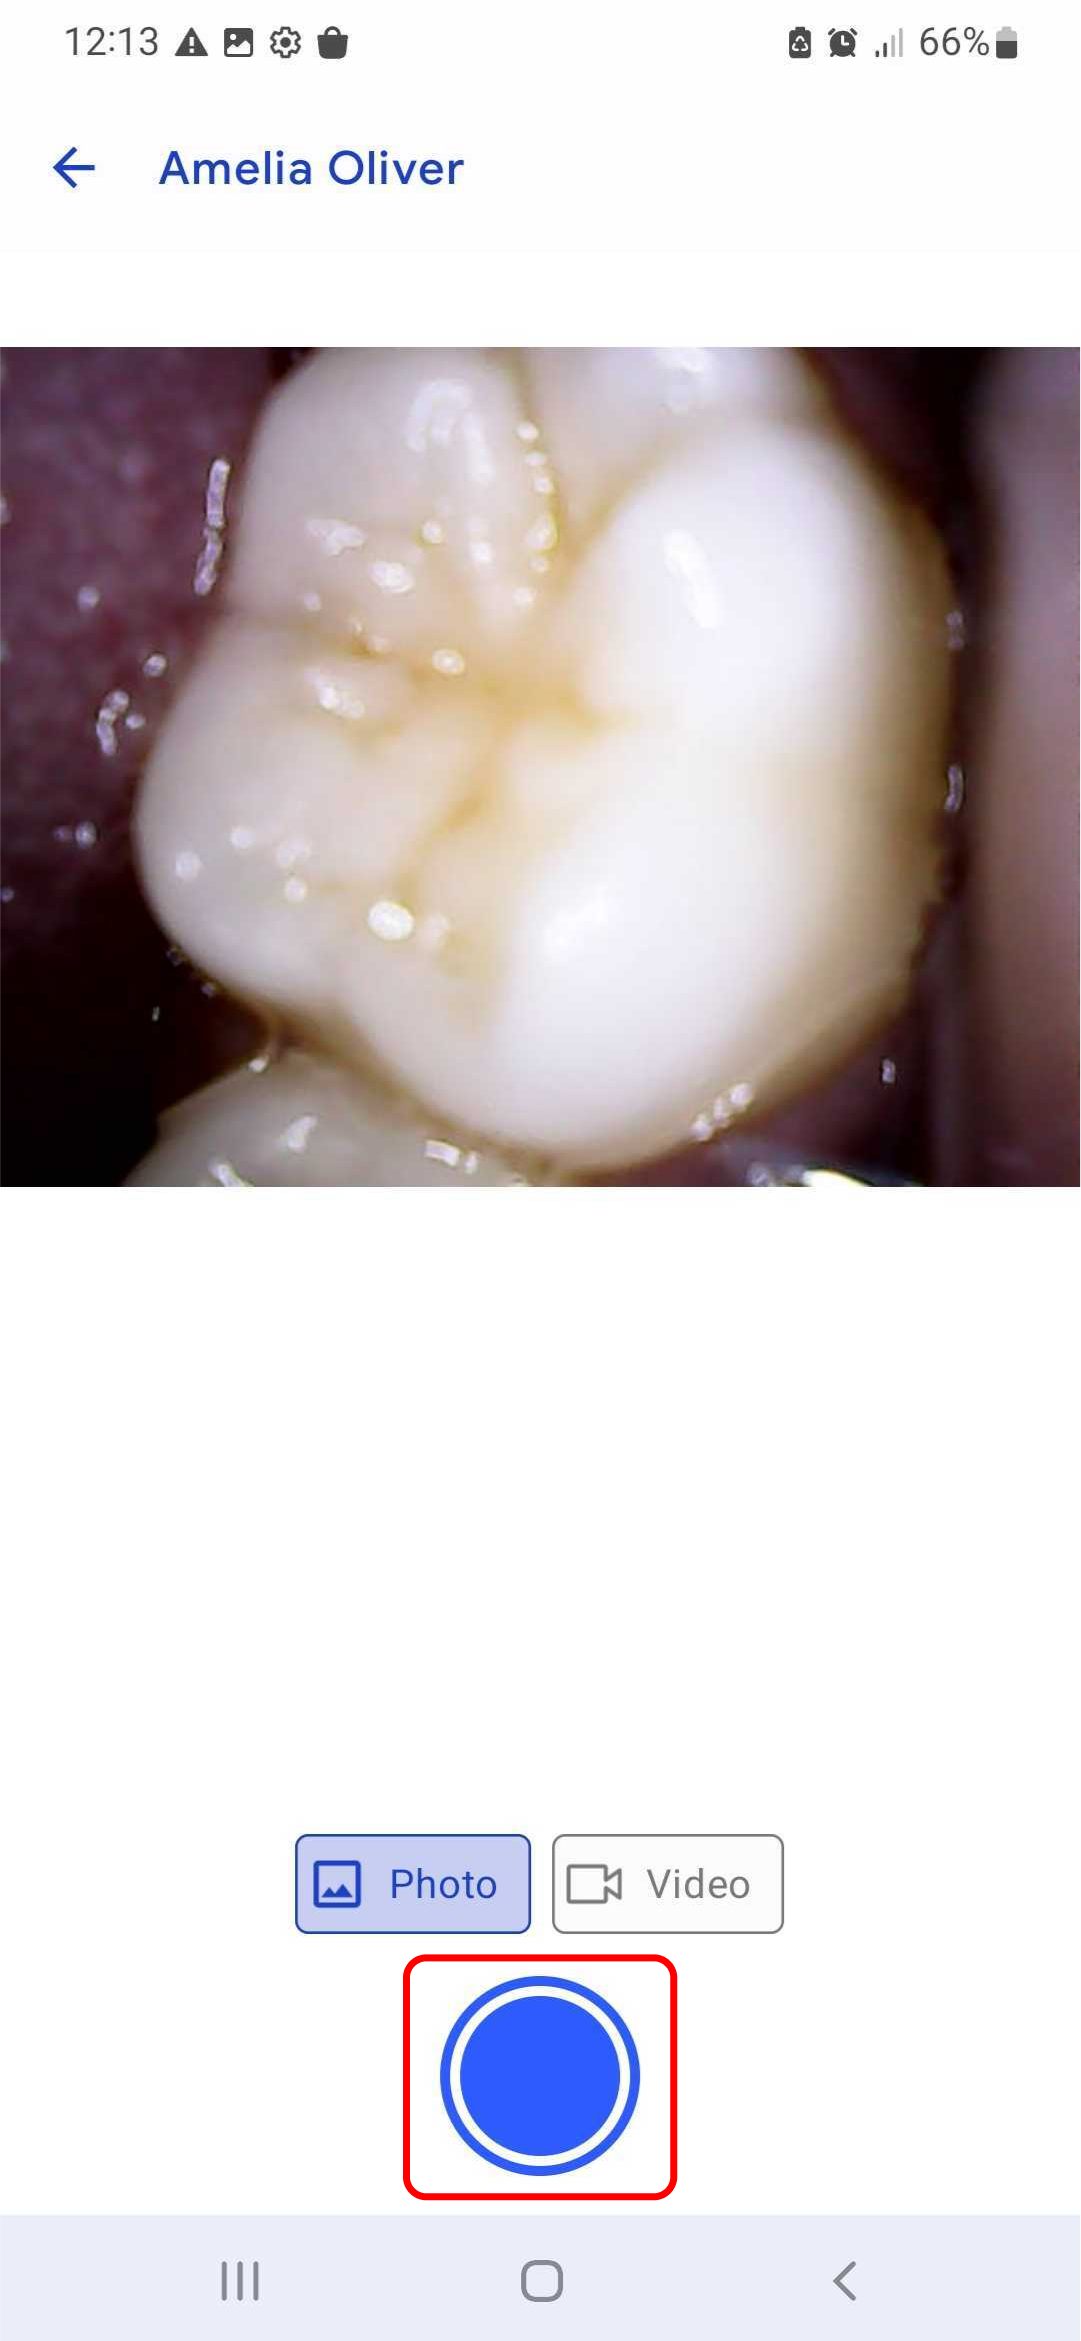
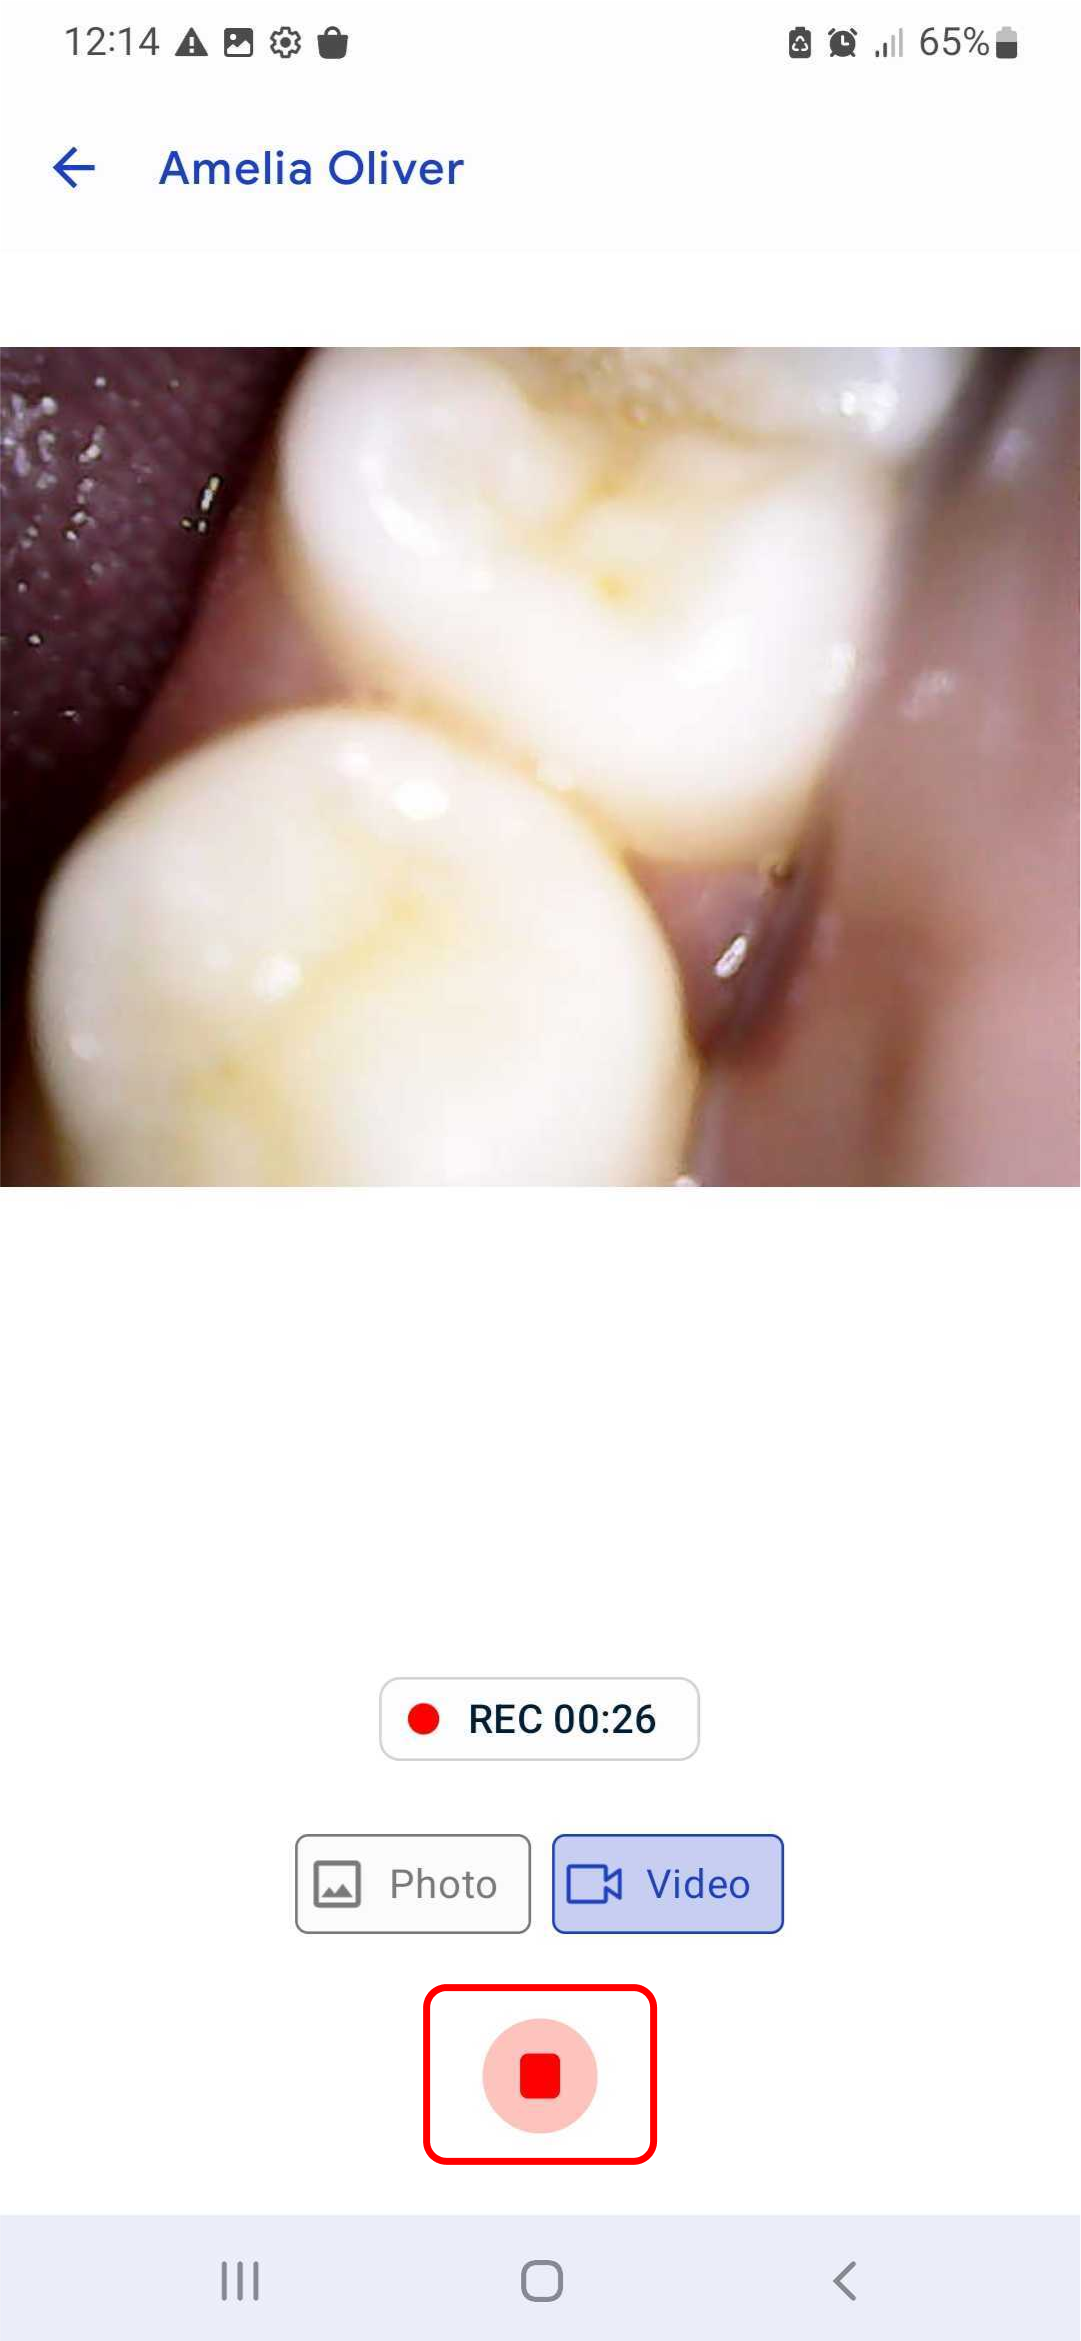
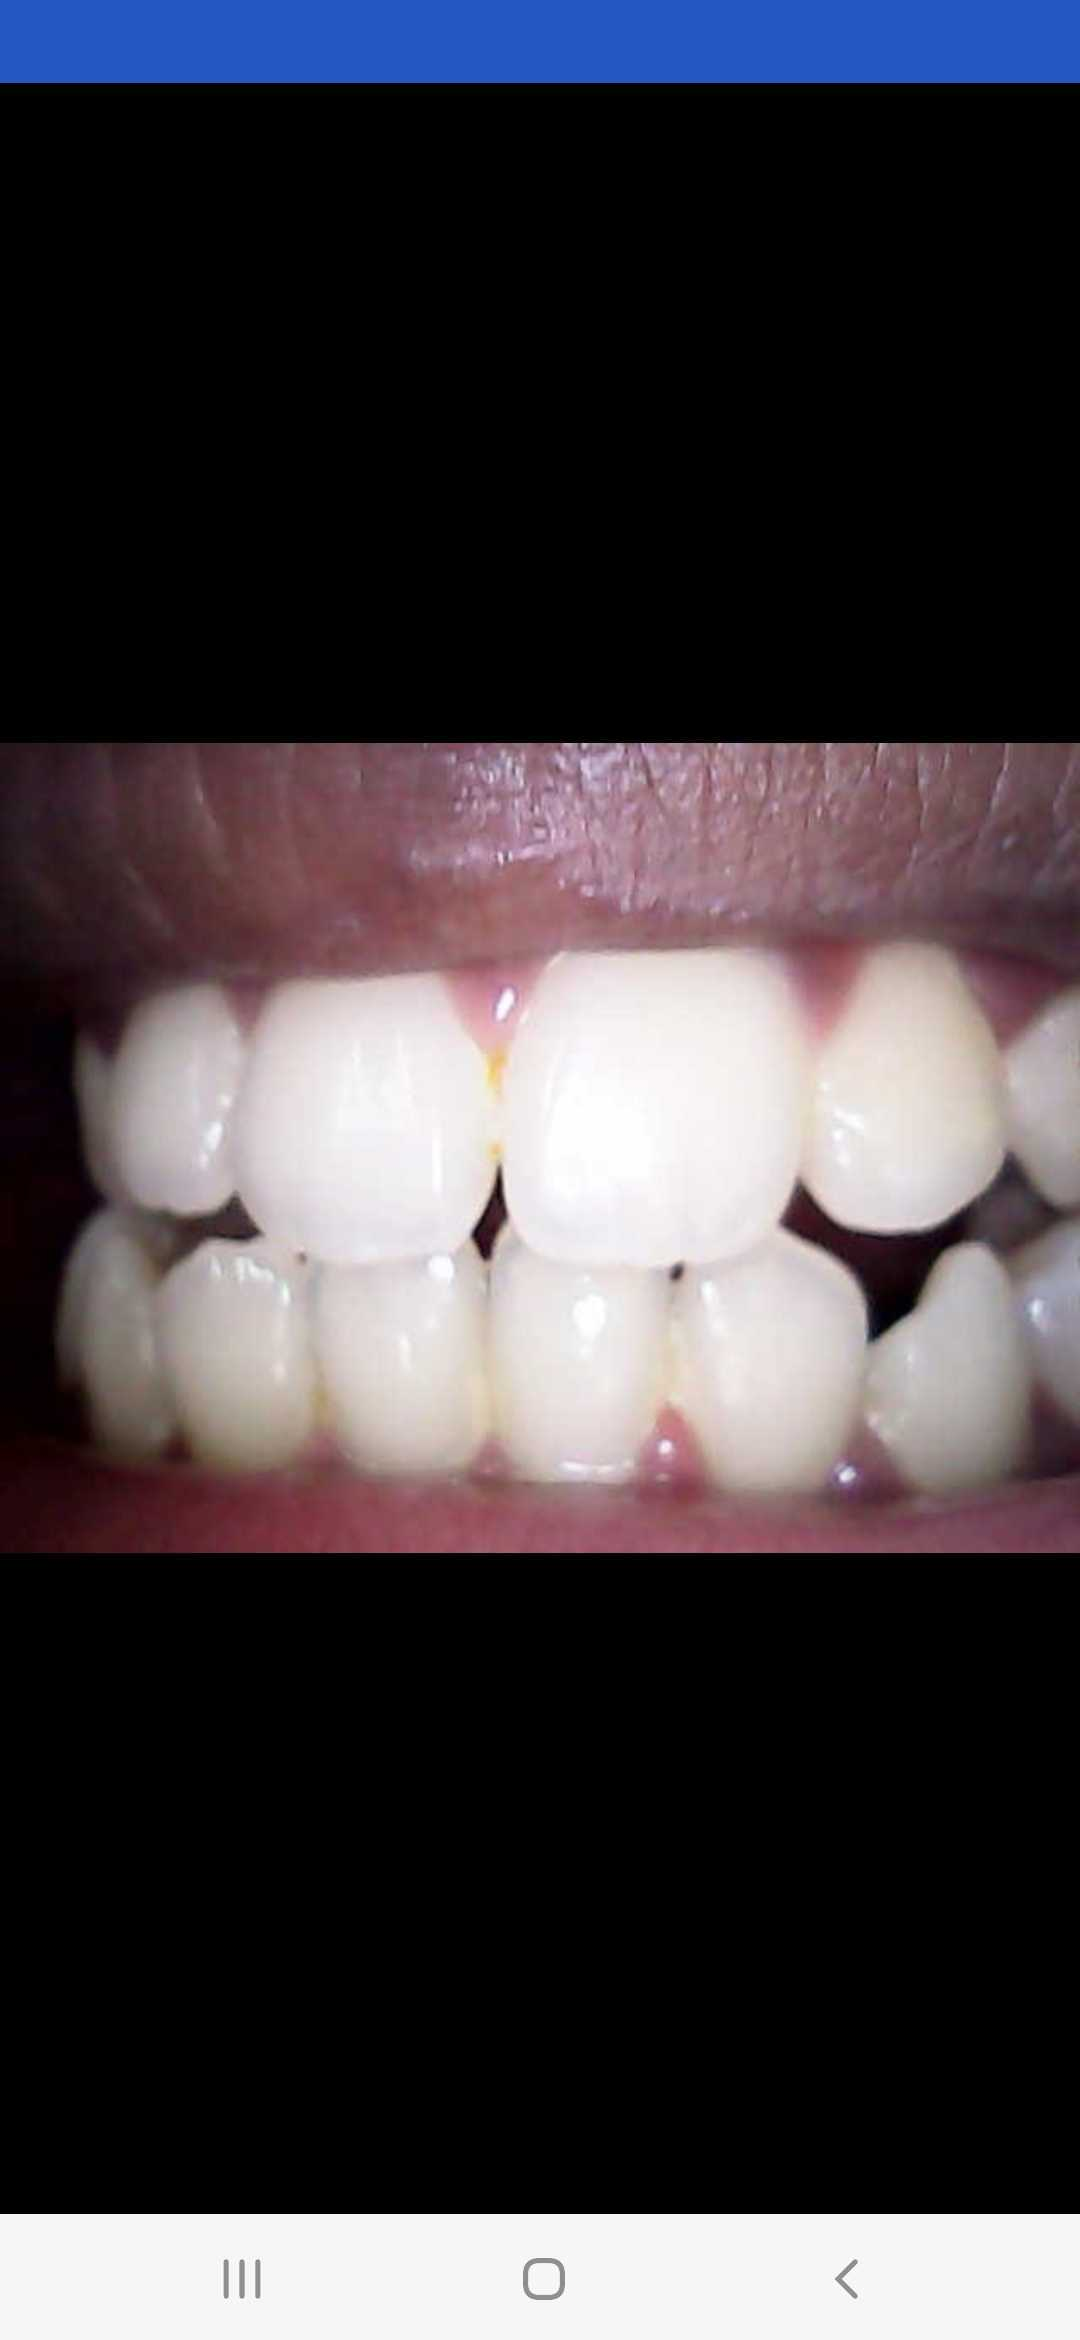
Tips: You can also use the button on the MouthCAM device for capturing. A single press will capture an image, while a long press will start or stop video recording.
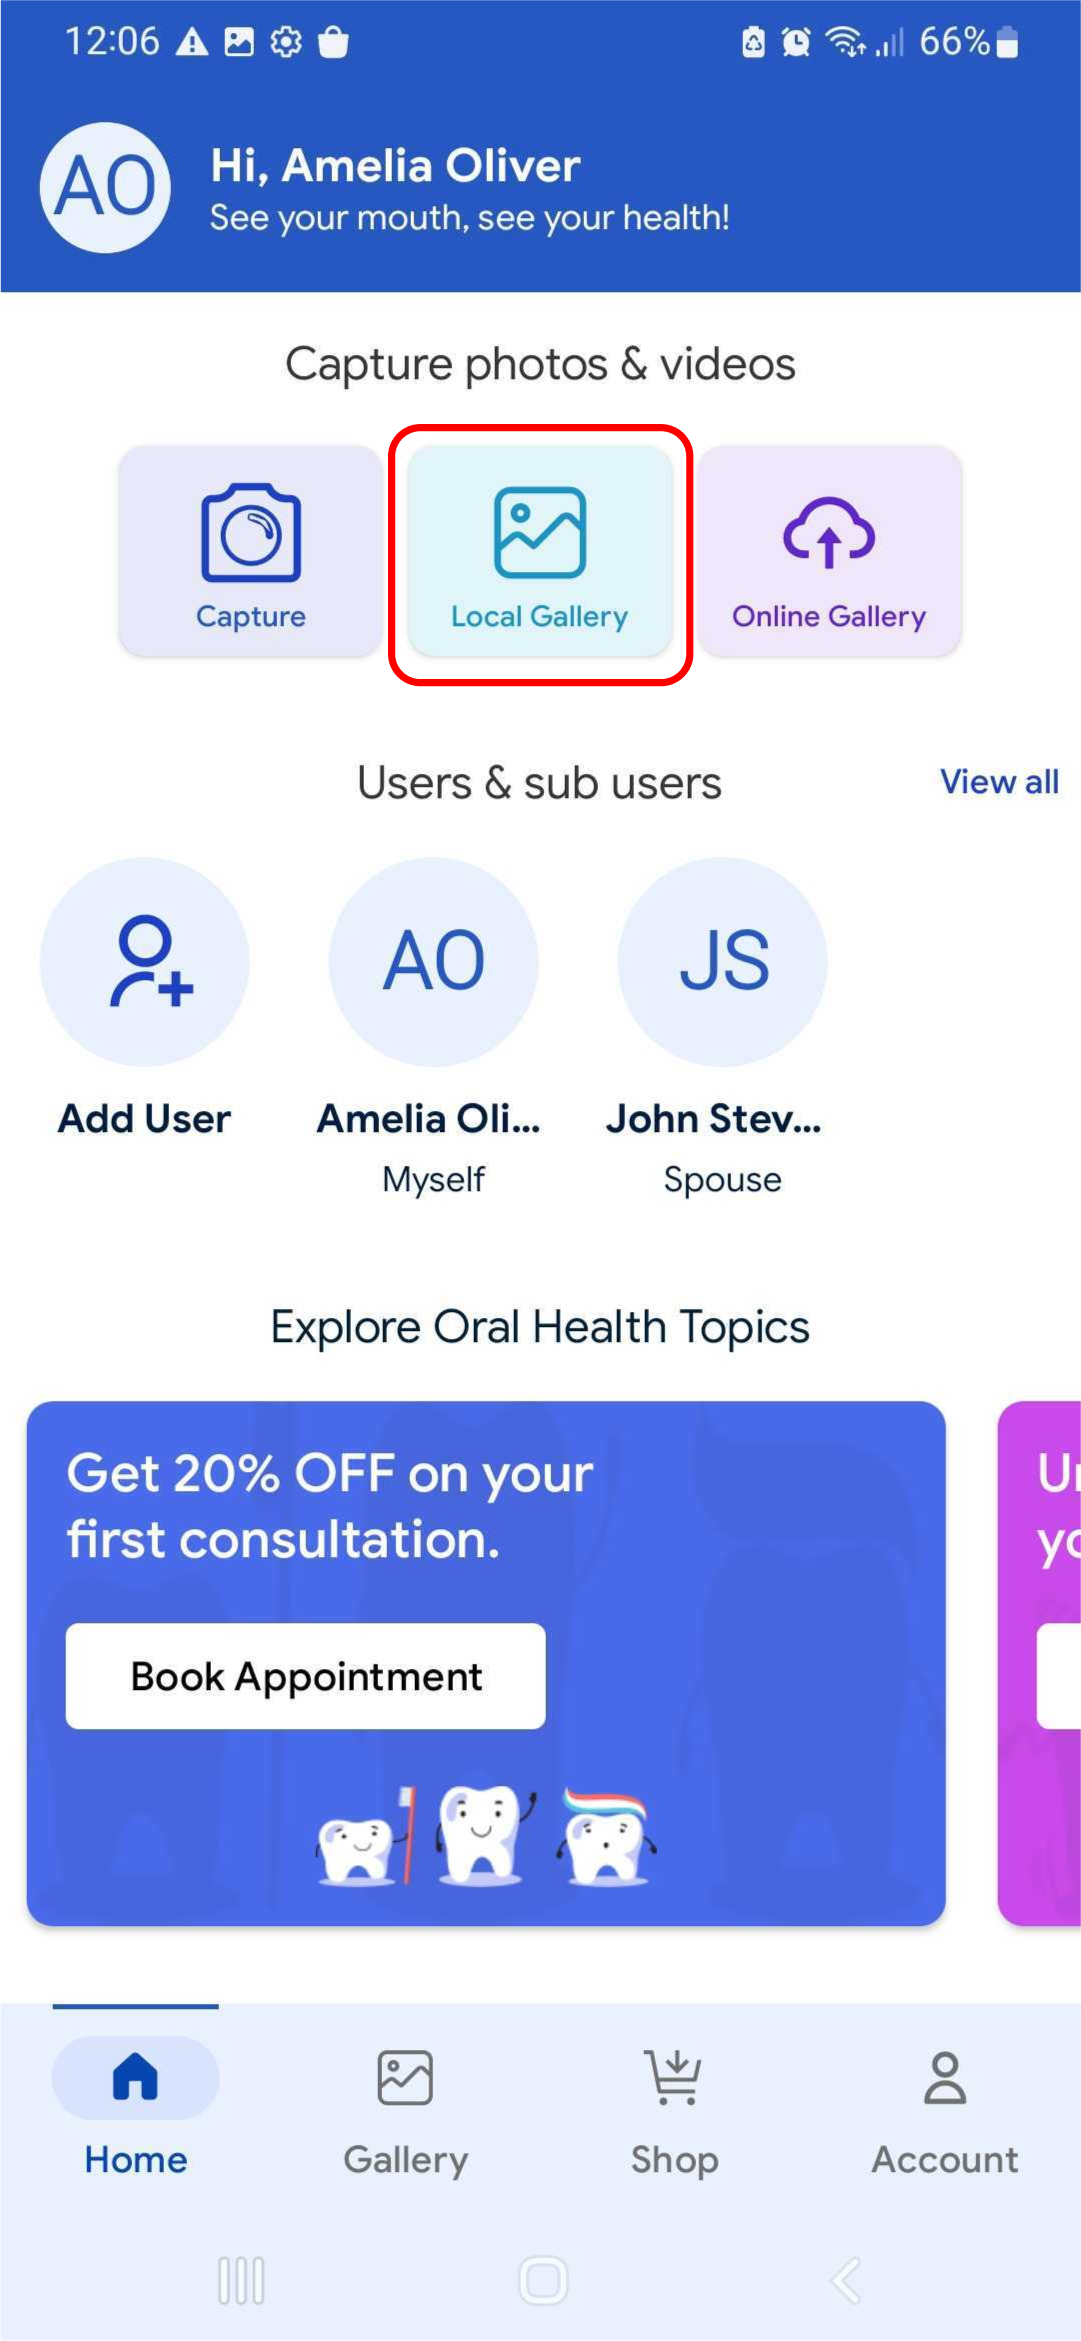
Step 6: Go back to your app dashboard. Click on the local gallery. You can view all the images and videos taken.
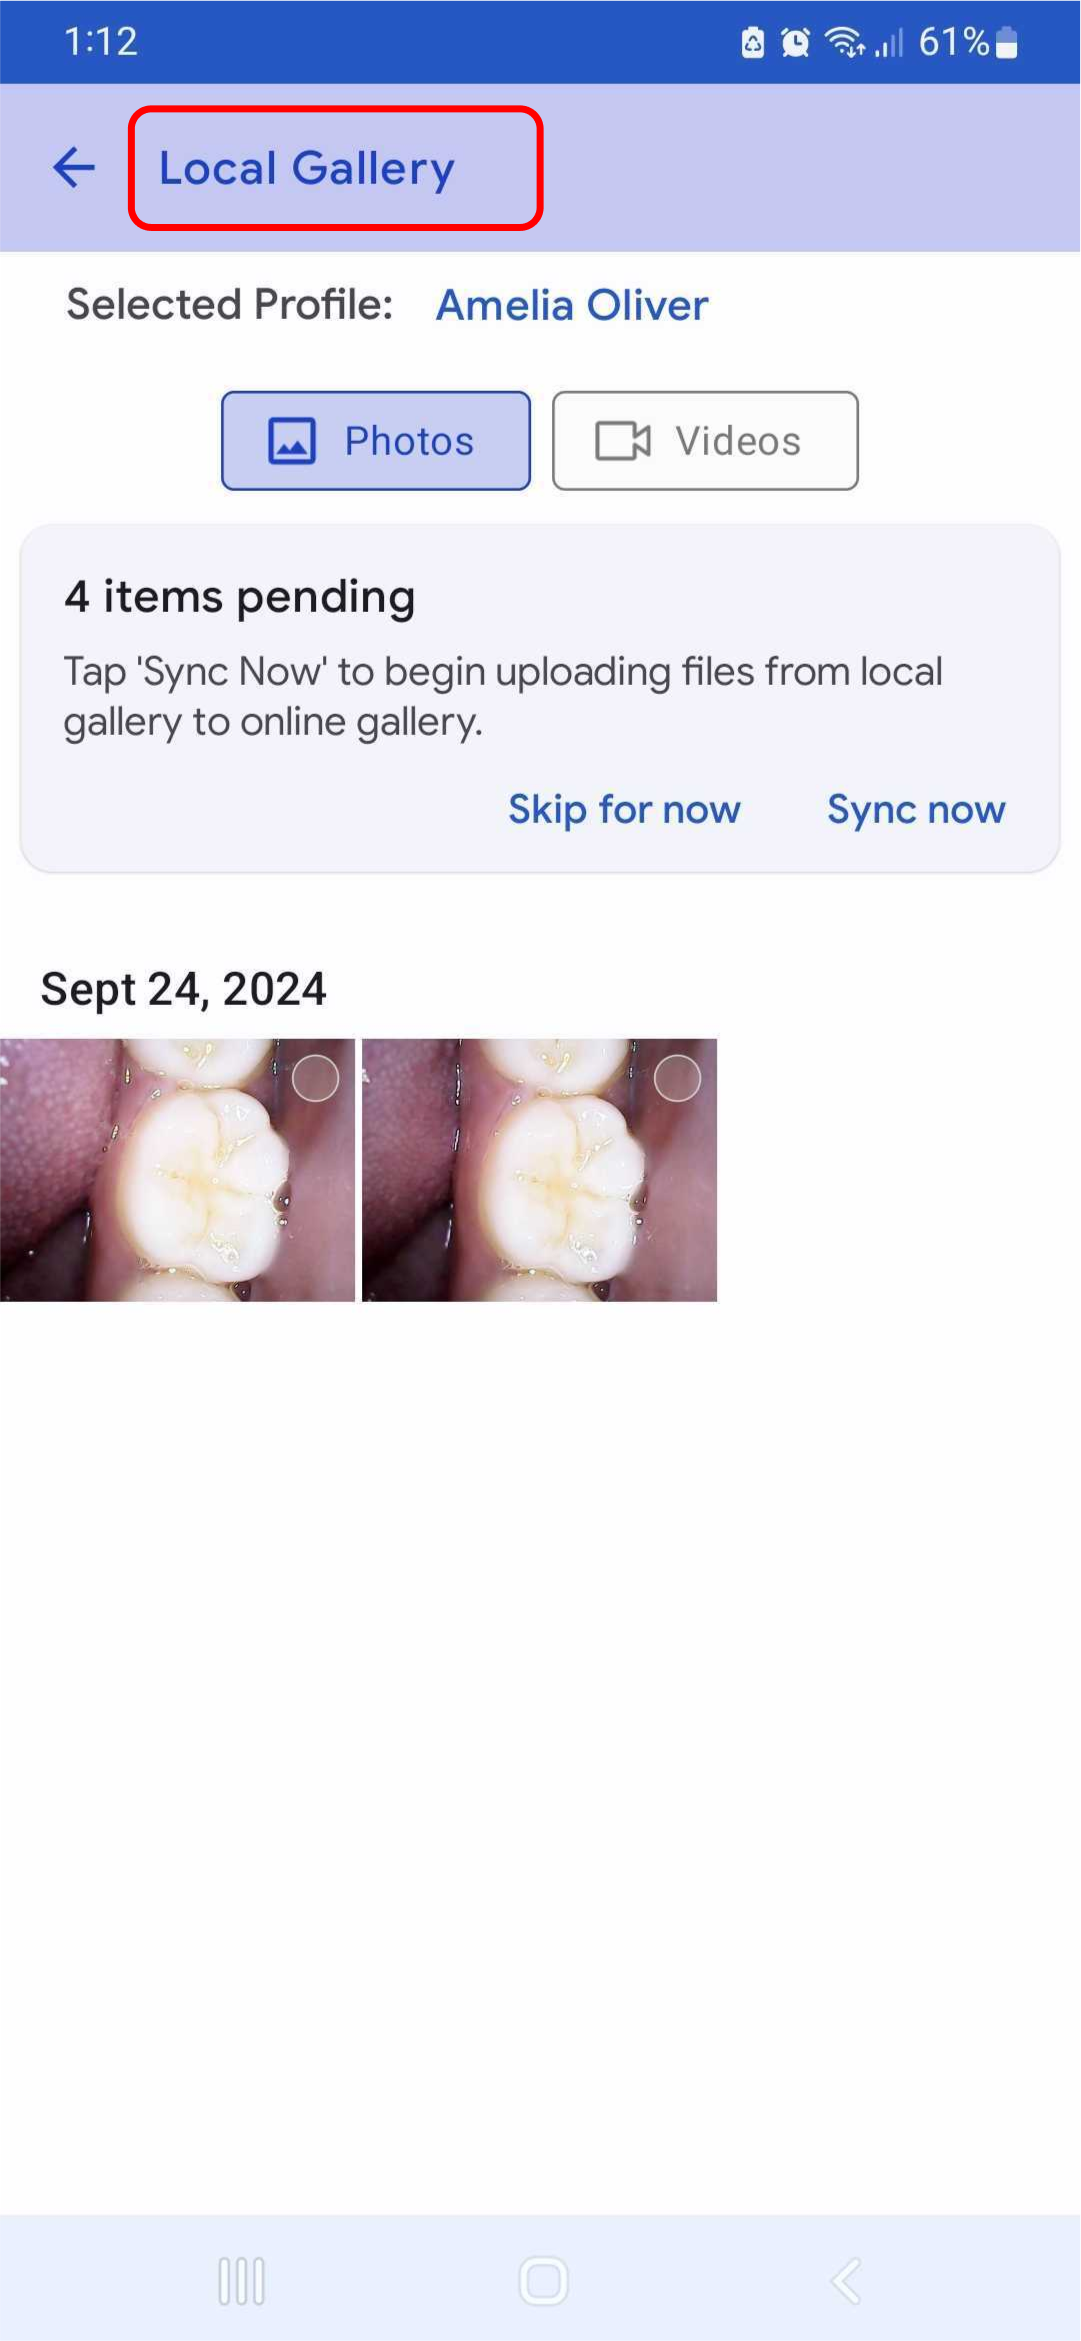
Step 7: You can find all the captured images and videos here at the local gallery. Here, you can view or delete the unwanted images and videos.
Step 8: We offer options to sync your images to our HIPAA-compliant cloud storage (free up to 100MB) or save them directly to your local gallery. You can choose to sync now to the cloud or save them locally and sync to cloud storage later. The next set of instructions will guide you on how to sync these images securely to our HIPAA-compliant cloud storage and safely share them with your dental provider.

Viewing Images in Your Gallery
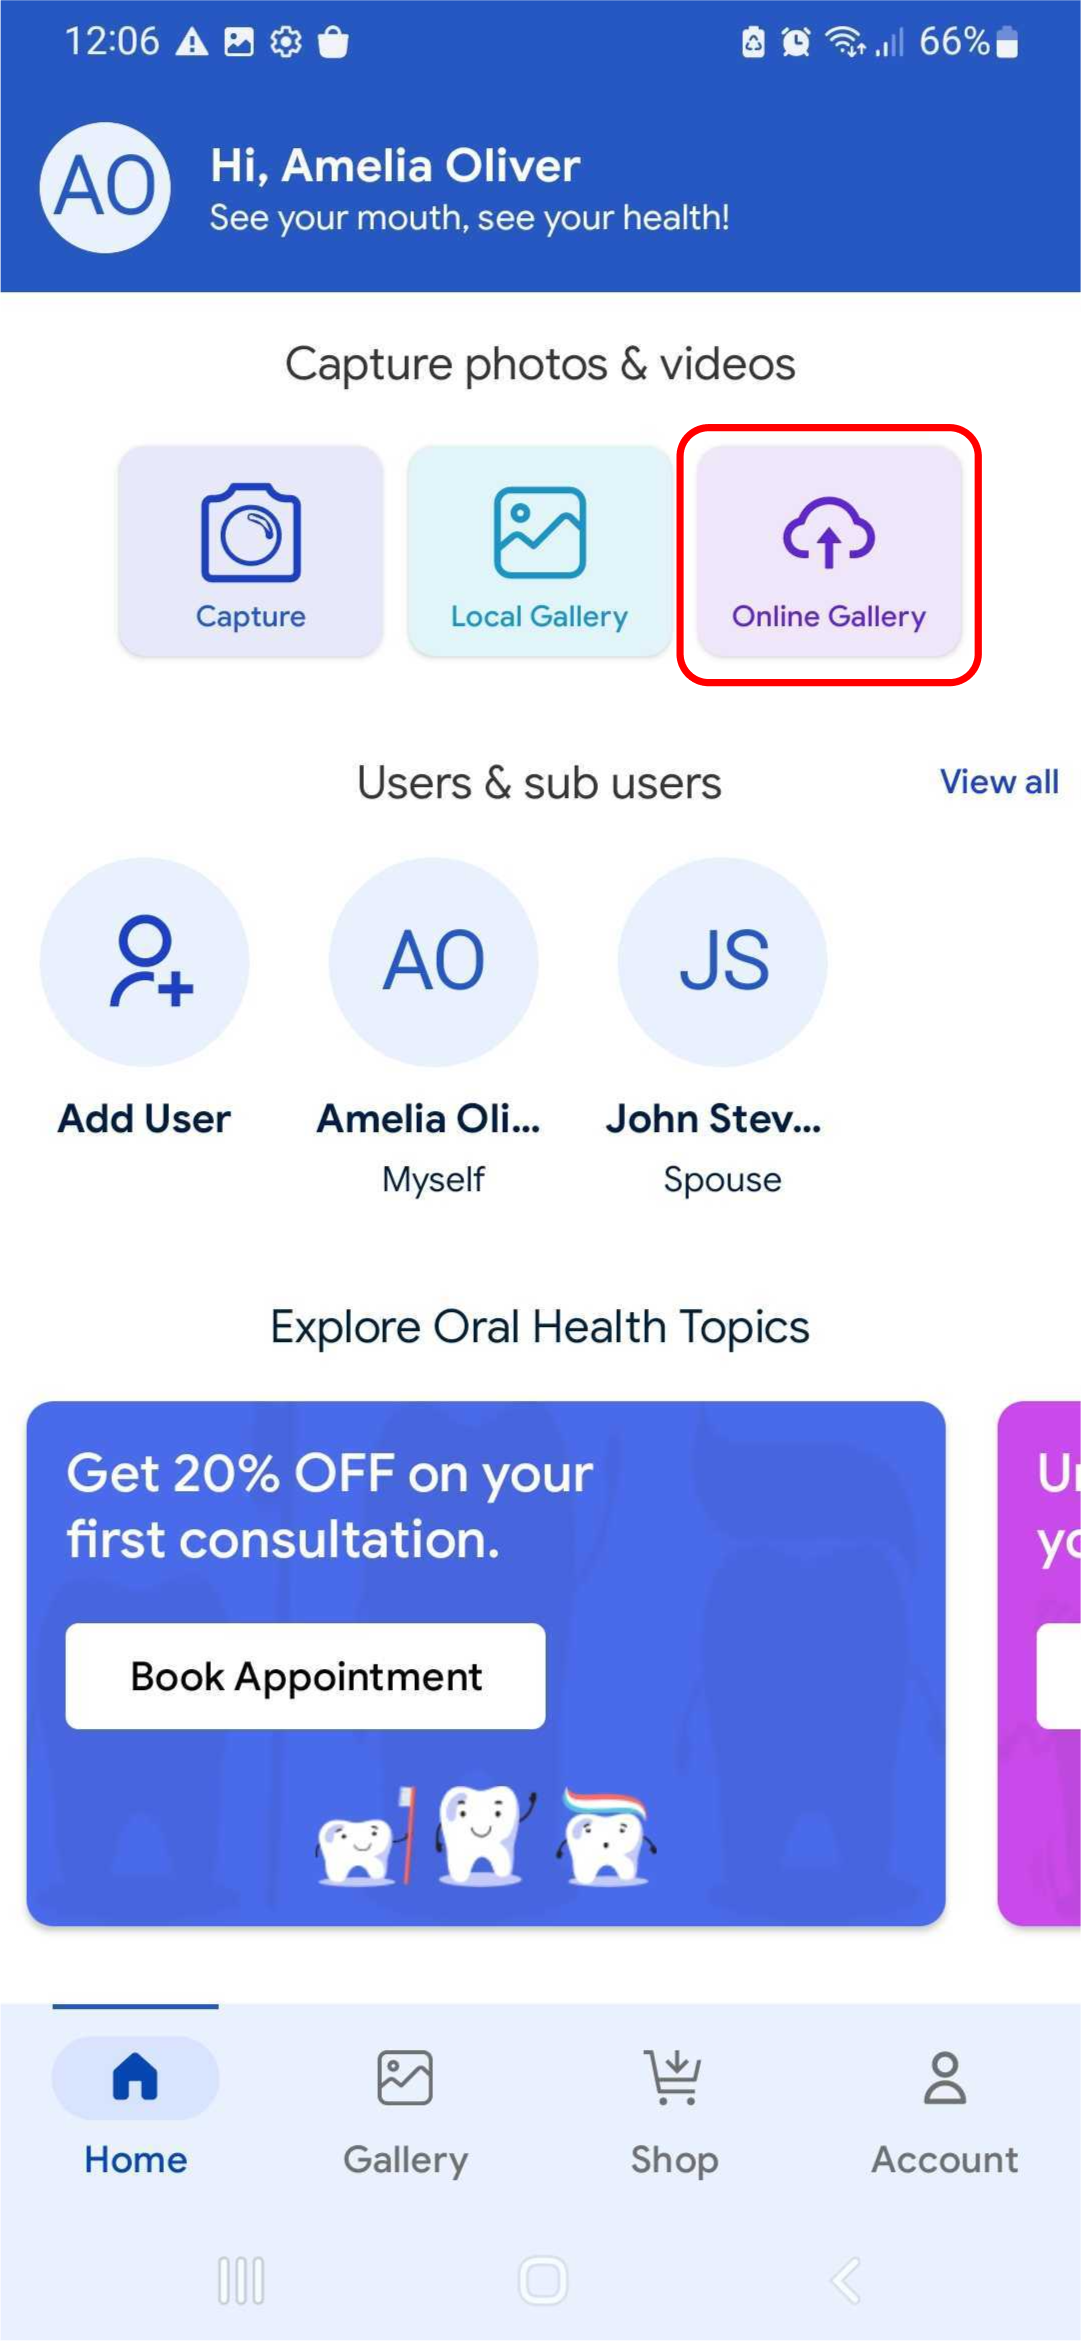
To view the images and videos you have captured, click on the online gallery button.
Syncing Your Gallery
Note: To ensure that you are never at risk of losing your images or videos, Dentulu has enabled a feature that allows you to sync your content to your cloud!
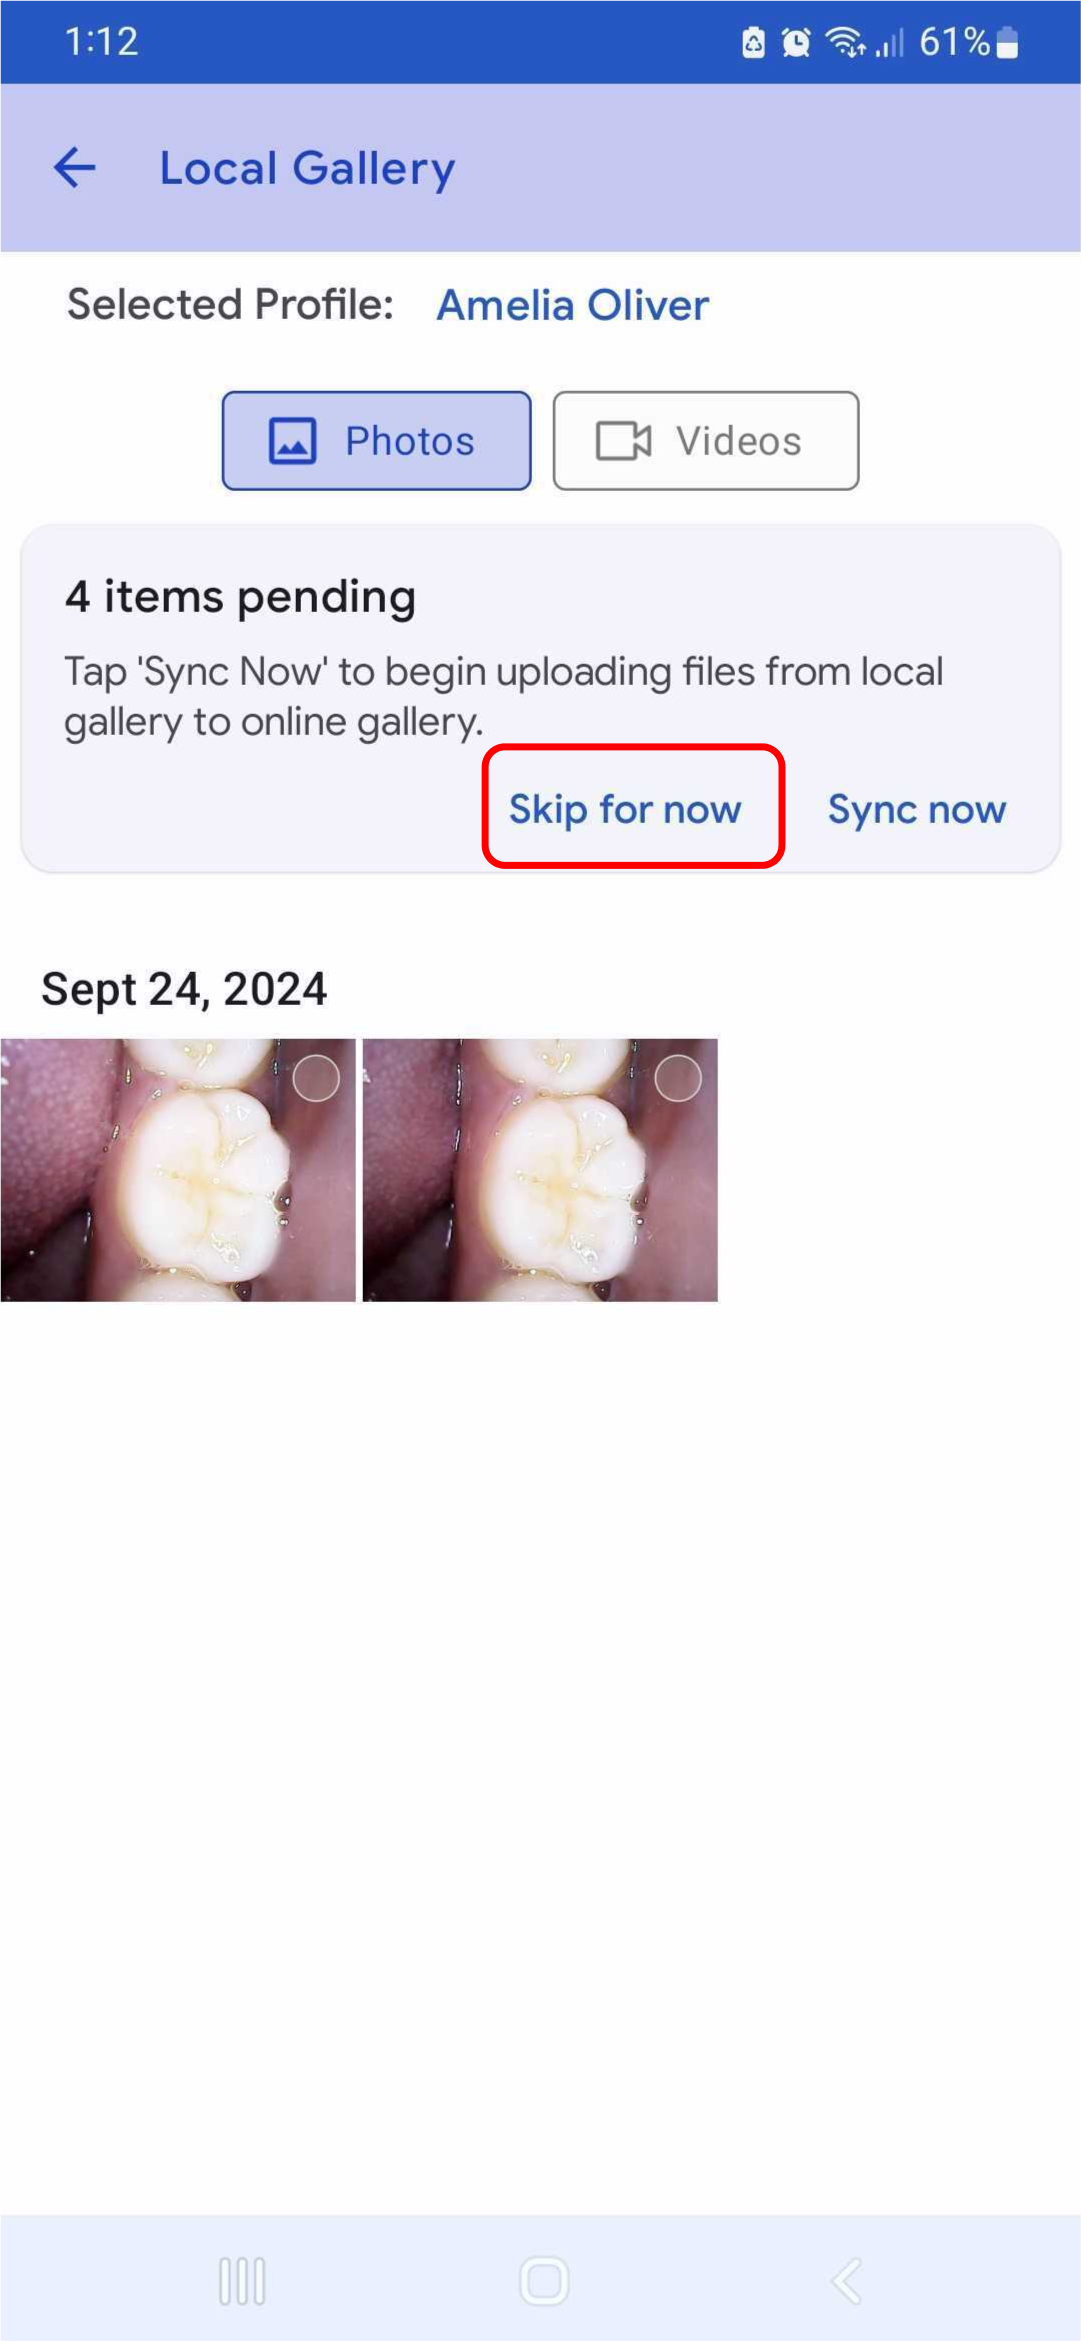
Step 1: Tap the local gallery icon on the dashboard
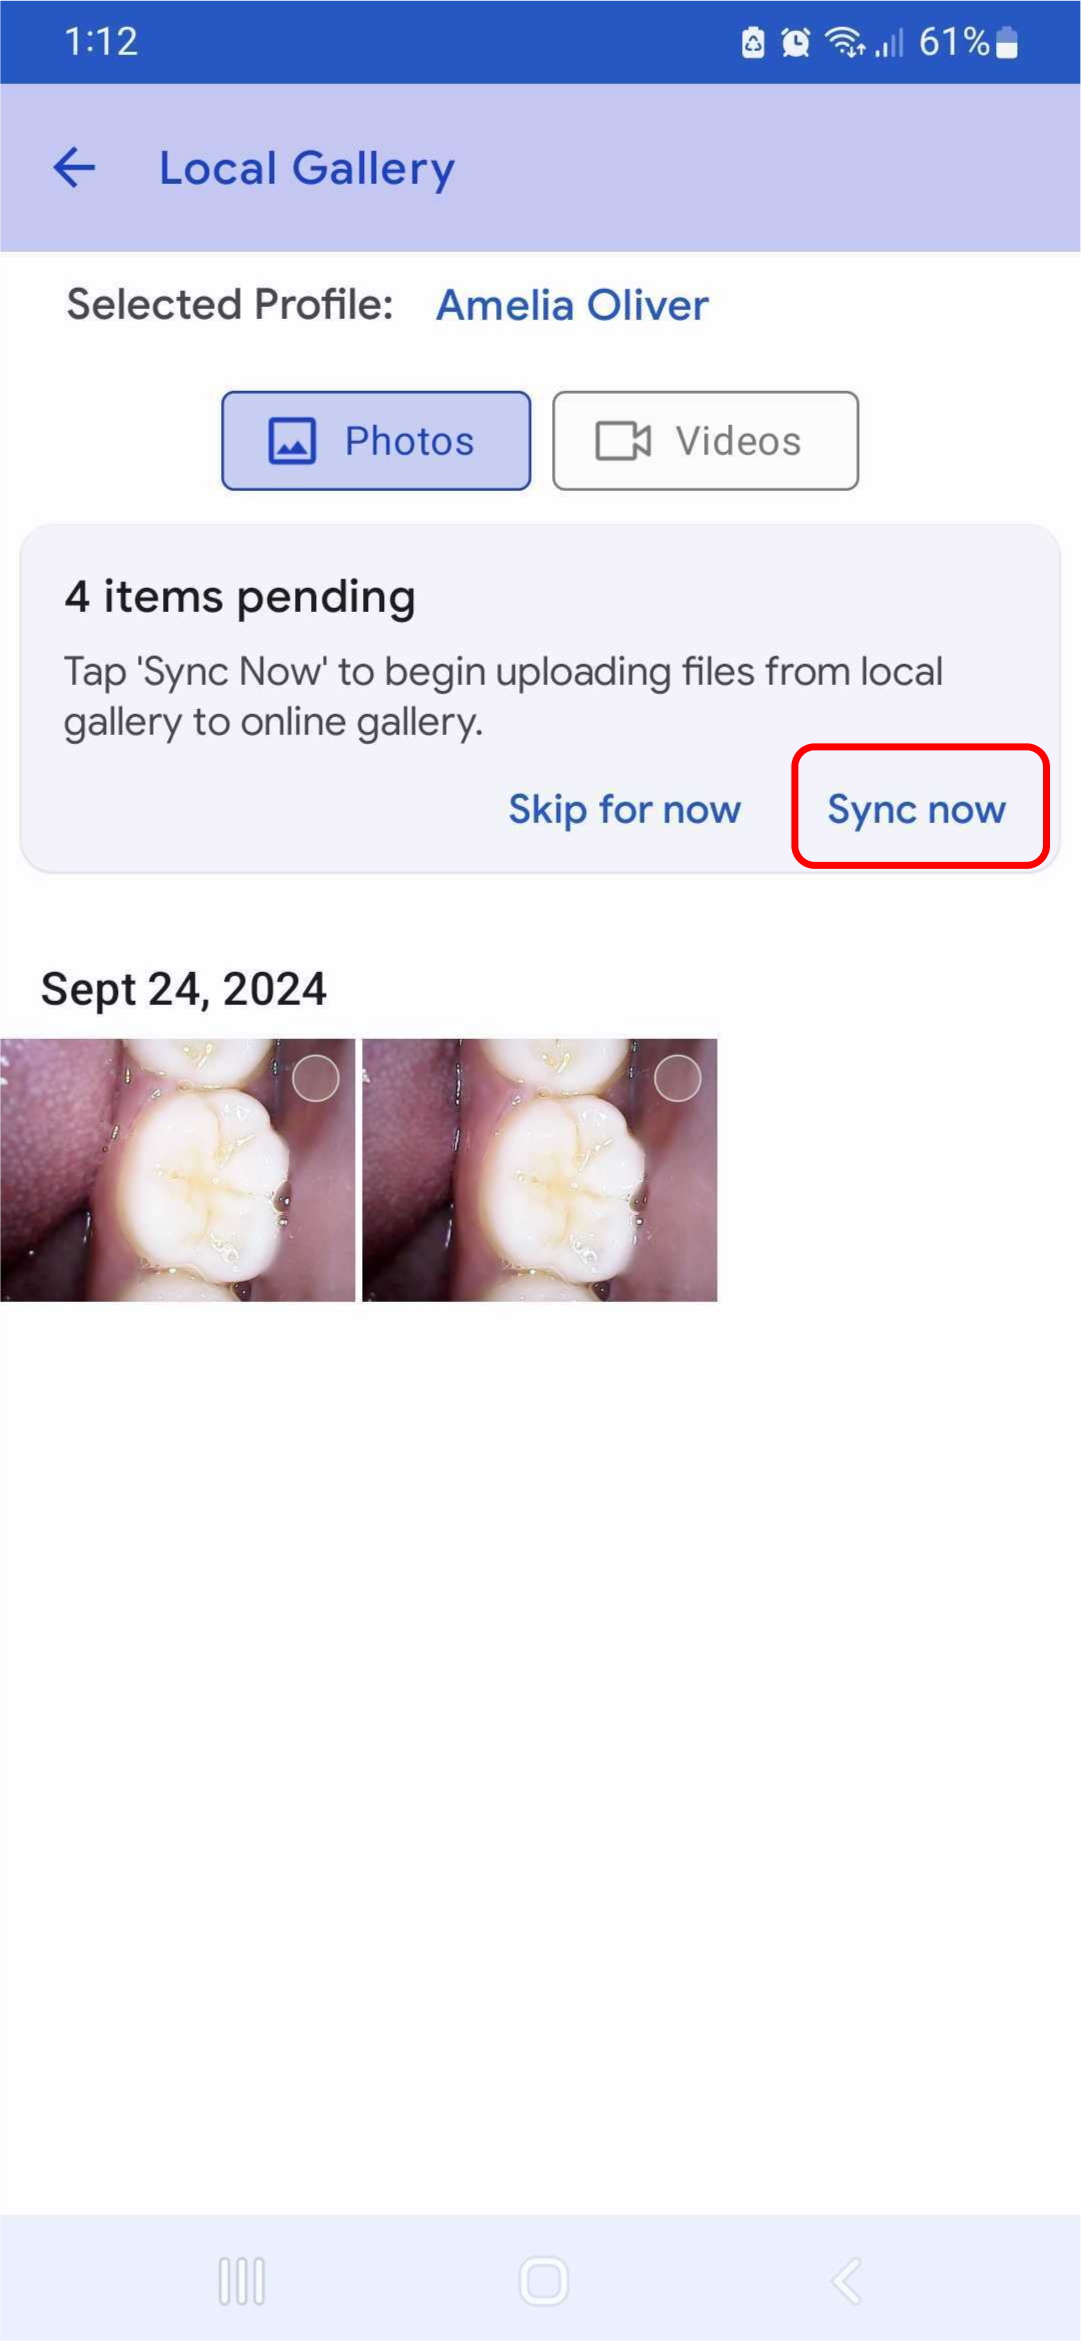
Step 2: Tap the ‘Sync now’ to sync all your images/ videos to cloud storage
Step 3: You can tap ‘Skip for now’ if you wish not to sync images/ videos
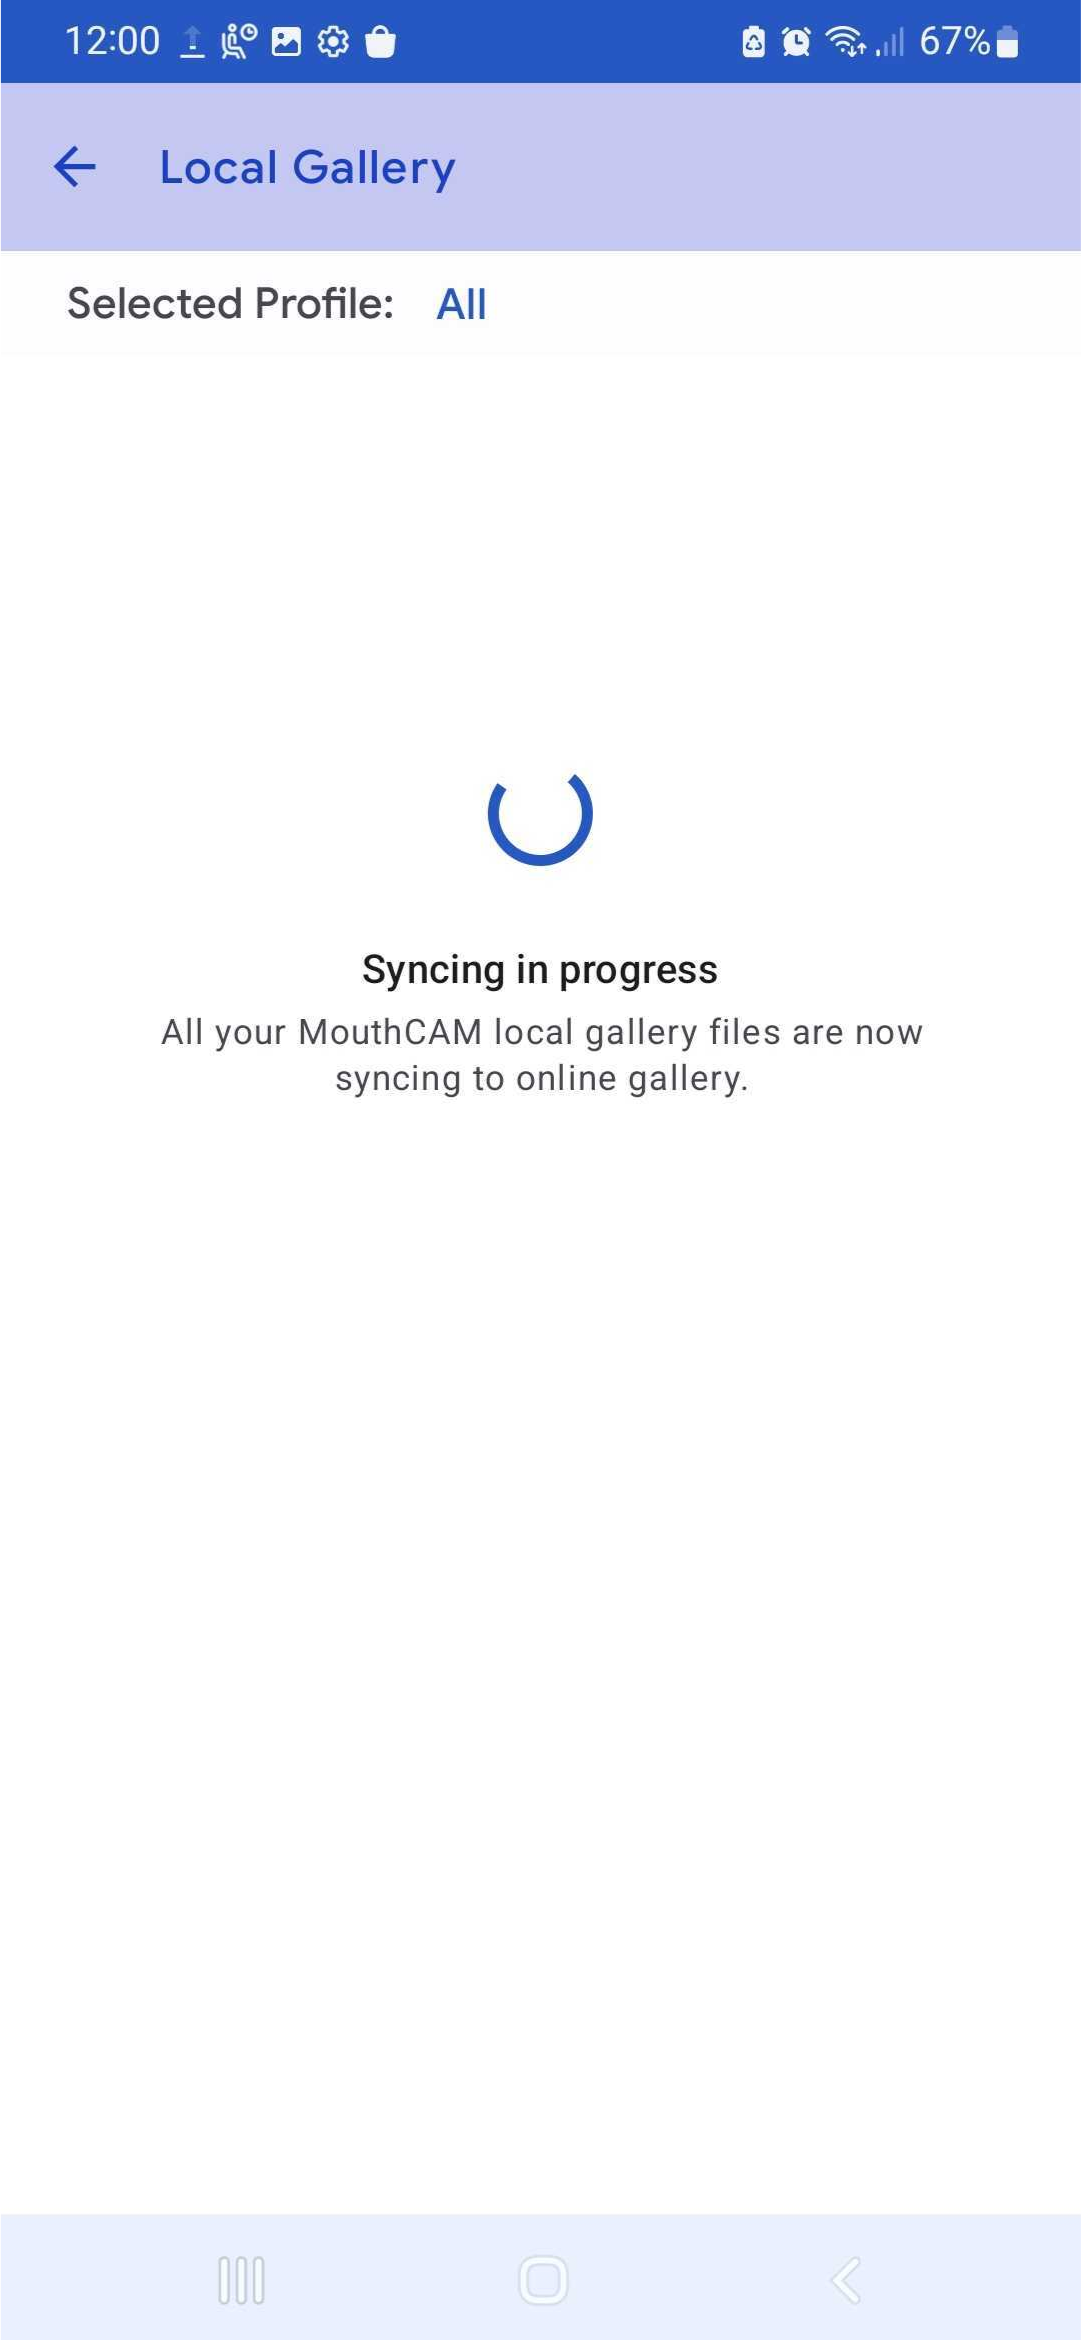
Step 4: Once you click on the sync button the images and/or videos will start syncing. It will show "Syncing in progress."
Step 5: Once you sync the items you will get the “Your local gallery is empty” message in the local gallery.
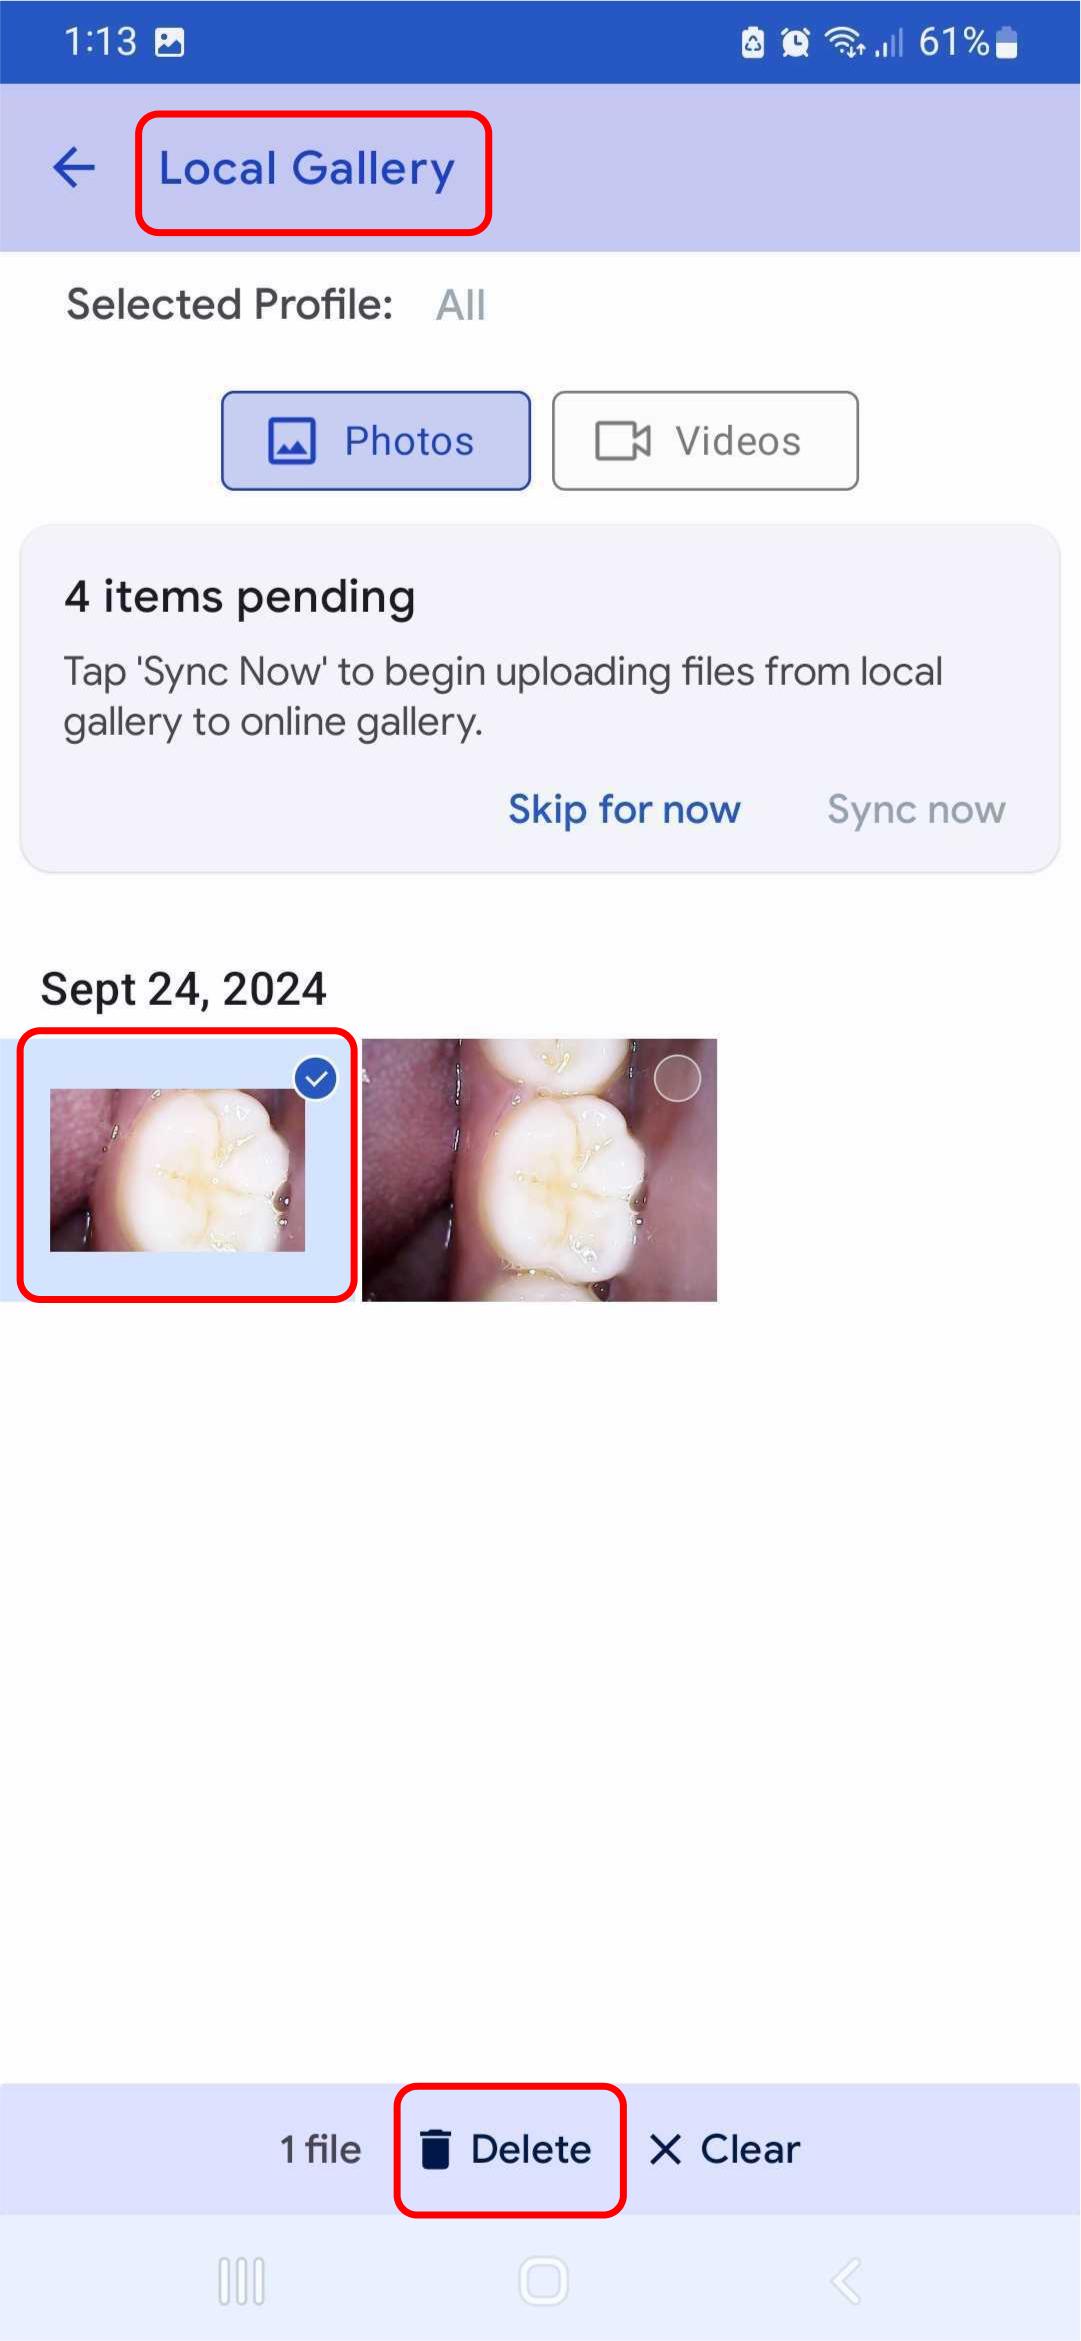
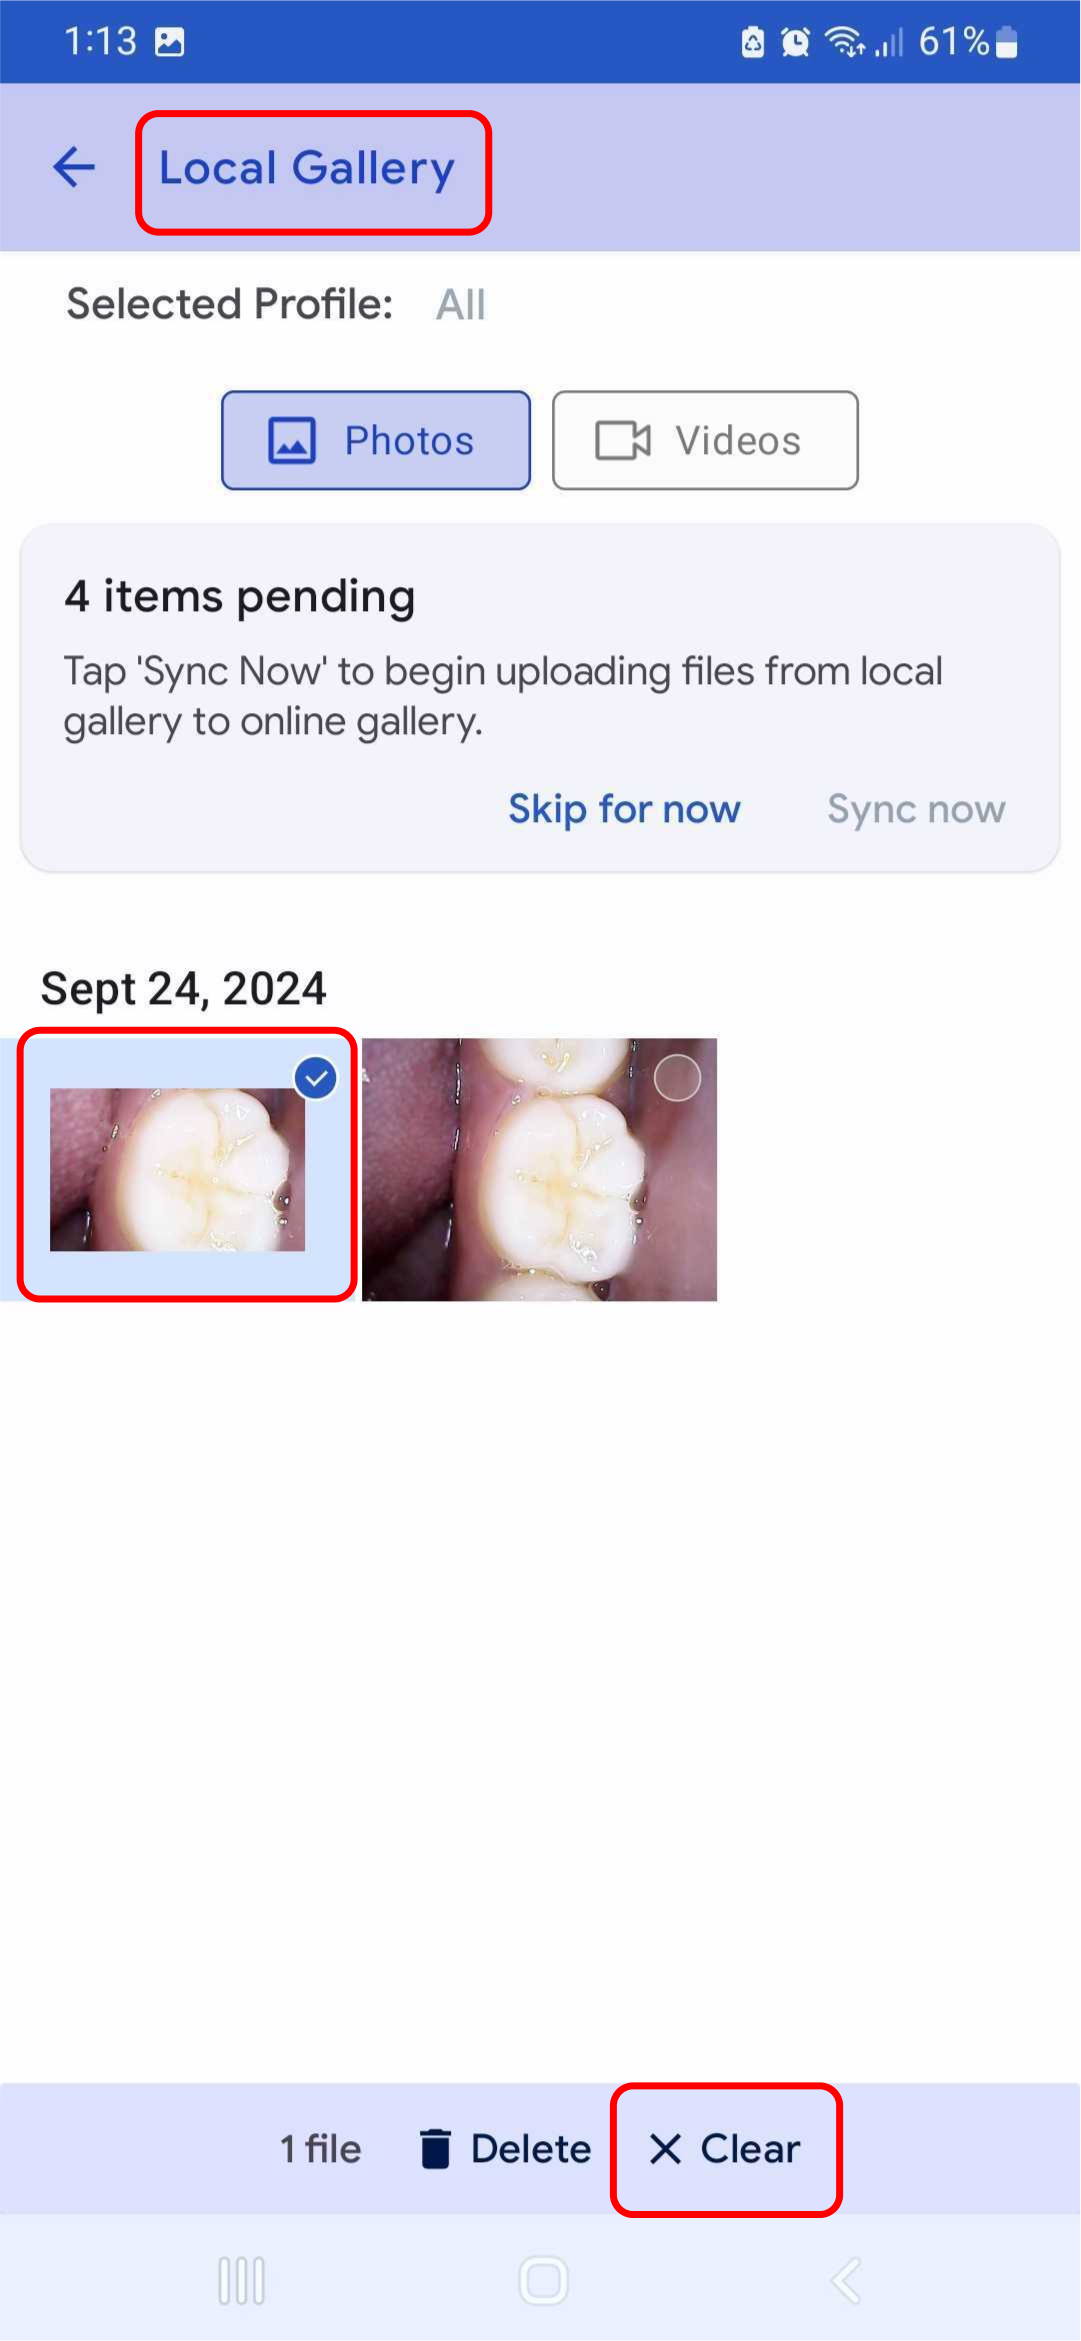
Step 6: Before syncing, you can delete any unwanted images or videos by long pressing to select the image or video you do not need.
Step 7: If you want to deselect images or videos, tap on the ‘Clear’ button.
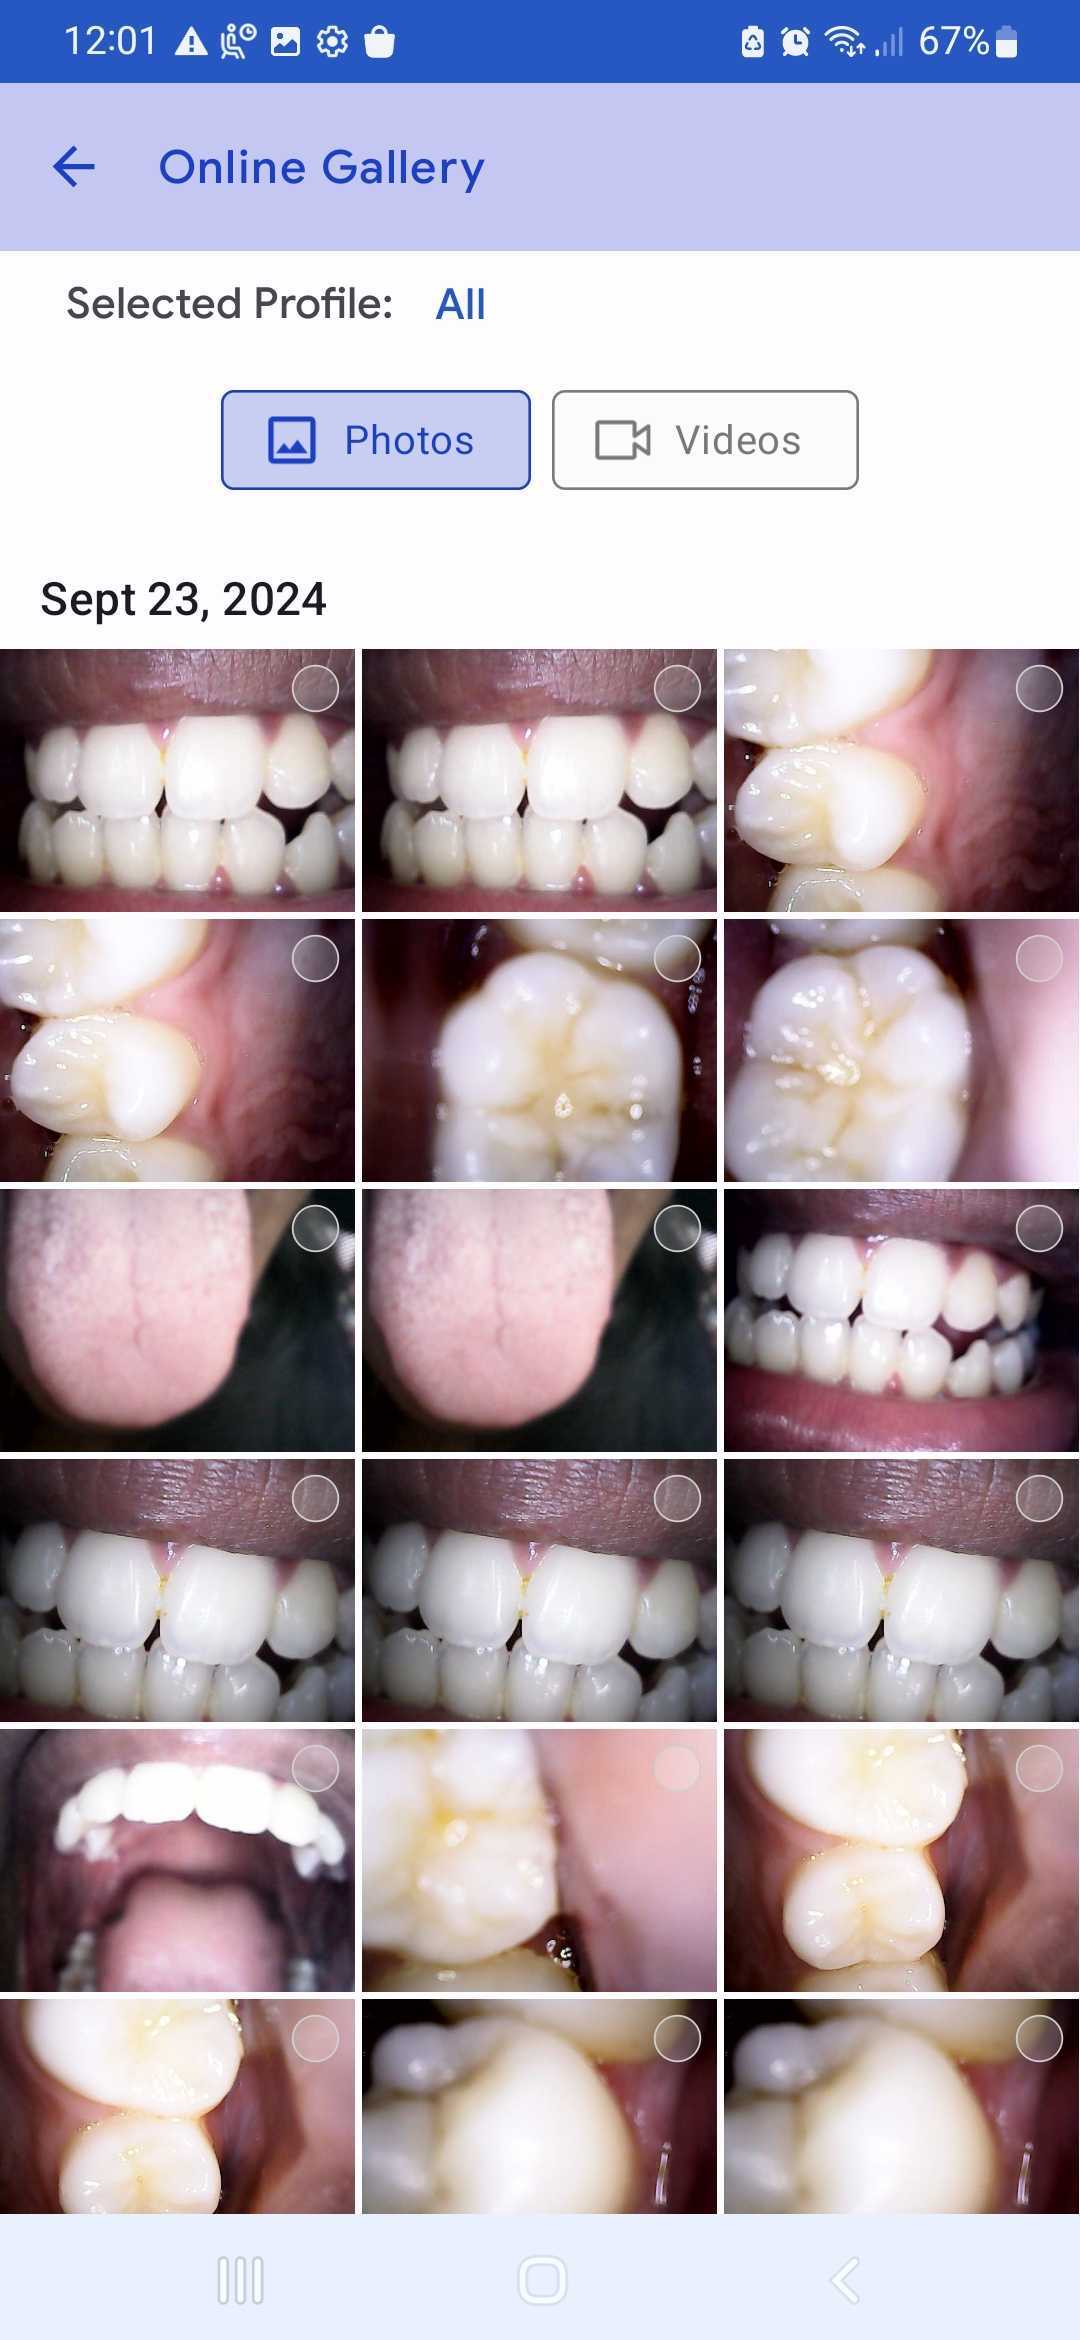
Step 8: Tap on the online gallery to check the images or videos reflected from the local gallery.
Image Management Options
You have the option to perform various actions on multiple selected images, including deleting and sharing.
 Delete: You can choose to delete select image or images.
 Share: Allows you to securely share your image through our HIPAA compliant platform with your dentist or anyone else you choose.

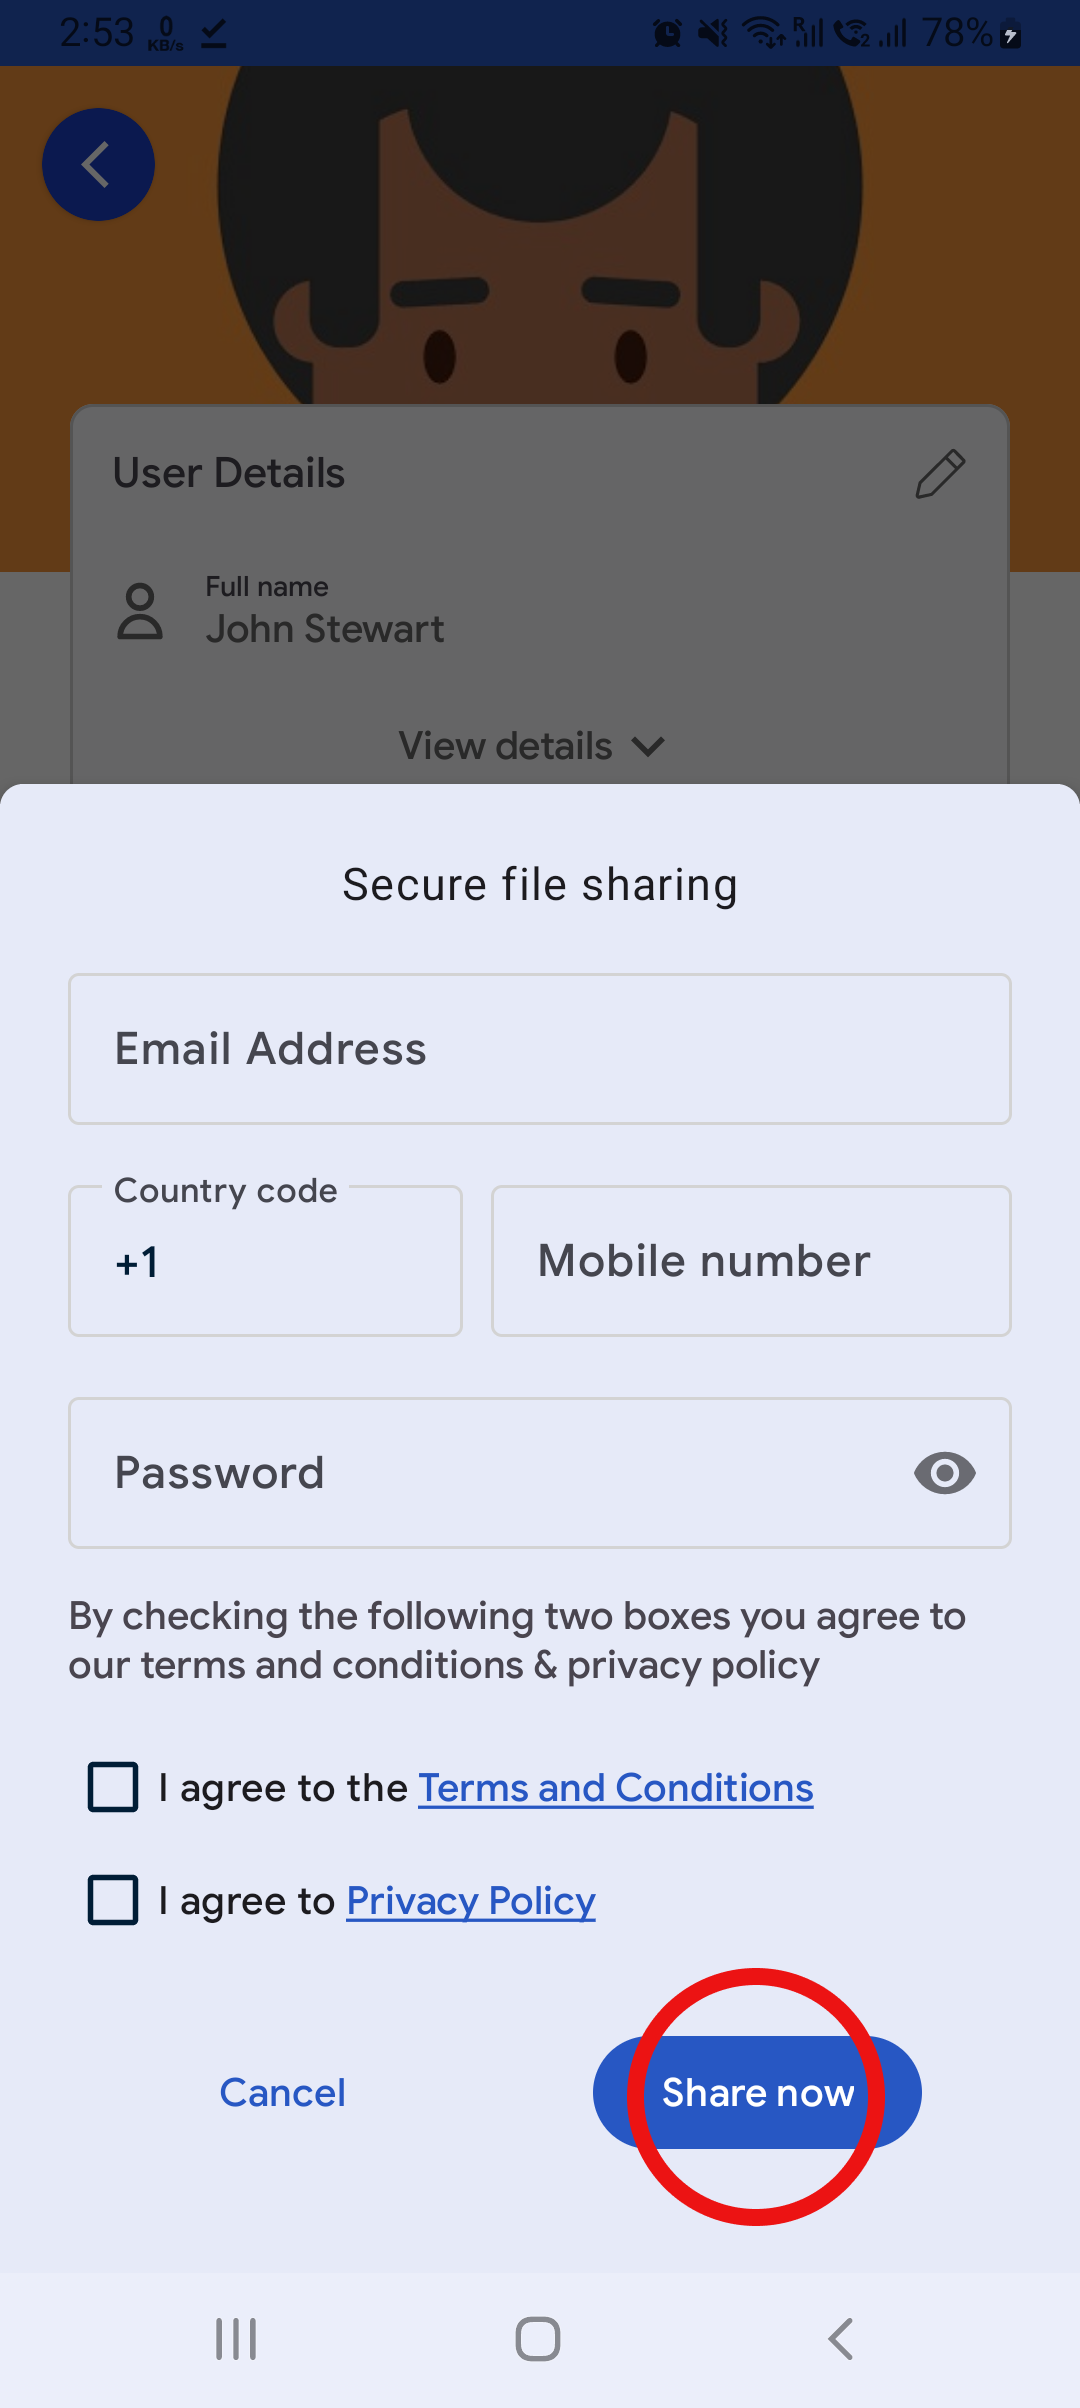
Sharing Images Securely
Step 1: Enter into the ‘online gallery’ to access the images and/or videos on the cloud storage.
A: Select an image first
B: Click on the share button to open a pop-up window
C: Create the password (Ex: Den1234!)
D: Enter the email address or phone number of the recipient to share the image with
E: Agree to the teledentistry consents and click send
F: The recipient will receive an email or text message with a link and secure password to view the file securely through our HIPAA-compliant platform.
Step 2: Once the files have been successfully shared, you will receive the ‘File(s) shared successfully’ pop-up.

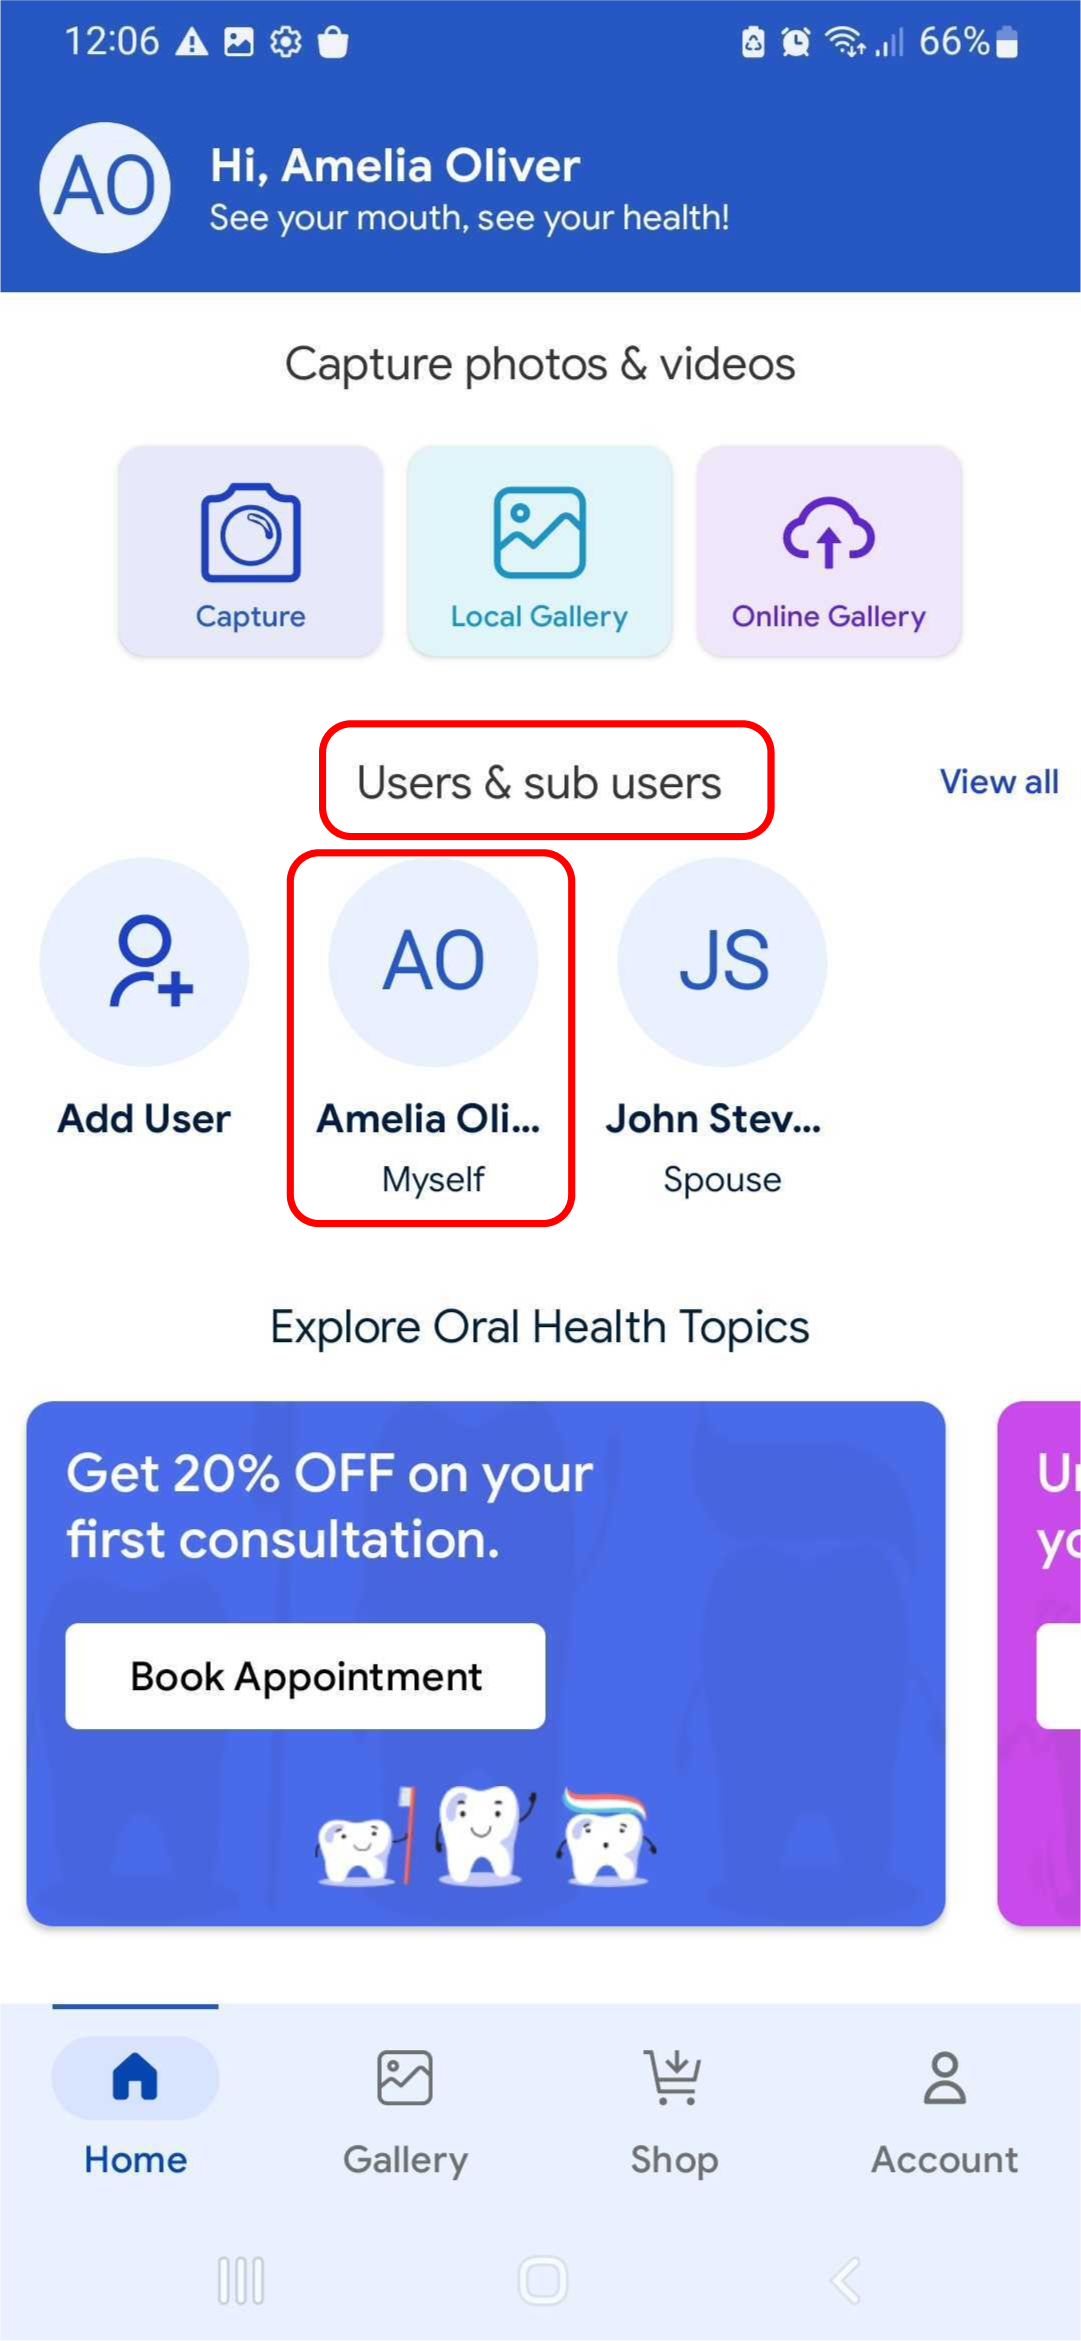
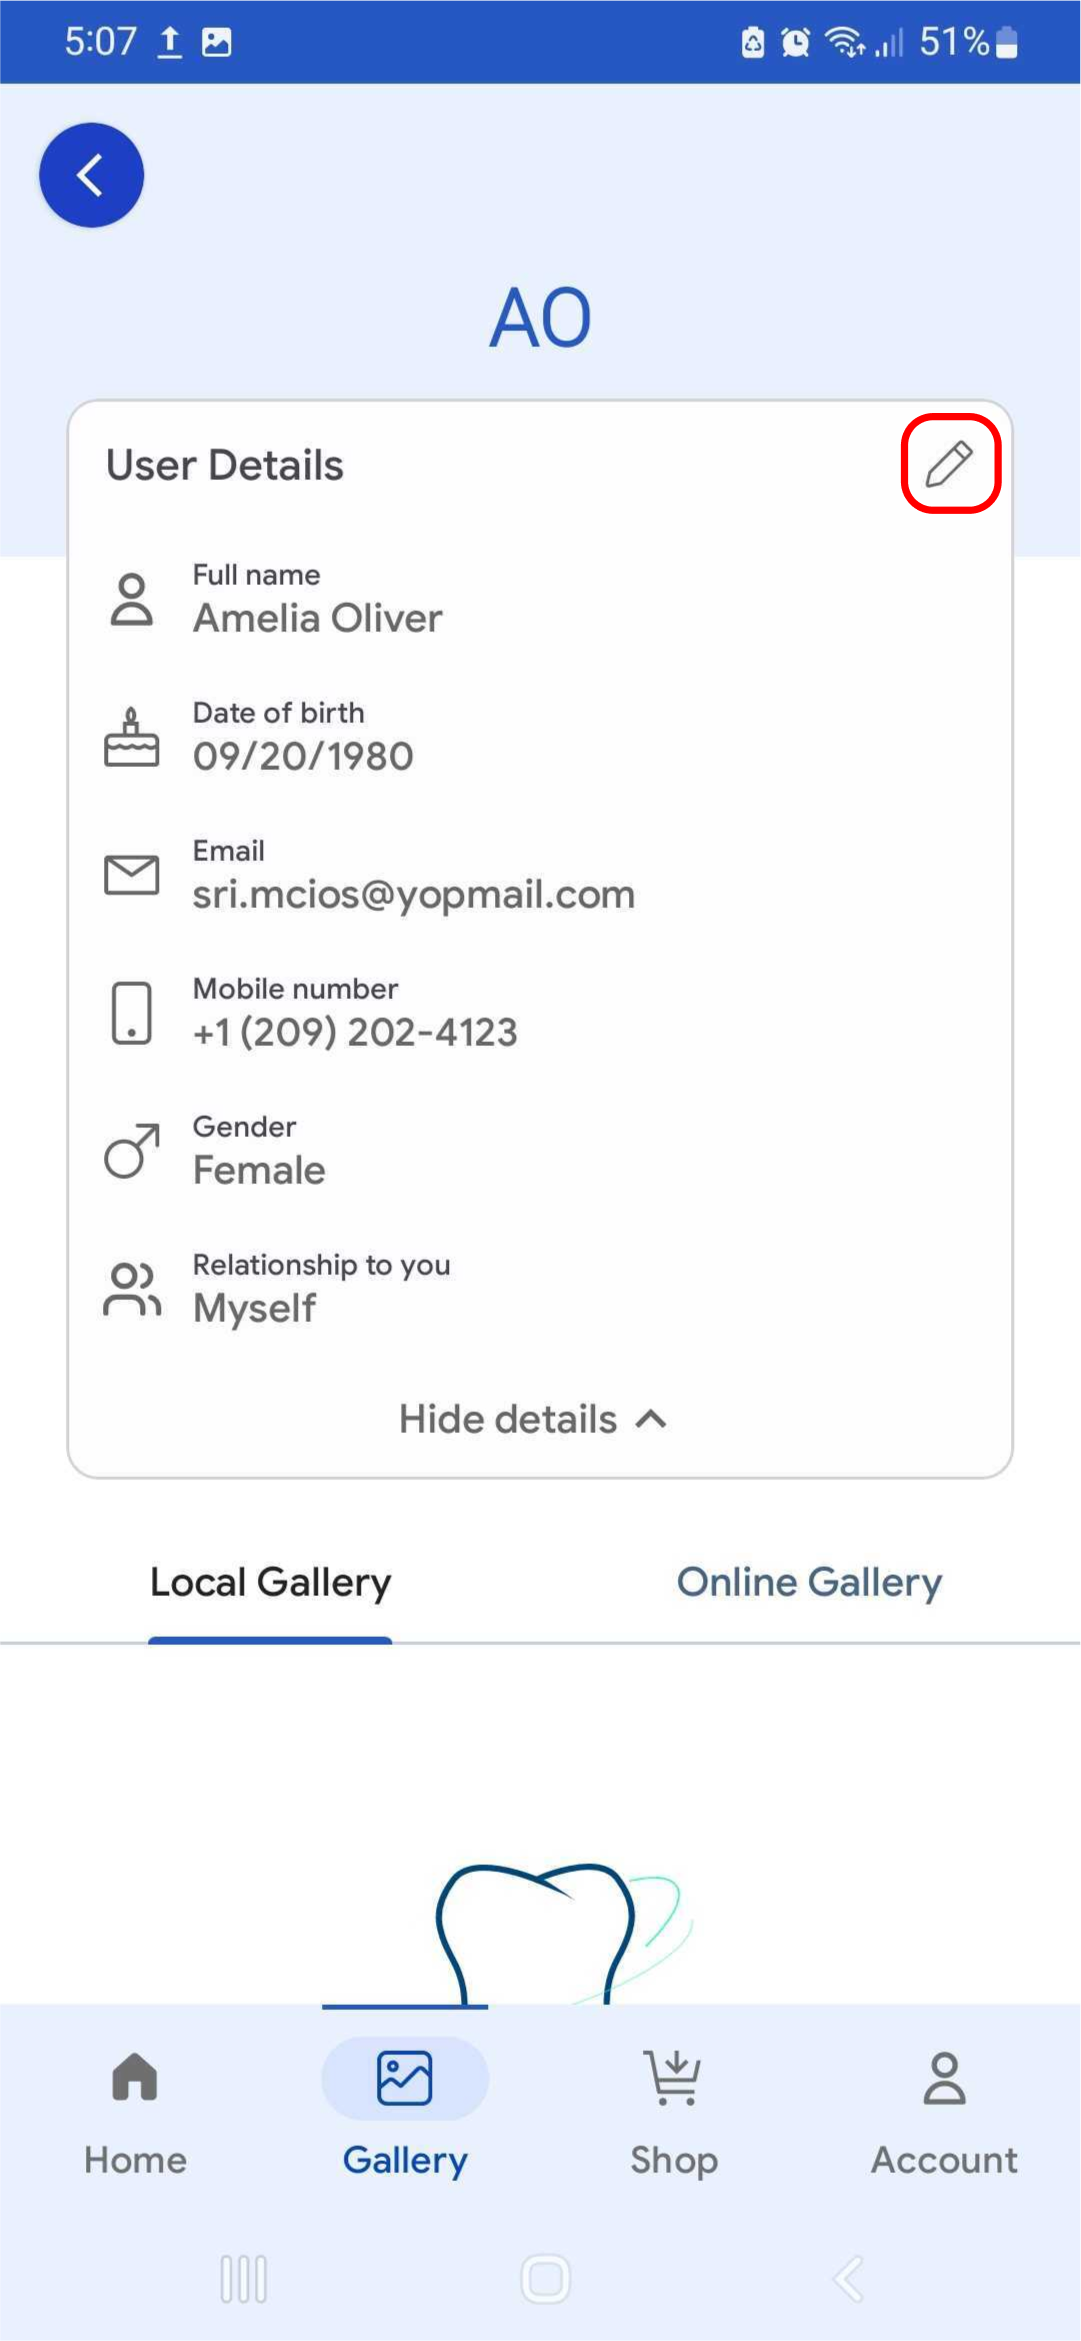
Editing User Details
Step 1: On your dashboard, you’ll find the users & sub users section. Tapping it will display the user’s details, including name, date of birth, email, mobile number, and gender. If viewing other profiles, you will also see the user's relationship to you.
Step 2: Use the edit option to edit the details.
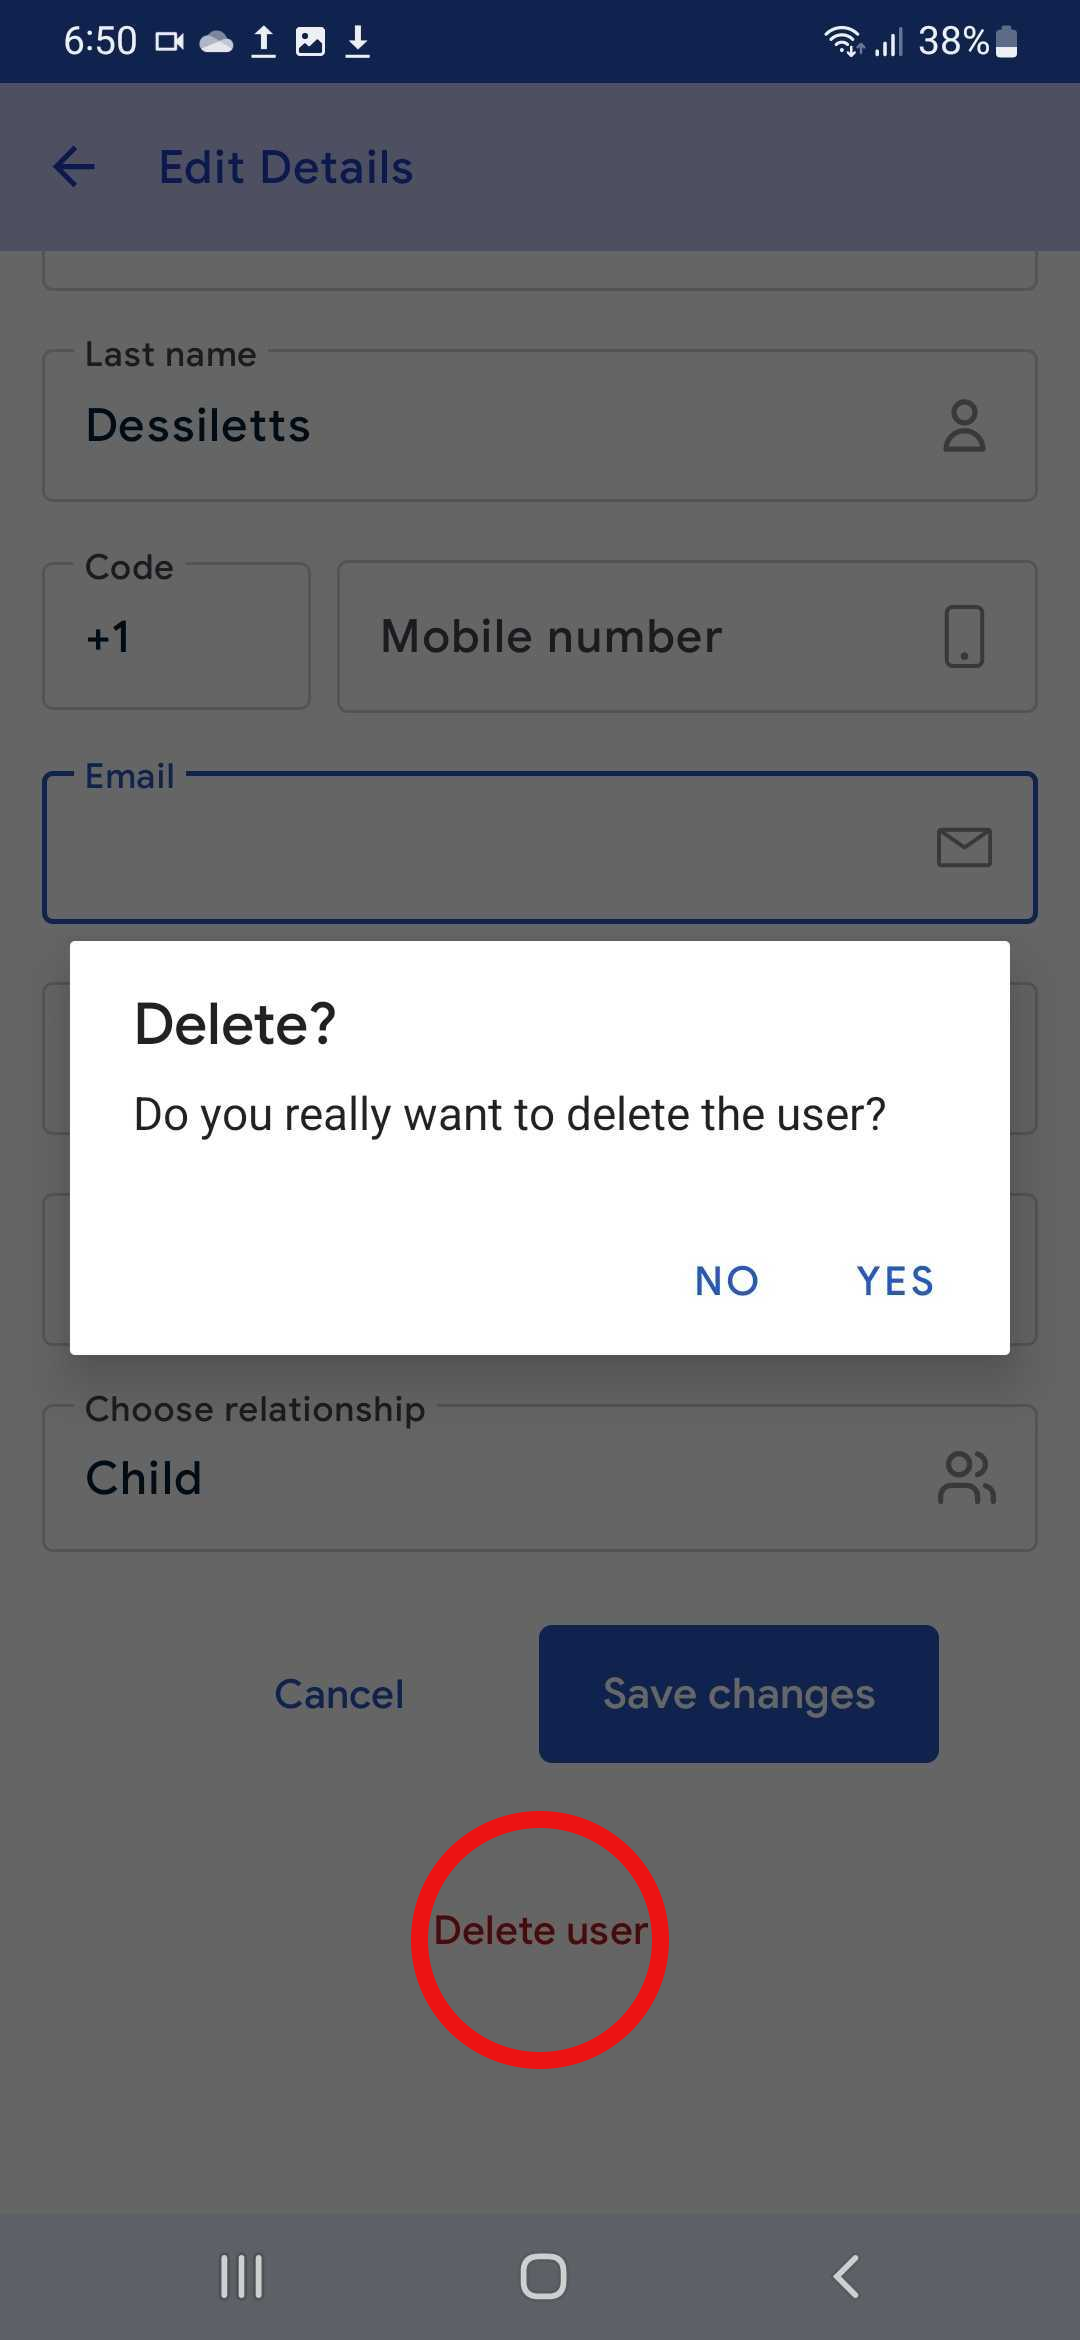
Step 3: You can delete users by tapping on the ‘Delete user’ button.