IOS
IOS Android
 Desktop
Initial prerequisites
To get started using a MouthCAM wired device you may need some basic set up.
-
1. Mac or Windows computer. It could be a laptop or desktop with a USB connector.
-
2. Latest updated operating system.
-
3. Please check if your computer has a browser
- Mac
 - Safari
  or Chrome
  or Firefox
- Windows
 - Chrome or Firefox or Edge browser
Installing MouthCAM software
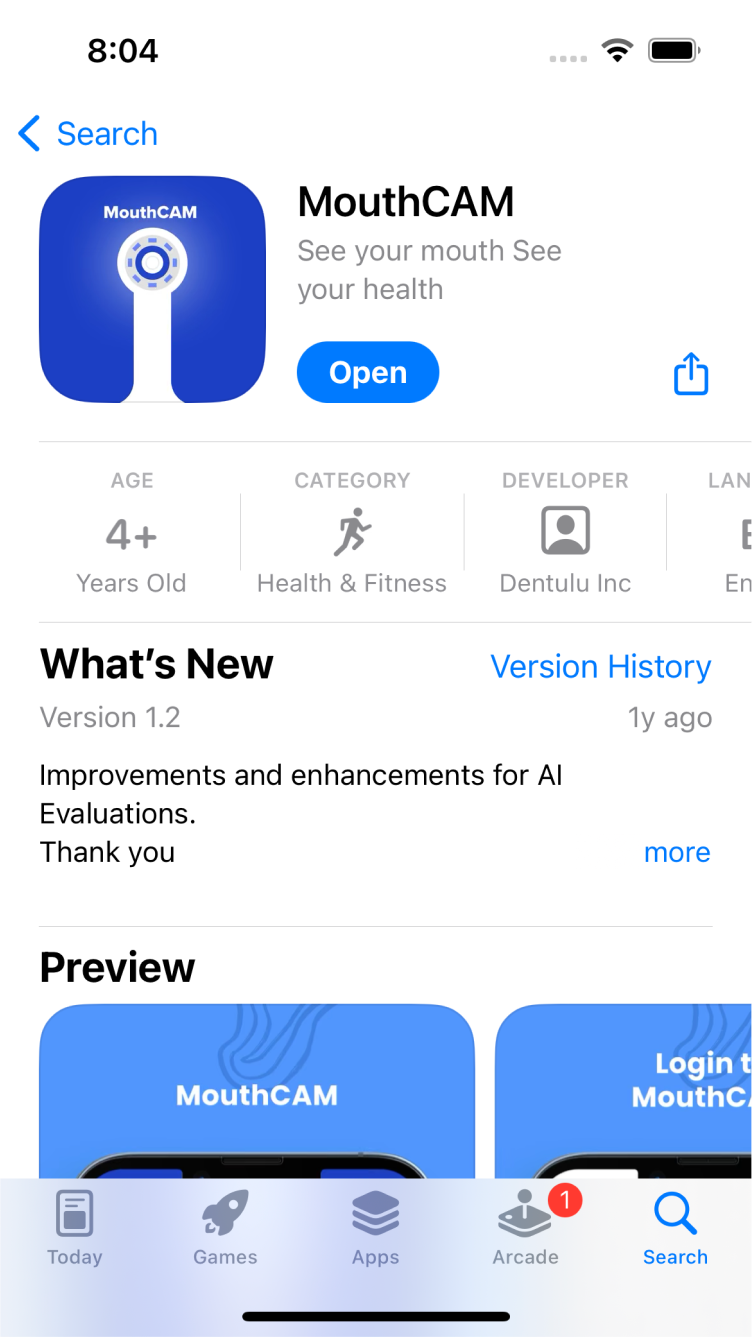
Download the MouthCAM software from here
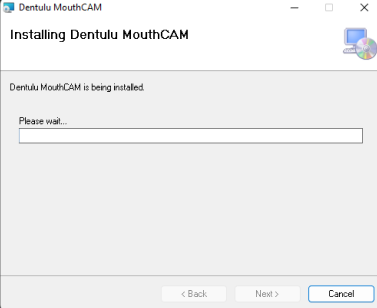
After downloading the MouthCAM installer.msi file, right click, open and run as administrator on a Windows computer.
Please proceed by selecting the following button
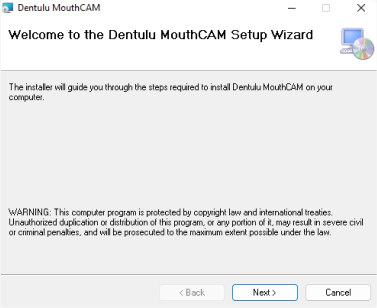
Please proceed by selecting the following button
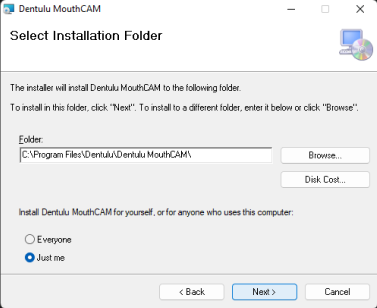
Please proceed by selecting the following button
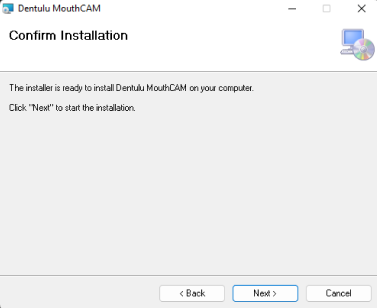
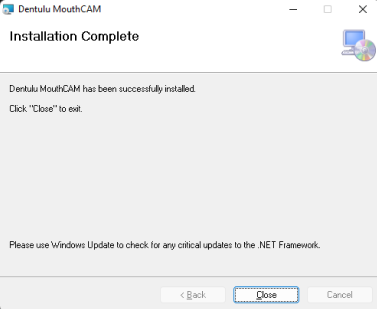
After the installation finishes, please click on the 'Close' button to complete the process and move forward
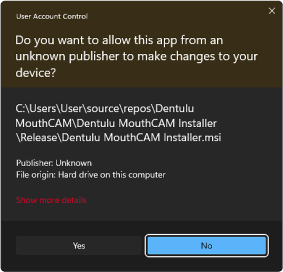
If a warning screen appears on your Windows screen for uknown publisher as described below, please disregard it and click "Yes" to proceed.
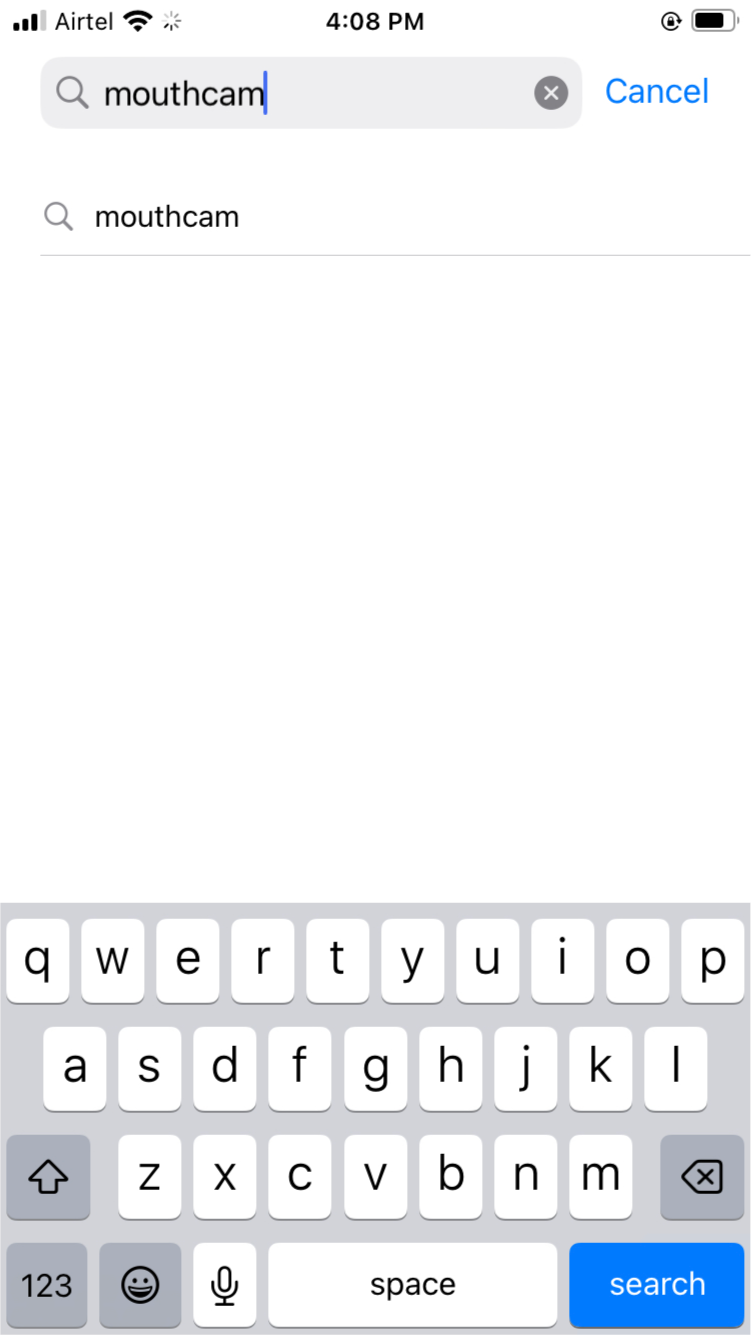
Now go to search and find “MouthCAM” and open the software
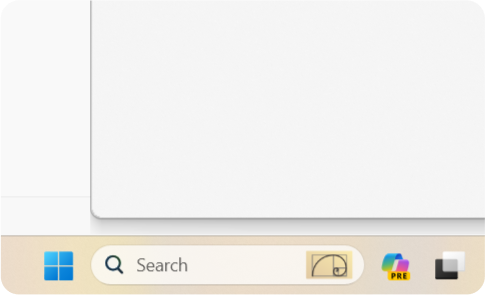
Launch the MouthCAM software by selecting the MouthCAM icon. Once clicked, the application will operate discreetly in the backdrop of your other computer programs.

The MouthCAM software is now active and running.
You are now ready to begin using the Dentulu web application along with the MouthCAM device.
Getting prepared
To get started follow the initial instructions
-
1. Ensure that your desktop computer or laptop is switched on.
-
2. Open any of the browsers - we recommend using Google Safari, Chrome, Firefox Mozilla or Edge browsers for optimum performance. The camera will work in other browsers as well but may need additional layers of setup which we do not recommend.
-
3. Ensure that you have given permissions to app.dentulu.com to access camera.
- How to give access to your camera
- Chrome Click Here
- Firefox Click Here
- Edge Click Here
Dentulu Portal:
Go to https://app.dentulu.com
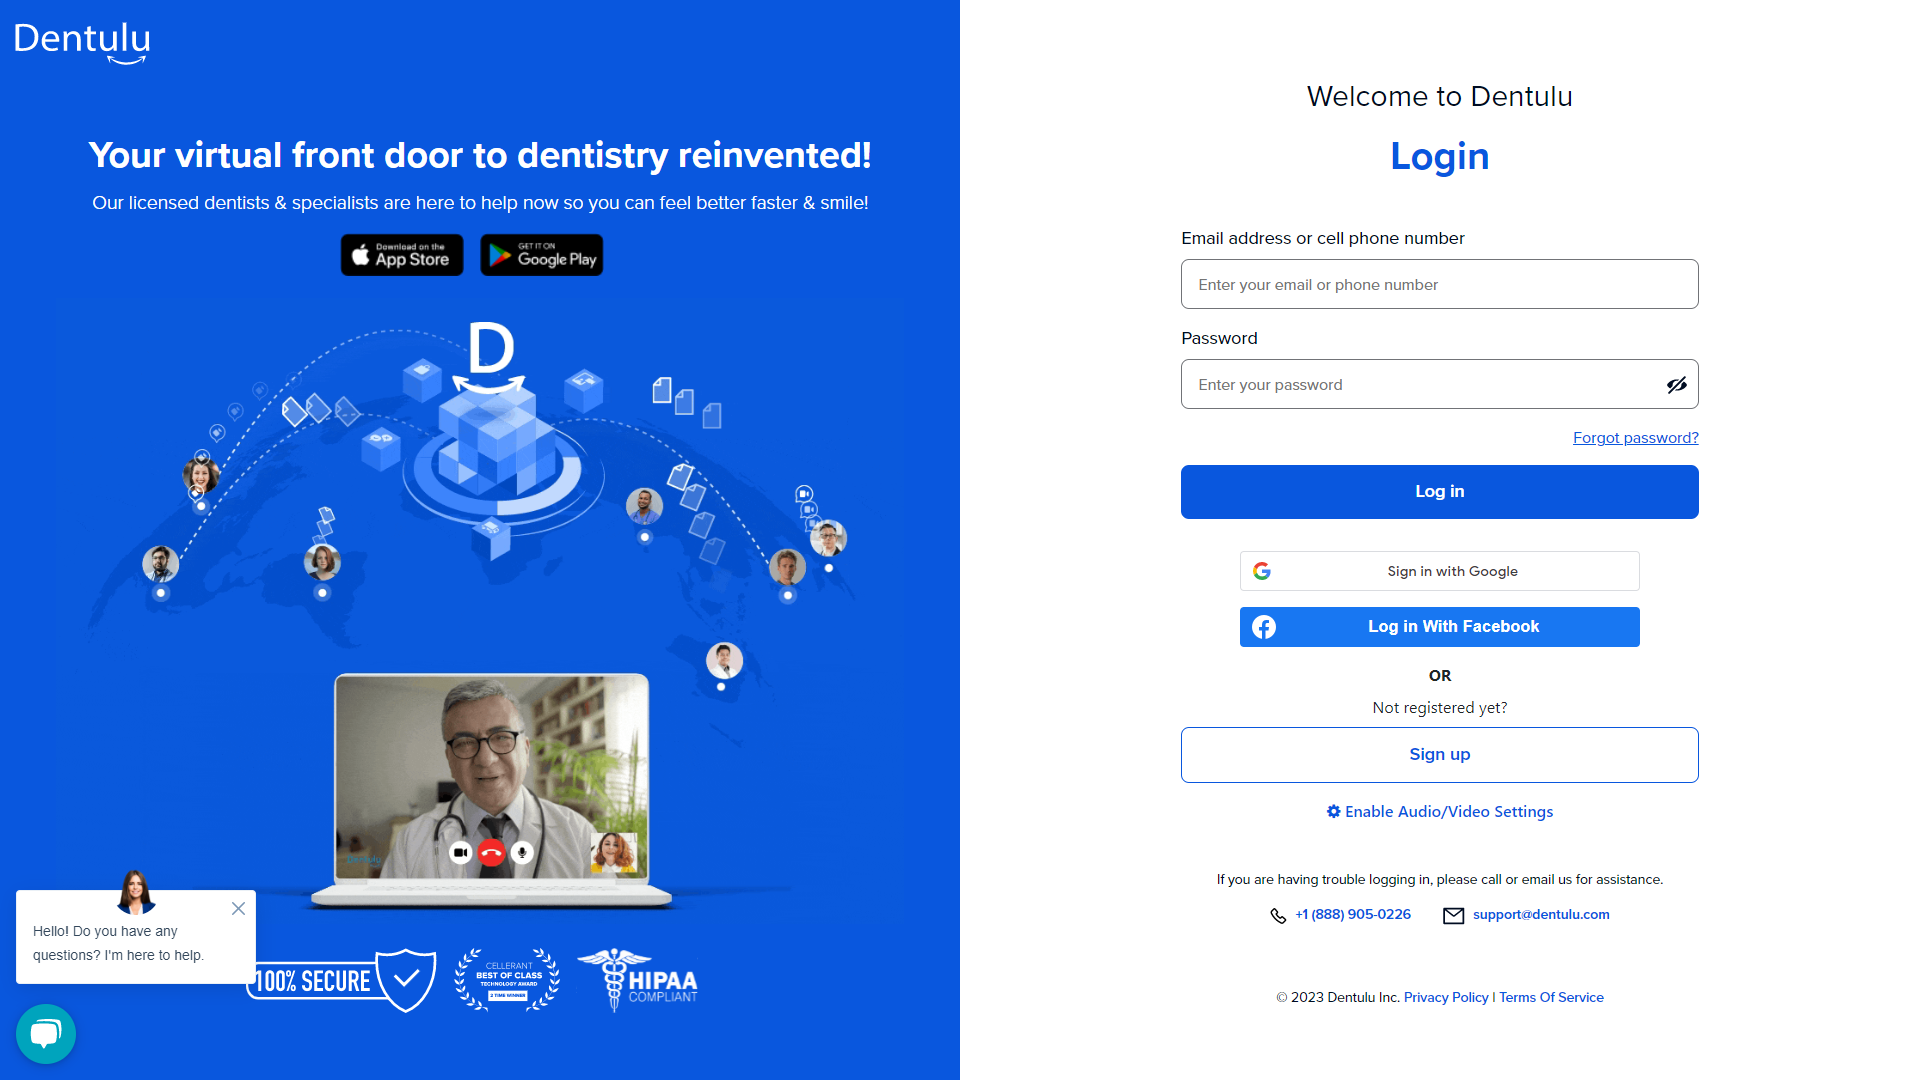
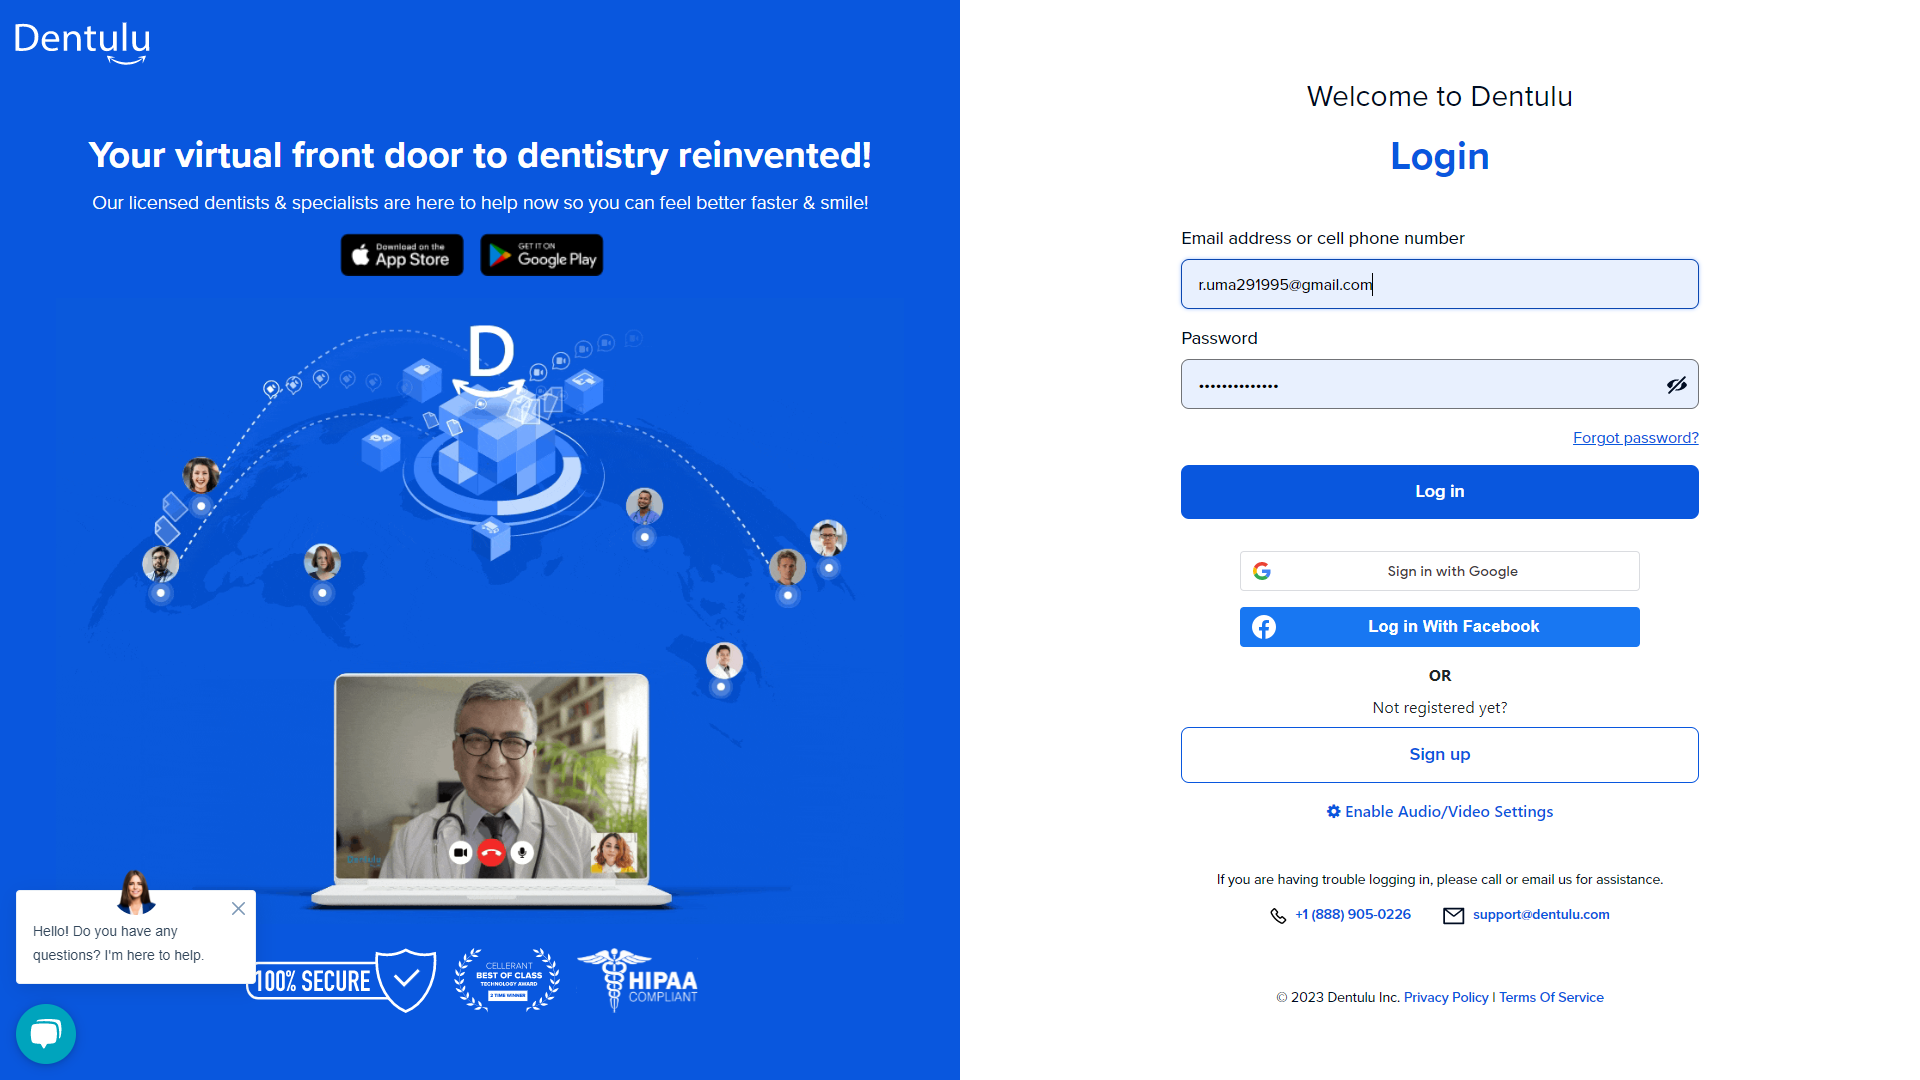
Logging on to Dentulu
Login with your login credentials
Username: ****************
Password: ****************
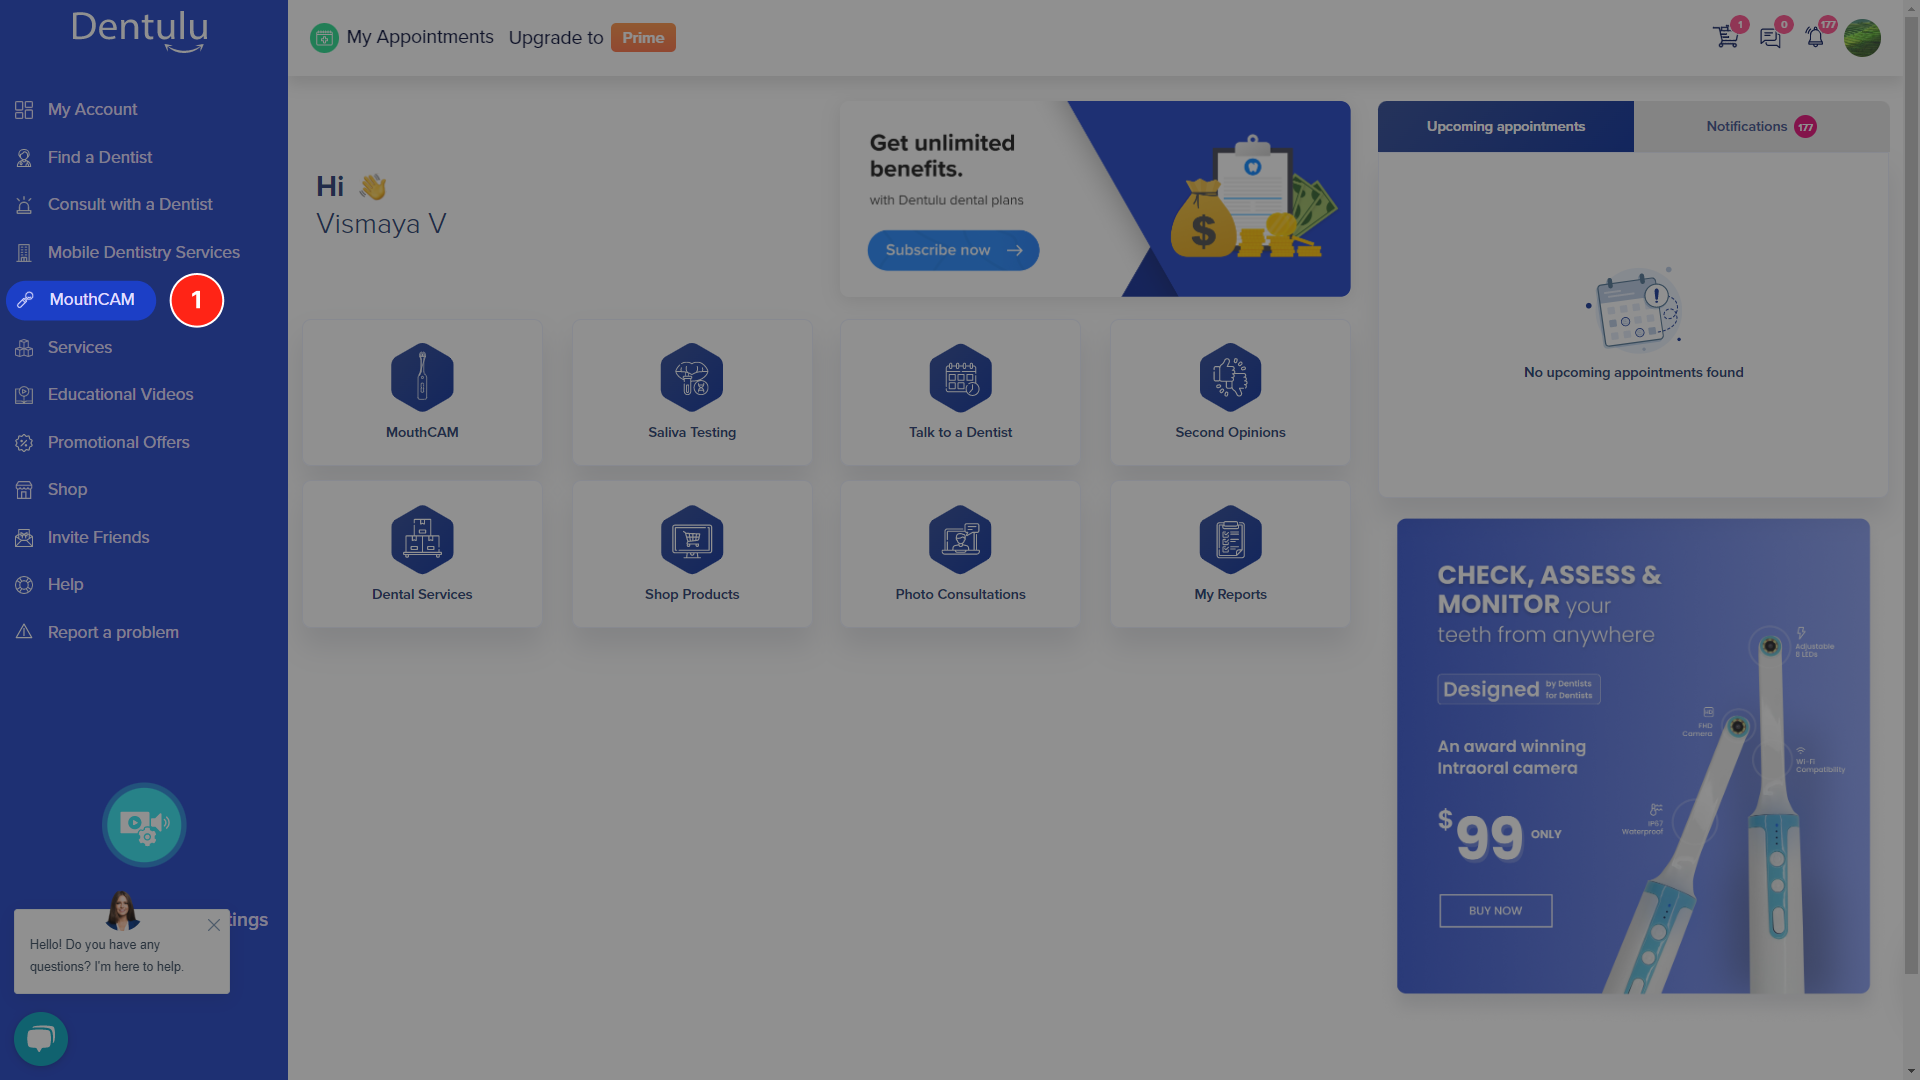
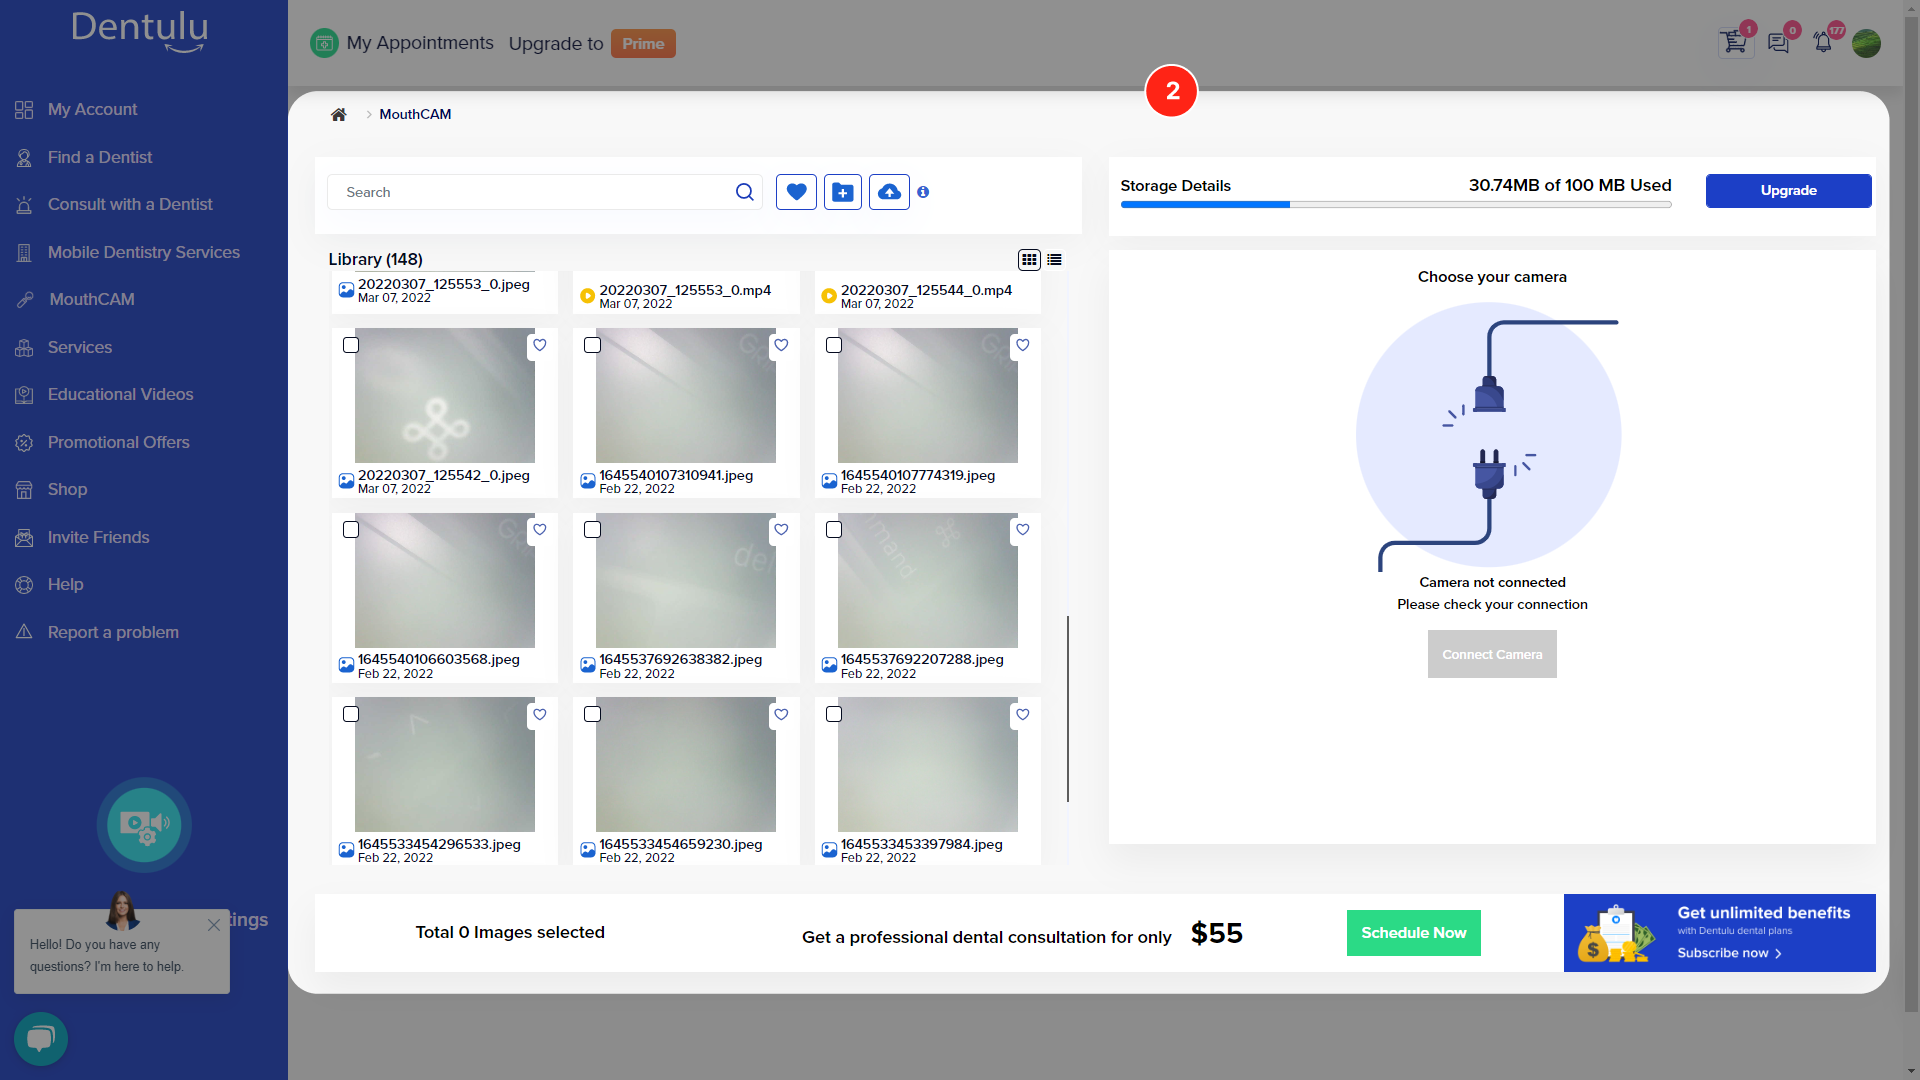
Accessing MouthCAM
-
A. To access MouthCAM, click on the left side menu
-
B. You will be directed to the MouthCAM dashboard where you can view previously taken images
-
C. The dashboard includes options to search and organize your images
-
D. You can also connect to the MouthCAM device from the dashboard
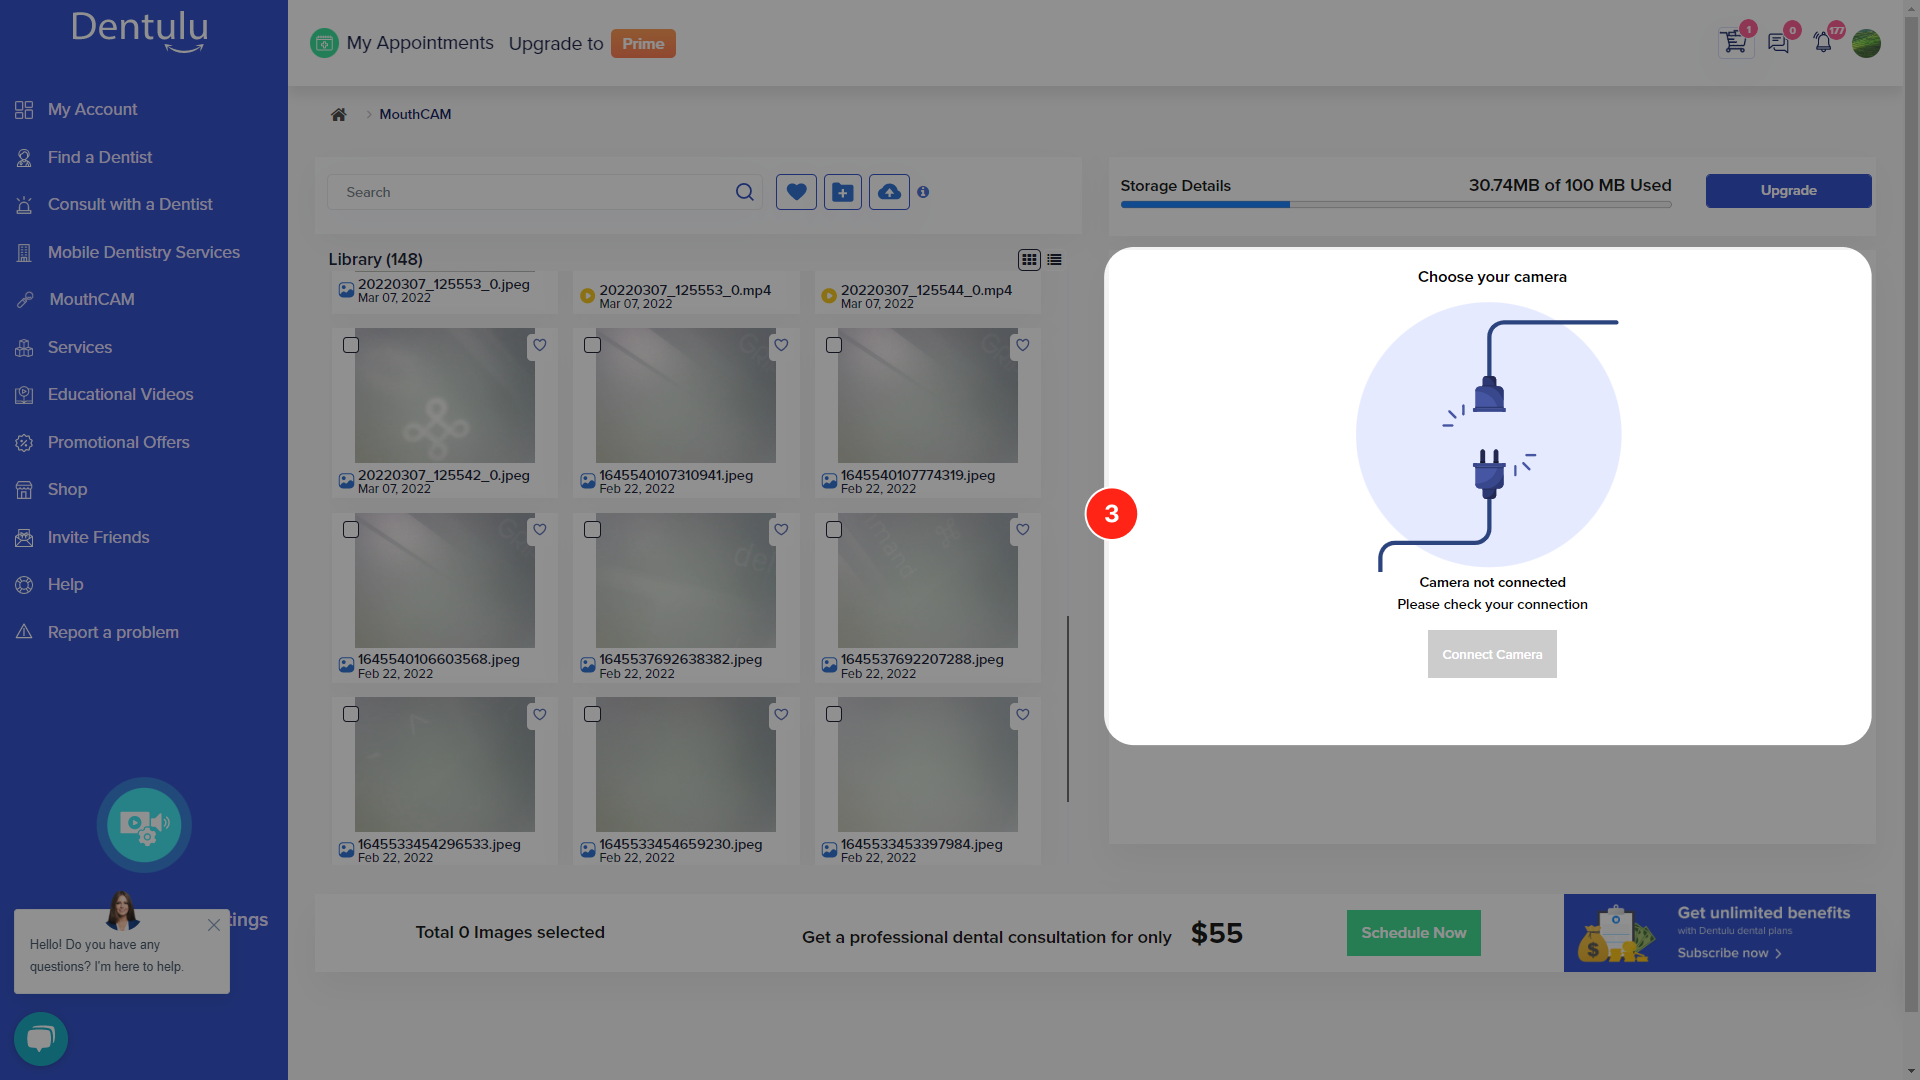
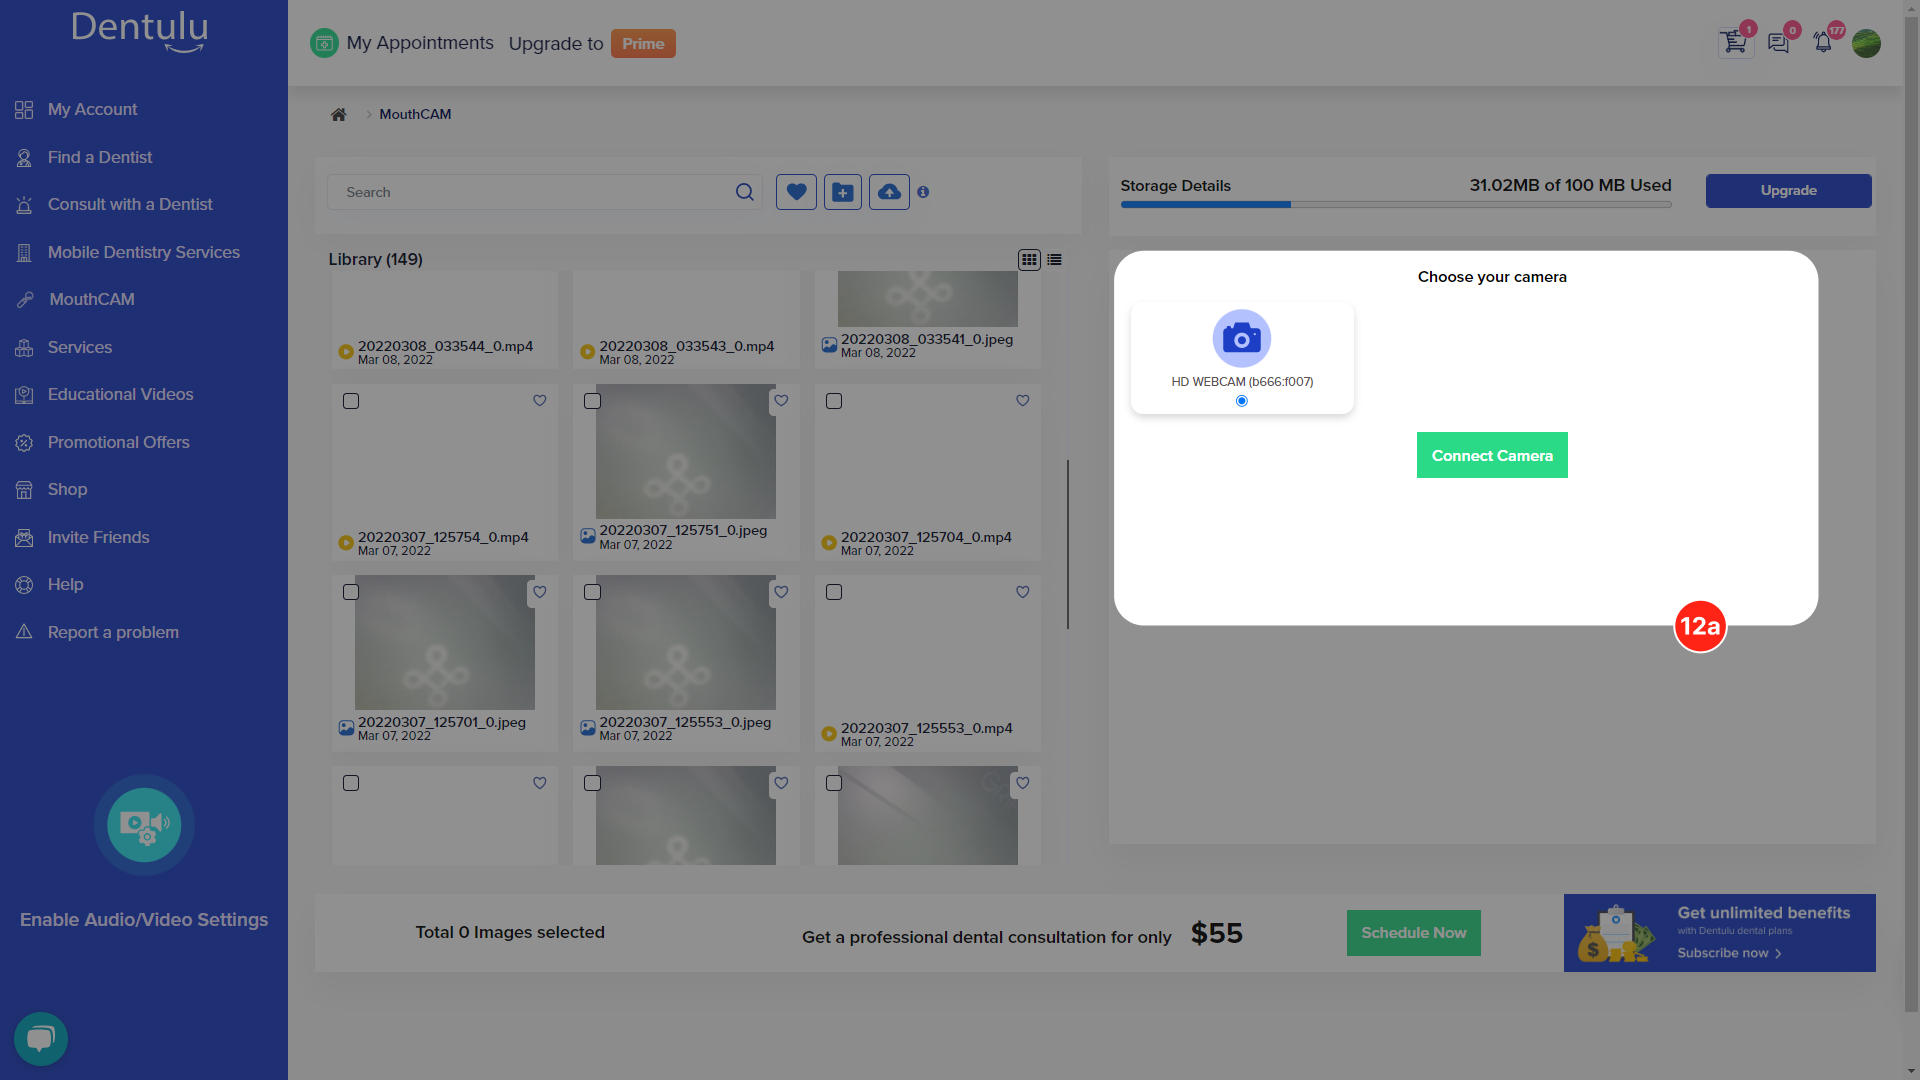
Connecting Your Camera
Plug your camera to one of the USB ports on your computer.
-
A. On screenshot 3 it shows that you are still not connected to the computer.
-
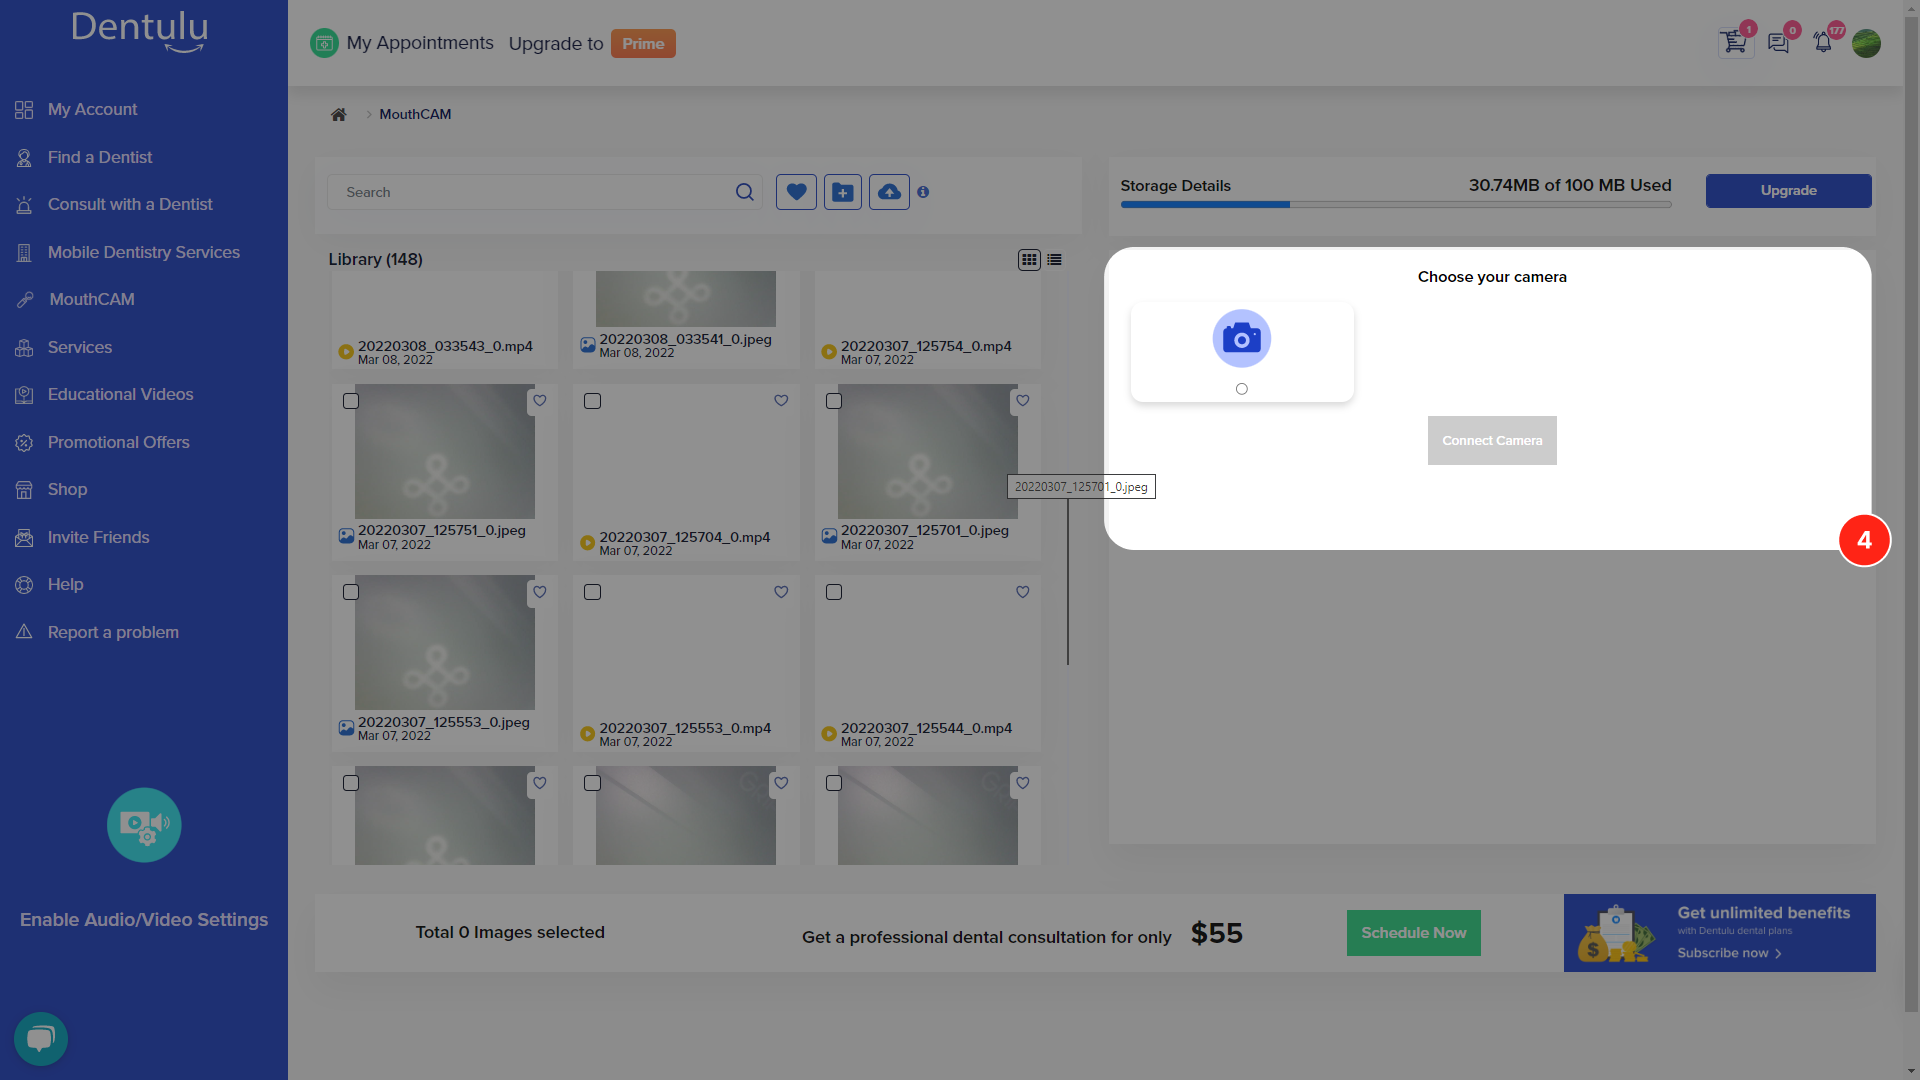
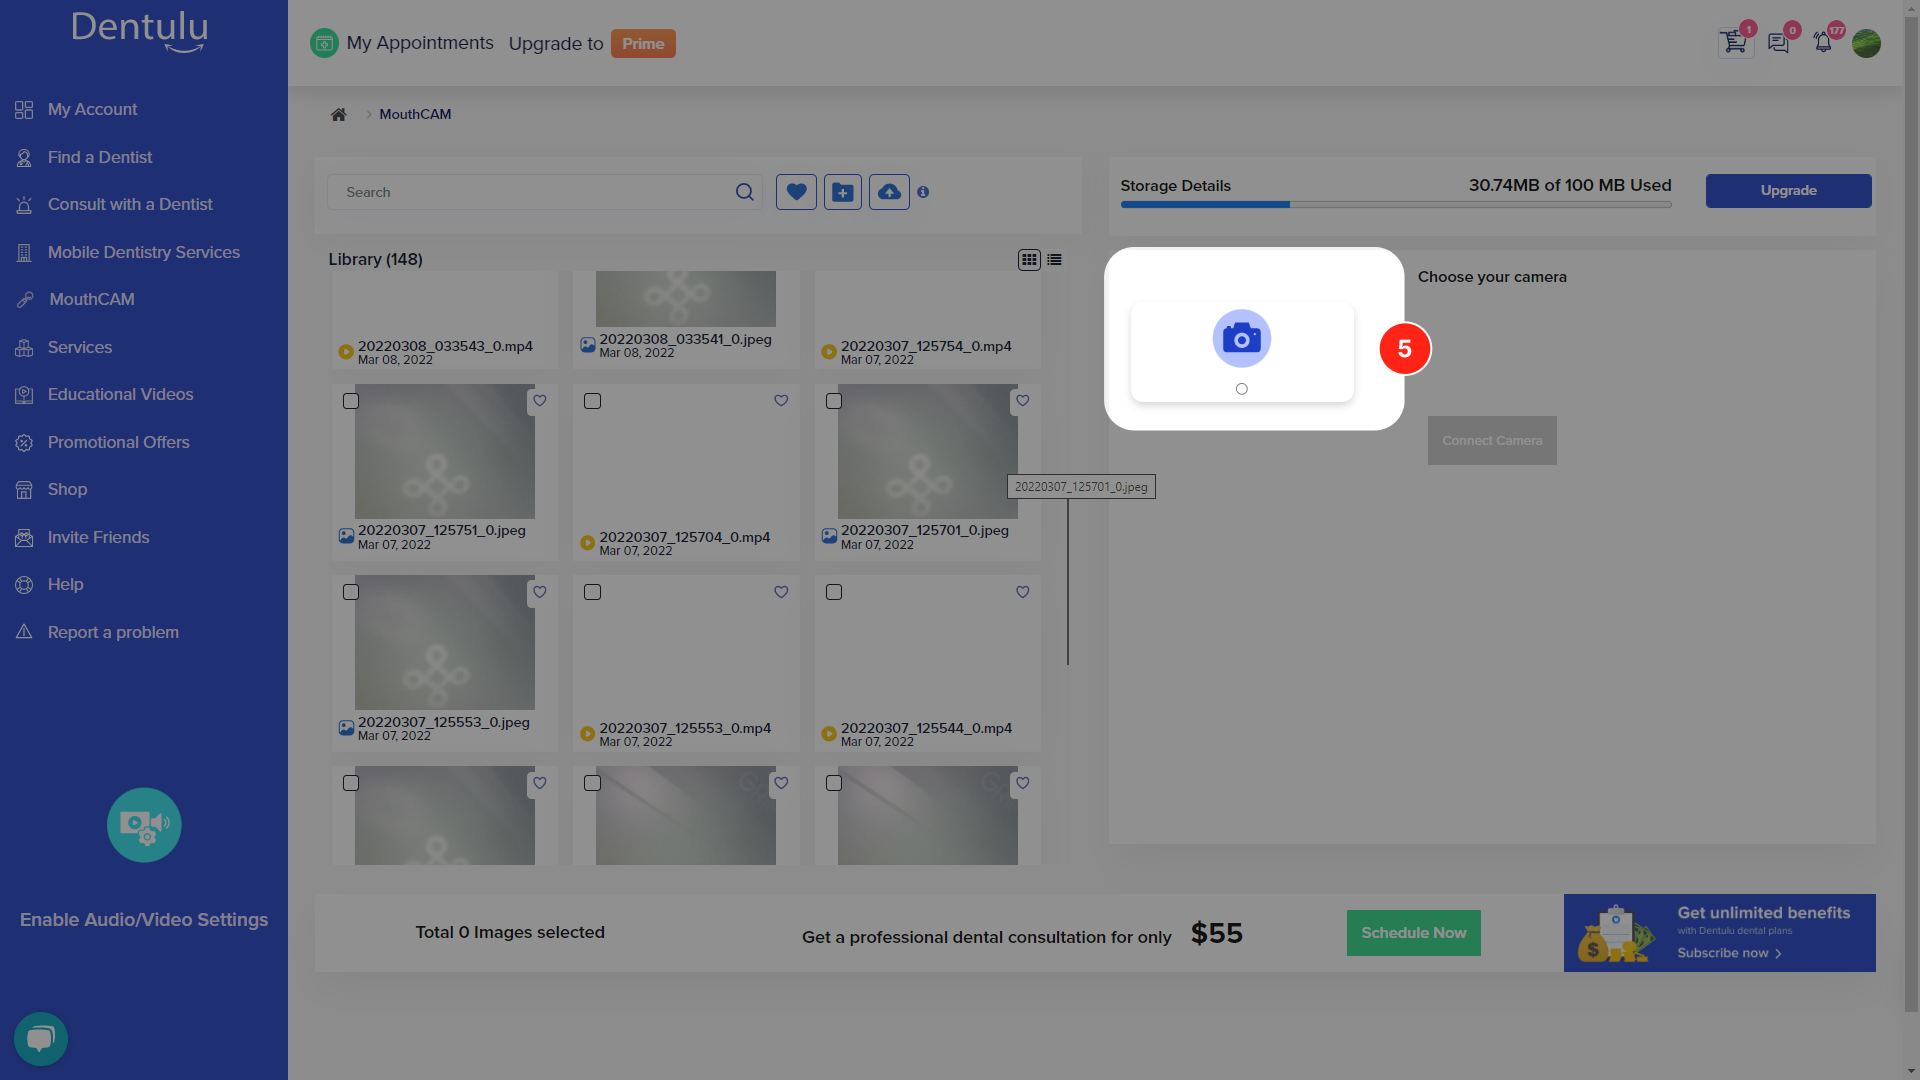
B. Once you are connected screenshot 4 shows you the cameras attached to your computer.
-
C. Click on the device that says WebCAM, differentiating it from any other camera you might already be connected to.
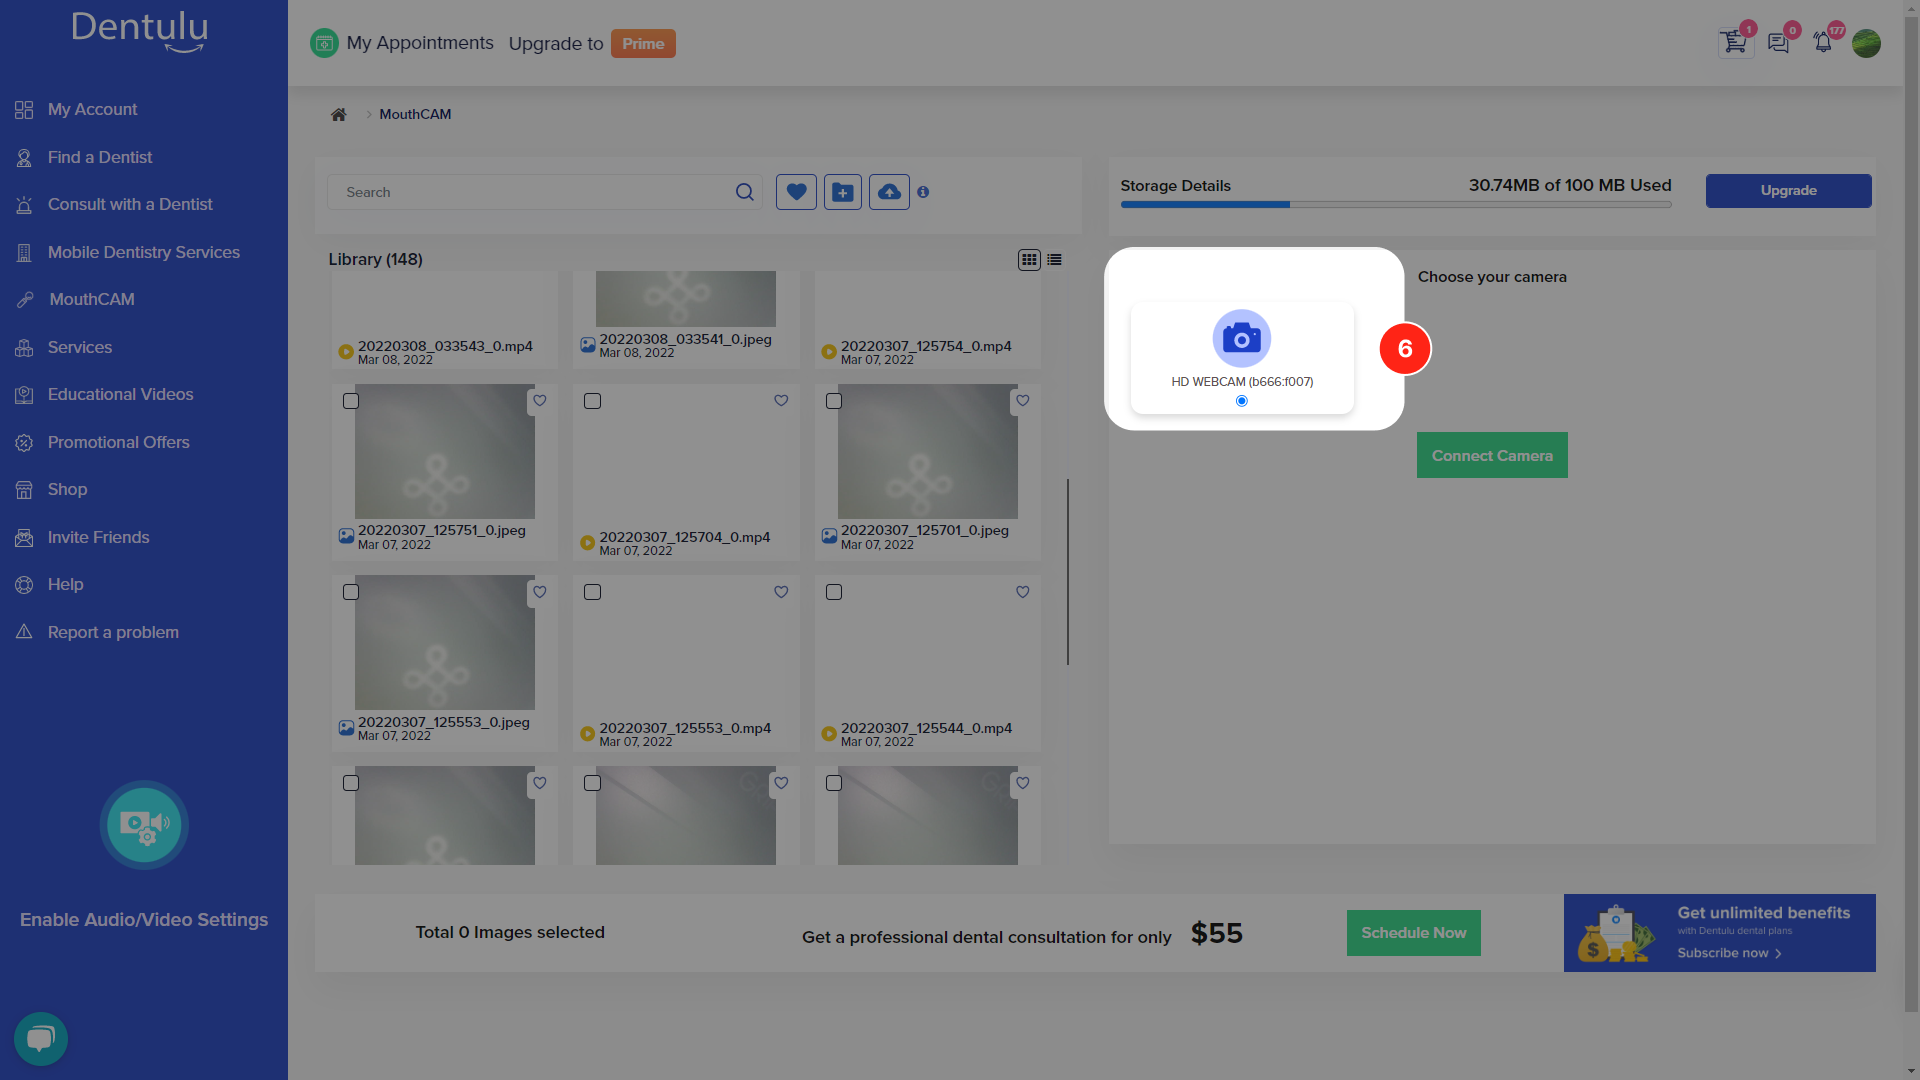
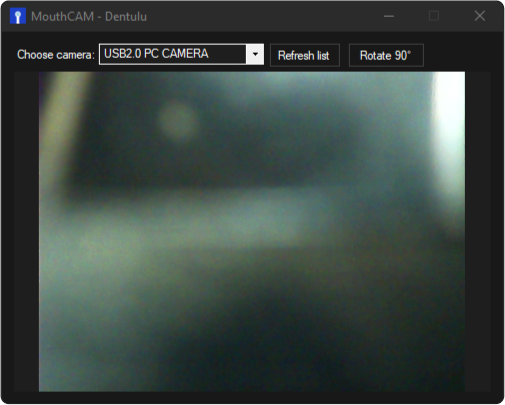
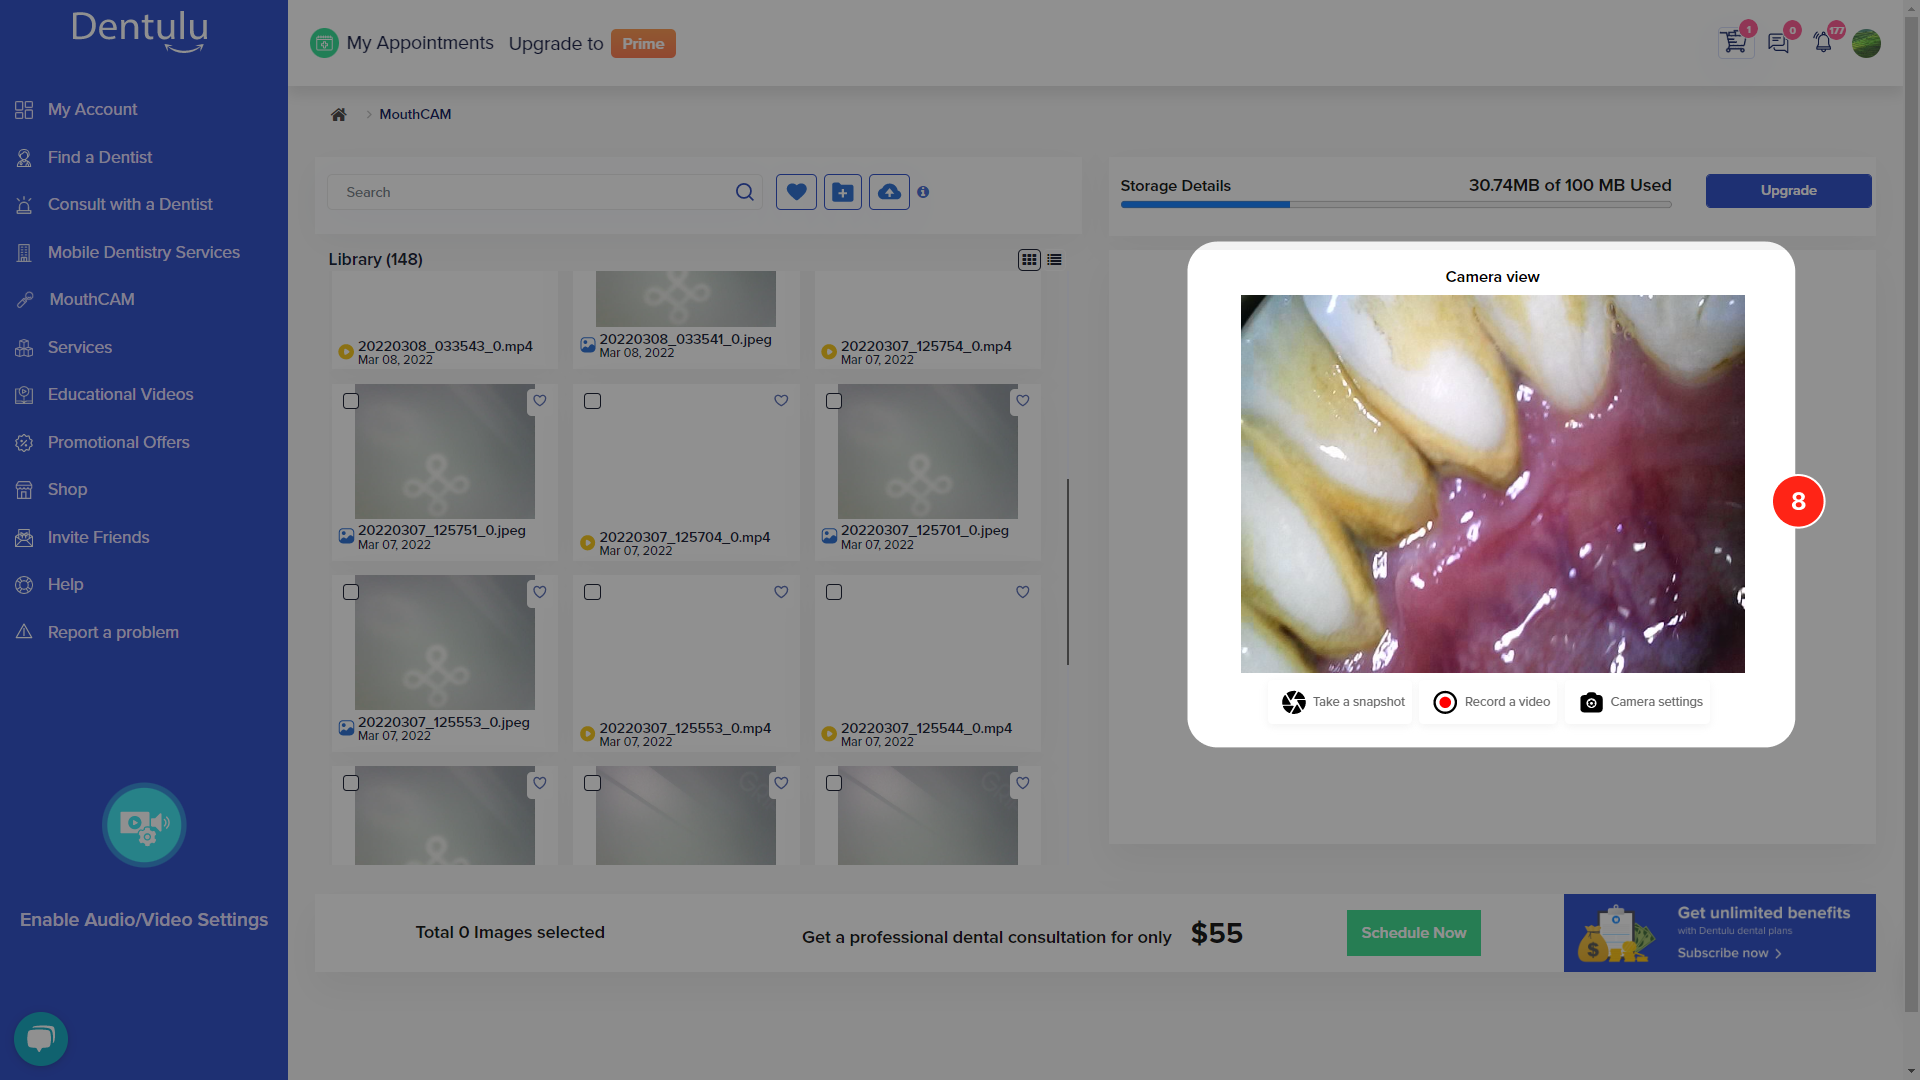
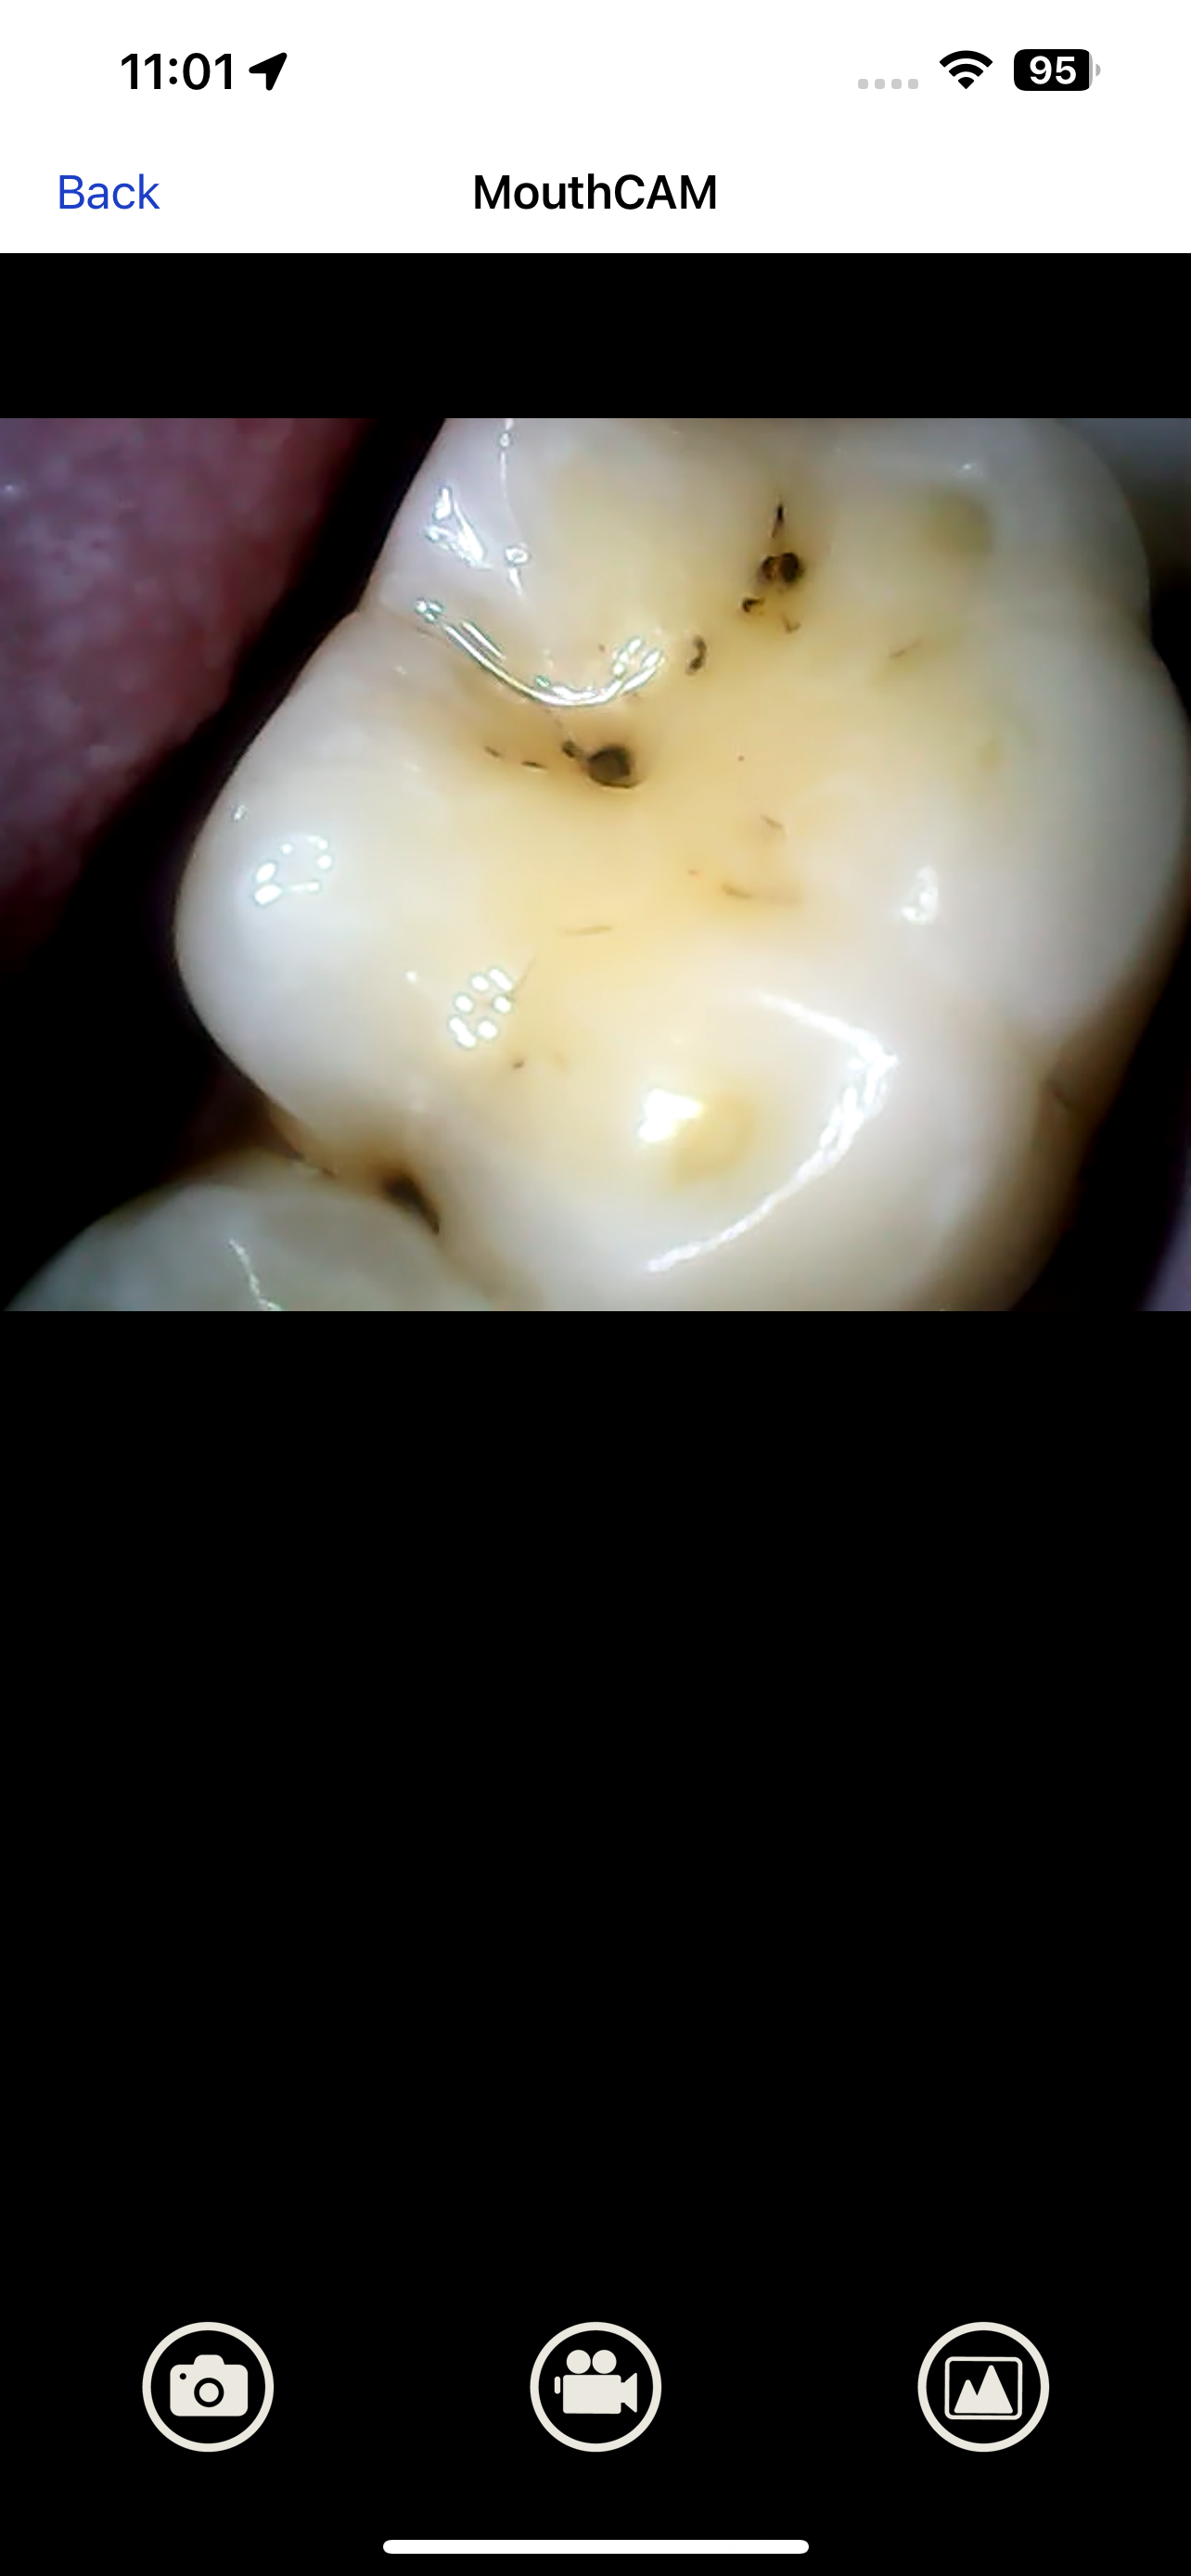
Preview Image
As soon as the camera is connected, you will be able to see a preview of the images on your screen.
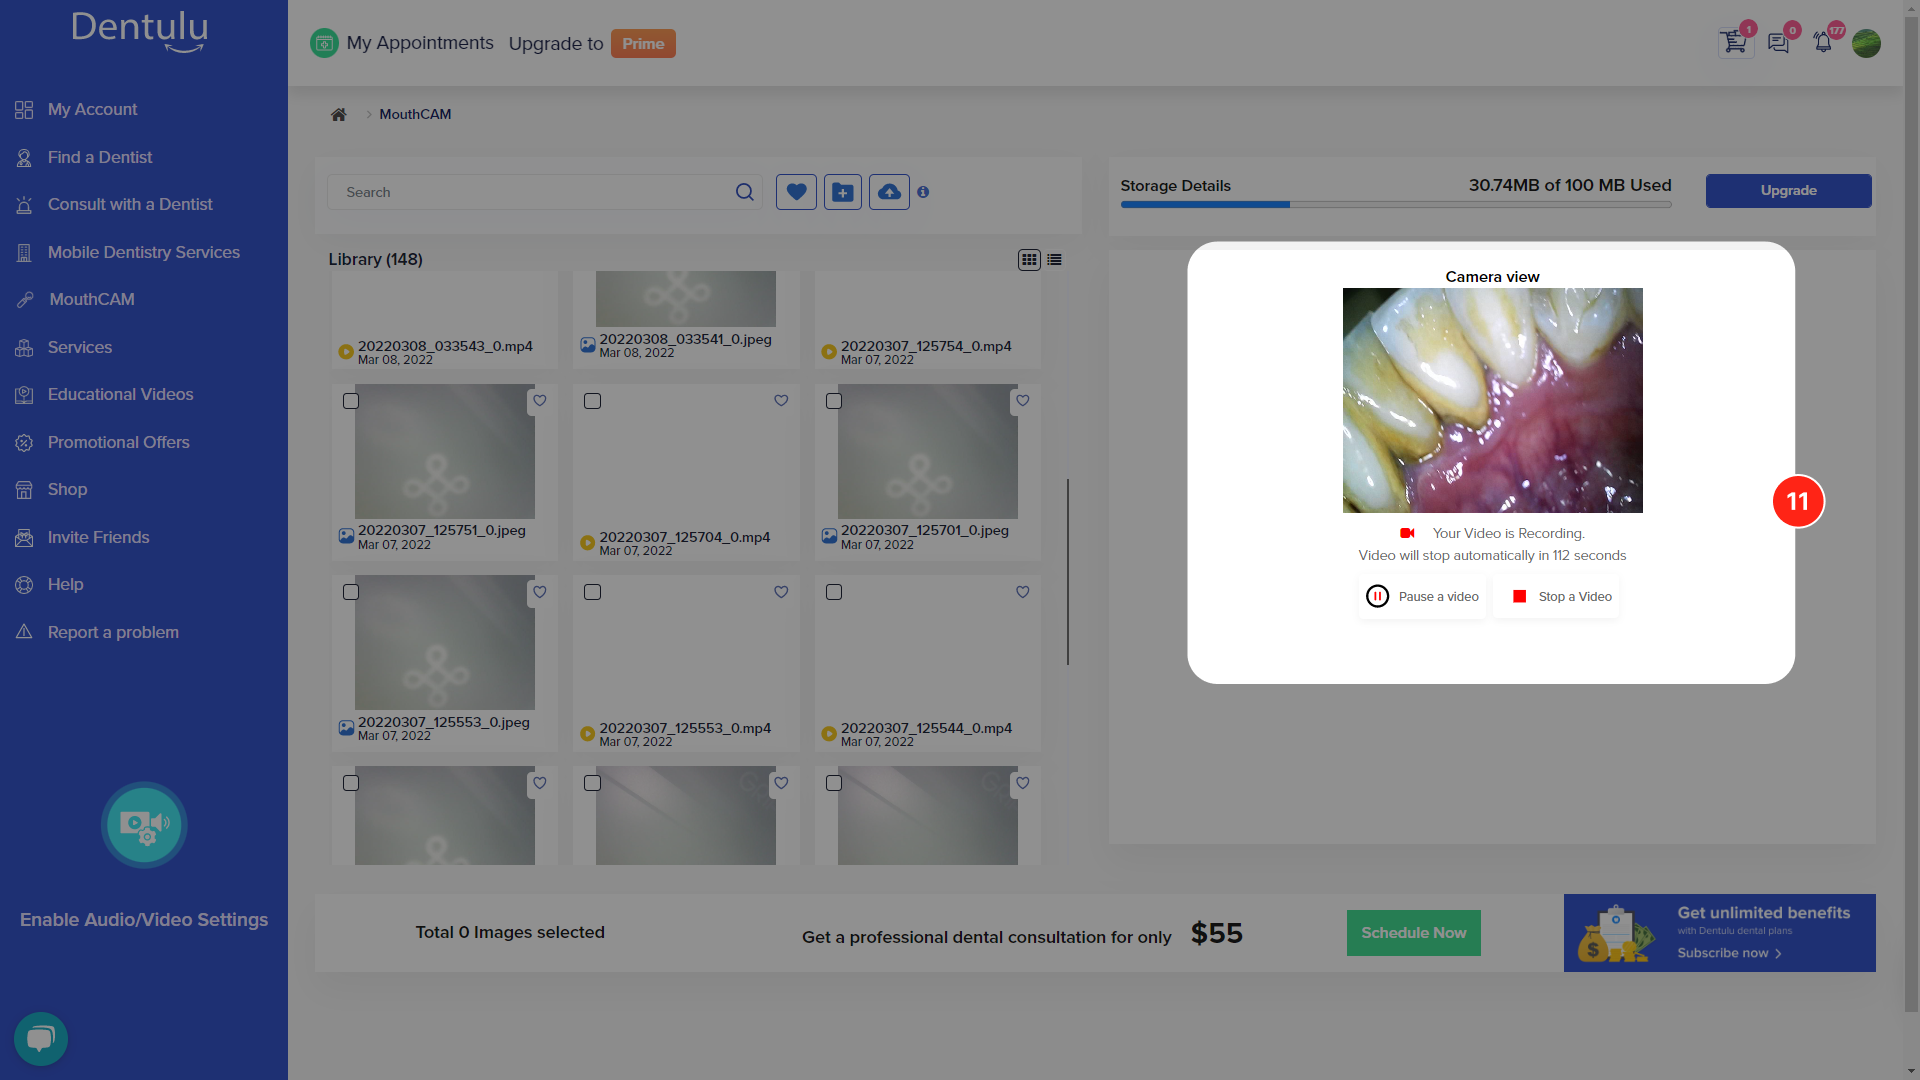
Capturing images
Please be advised that the capture button on your device cannot be used to take images due to browser restrictions. Instead, we have provided a capture button, as shown in Image 9, for your convenience. You may use this button to capture any number of images required
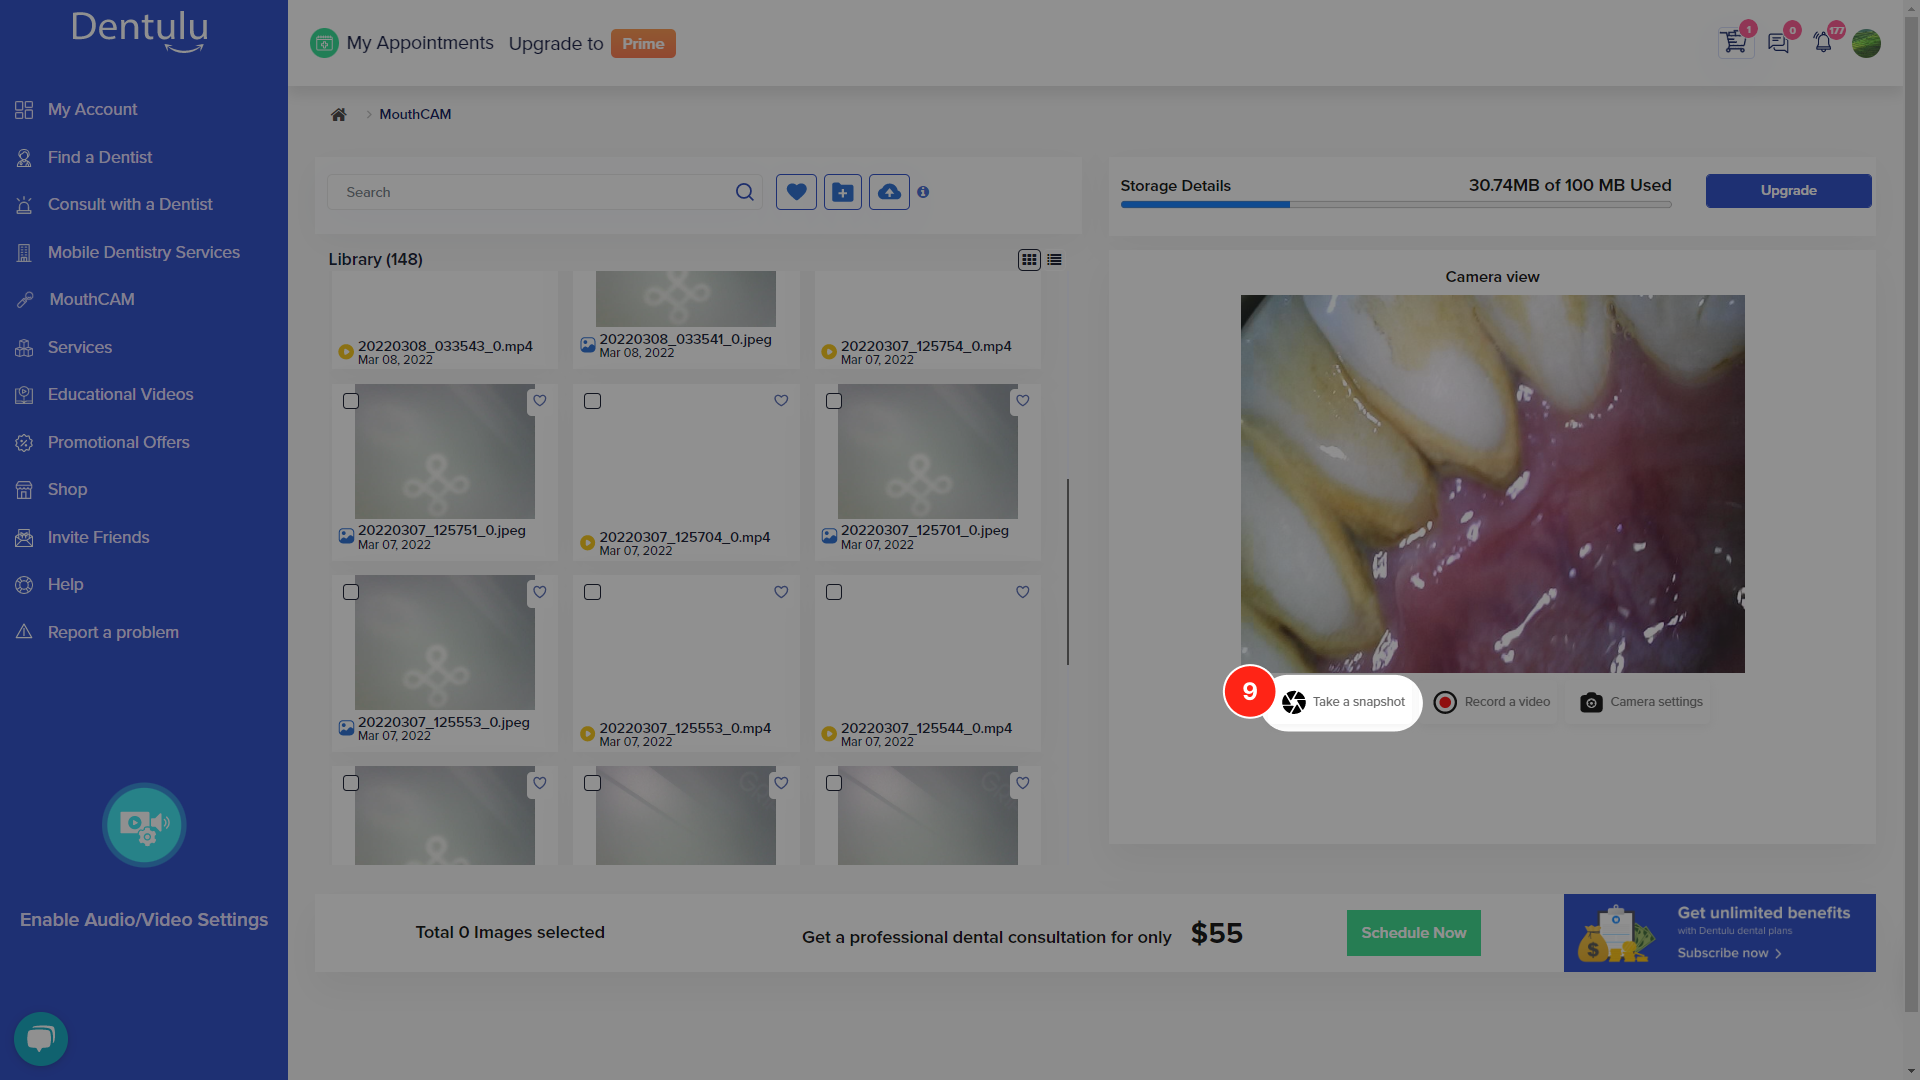
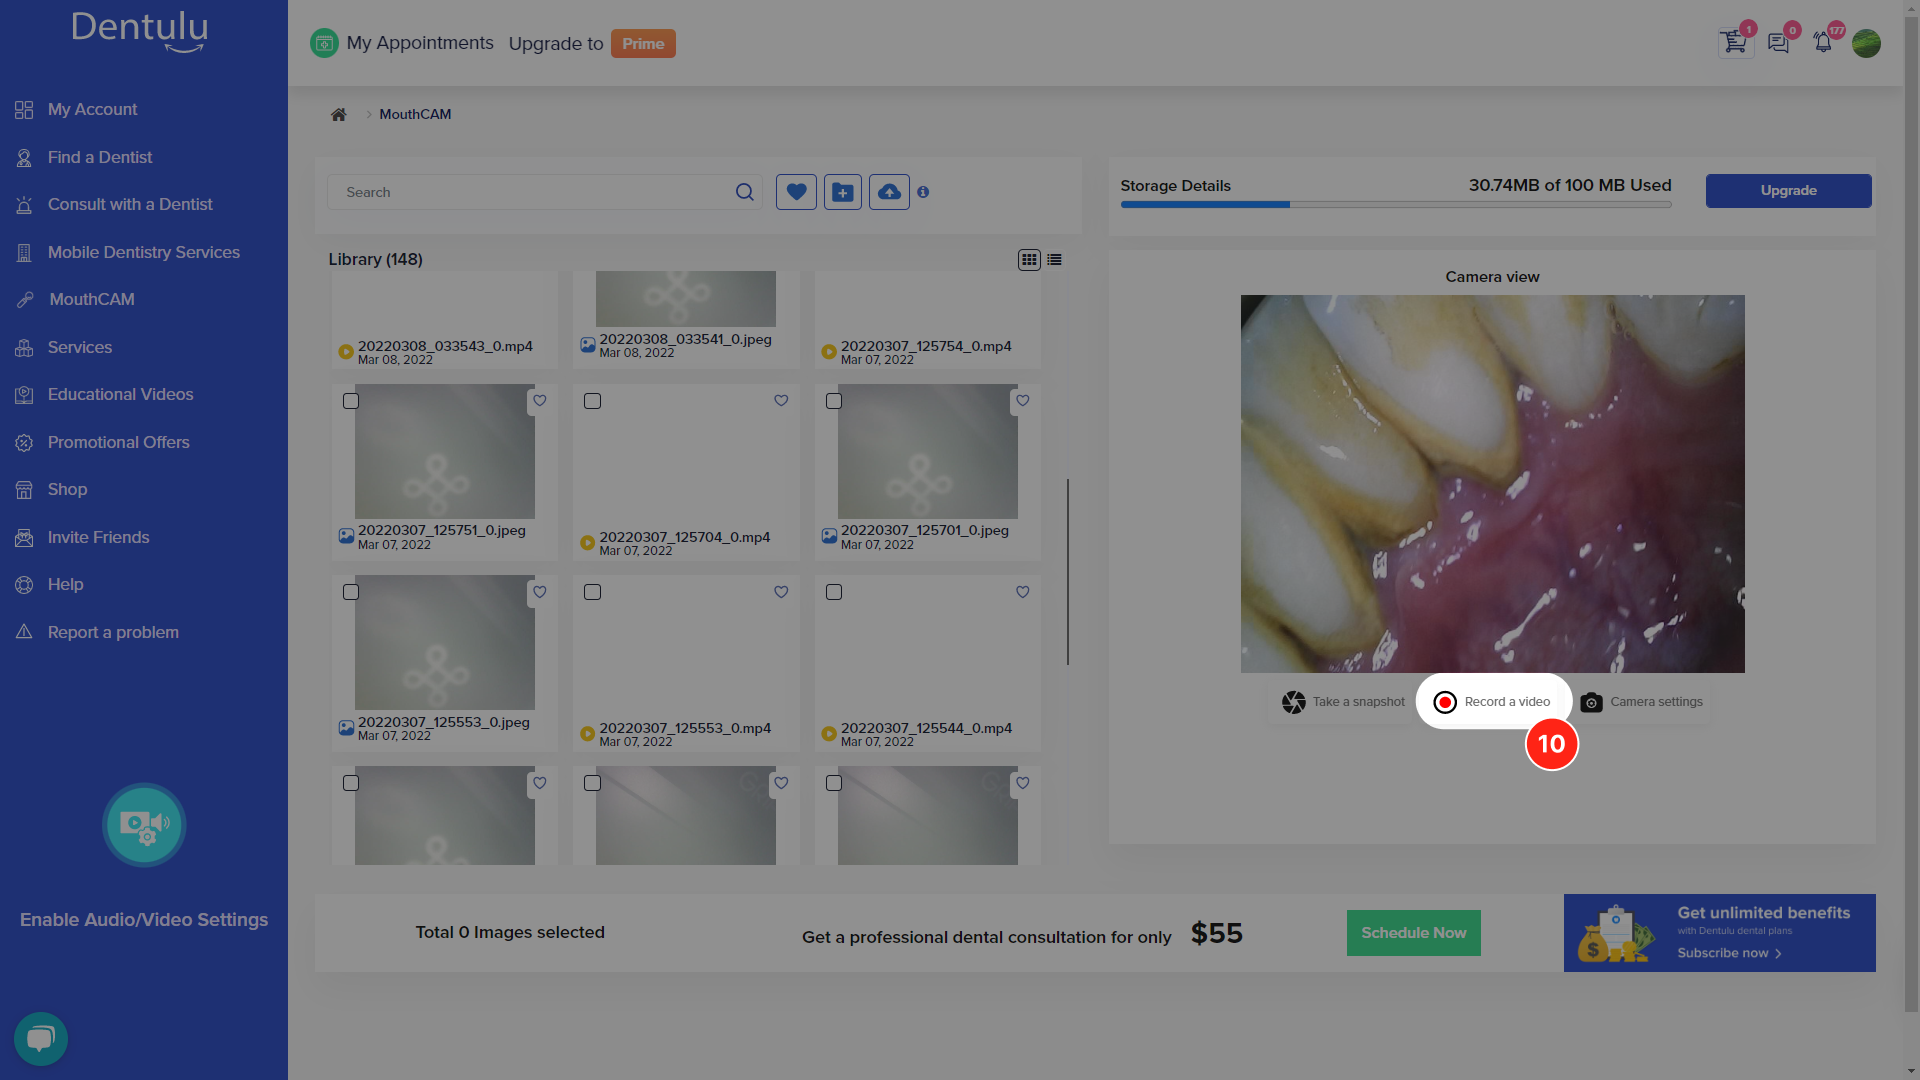
Image 10 shows you how to record a video. Once you click, you can record videos up to 2 min in length. You can record multiple videos and save them all in one go or discard them as you wish.
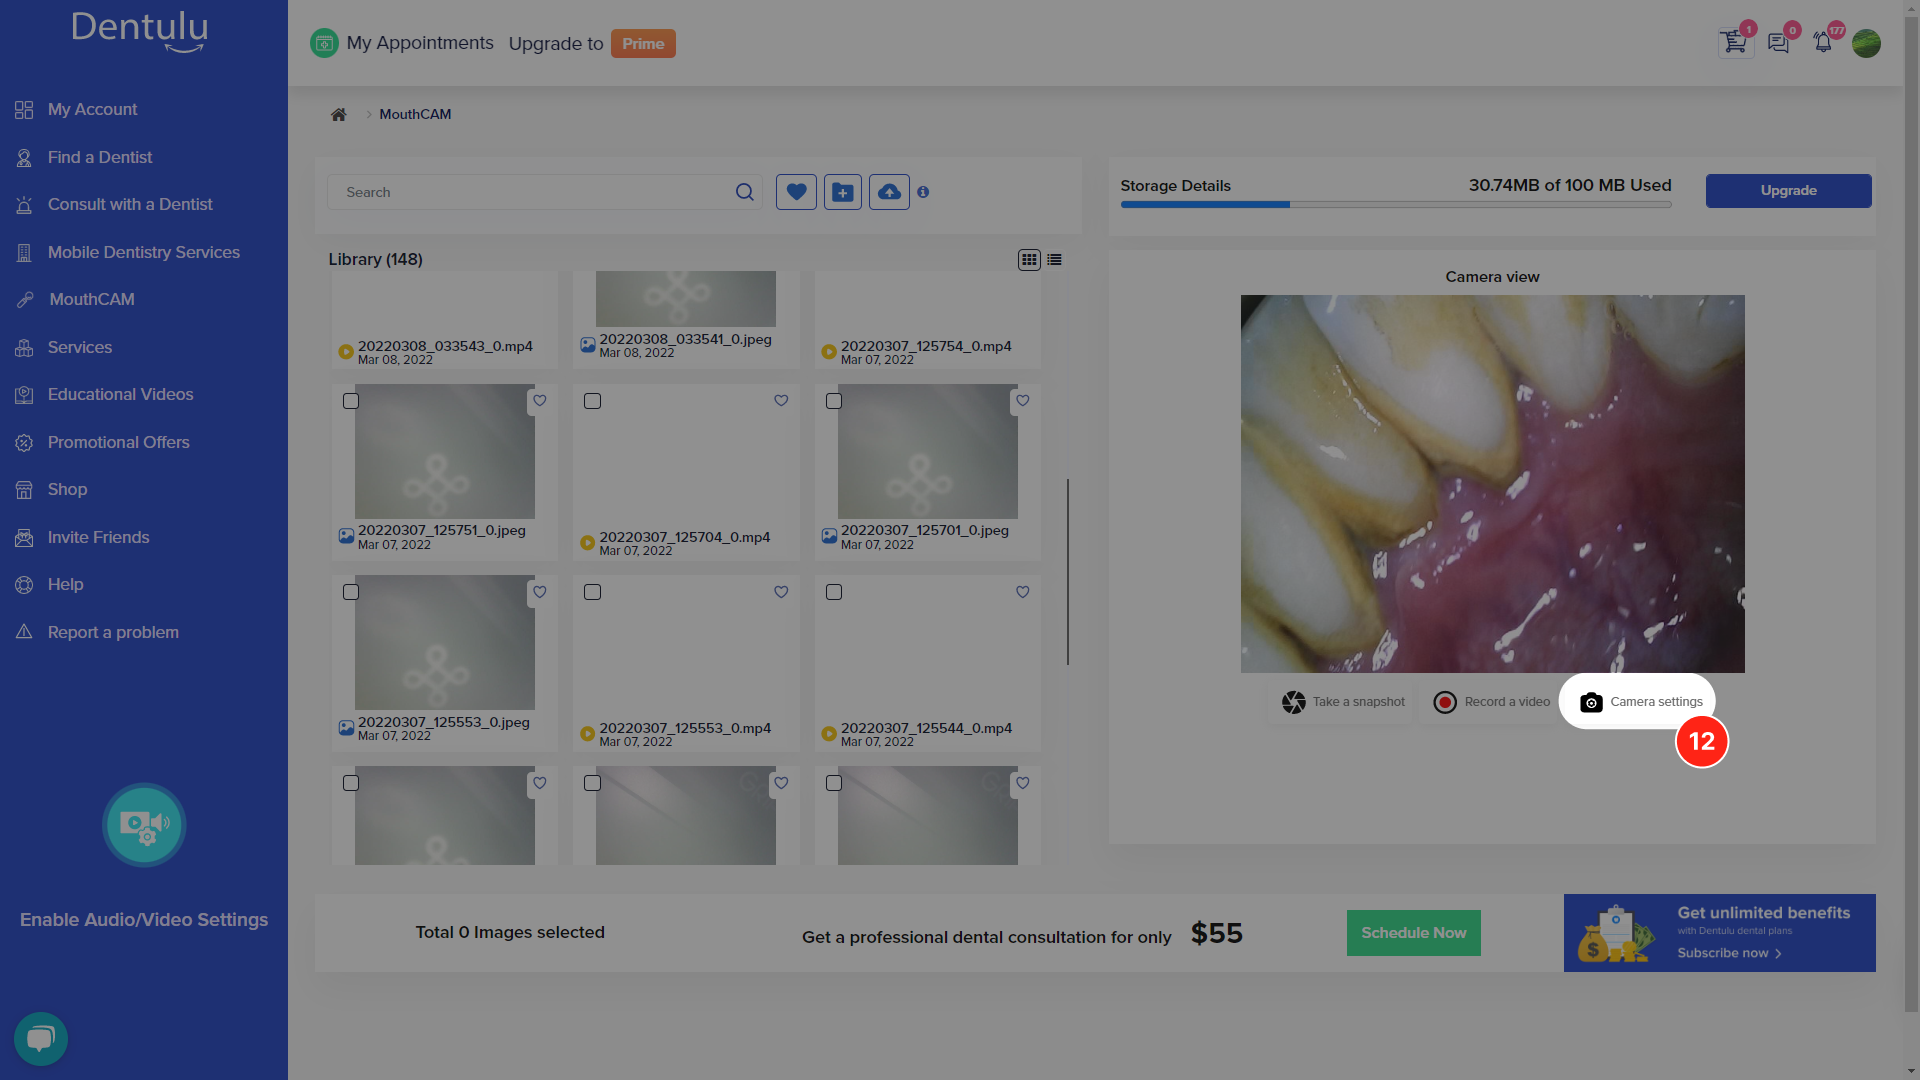
Camera Settings
Did you know that you can also use other USB cameras with Dentulu MouthCAM dashboard, as it can connect to any USB camera?
Camera settings allow you the convenience to change the camera attached to your computer!
Viewing captured images
On the left-hand side of the MouthCAM dashboard, you will find all the images you have taken using the MouthCAM device.
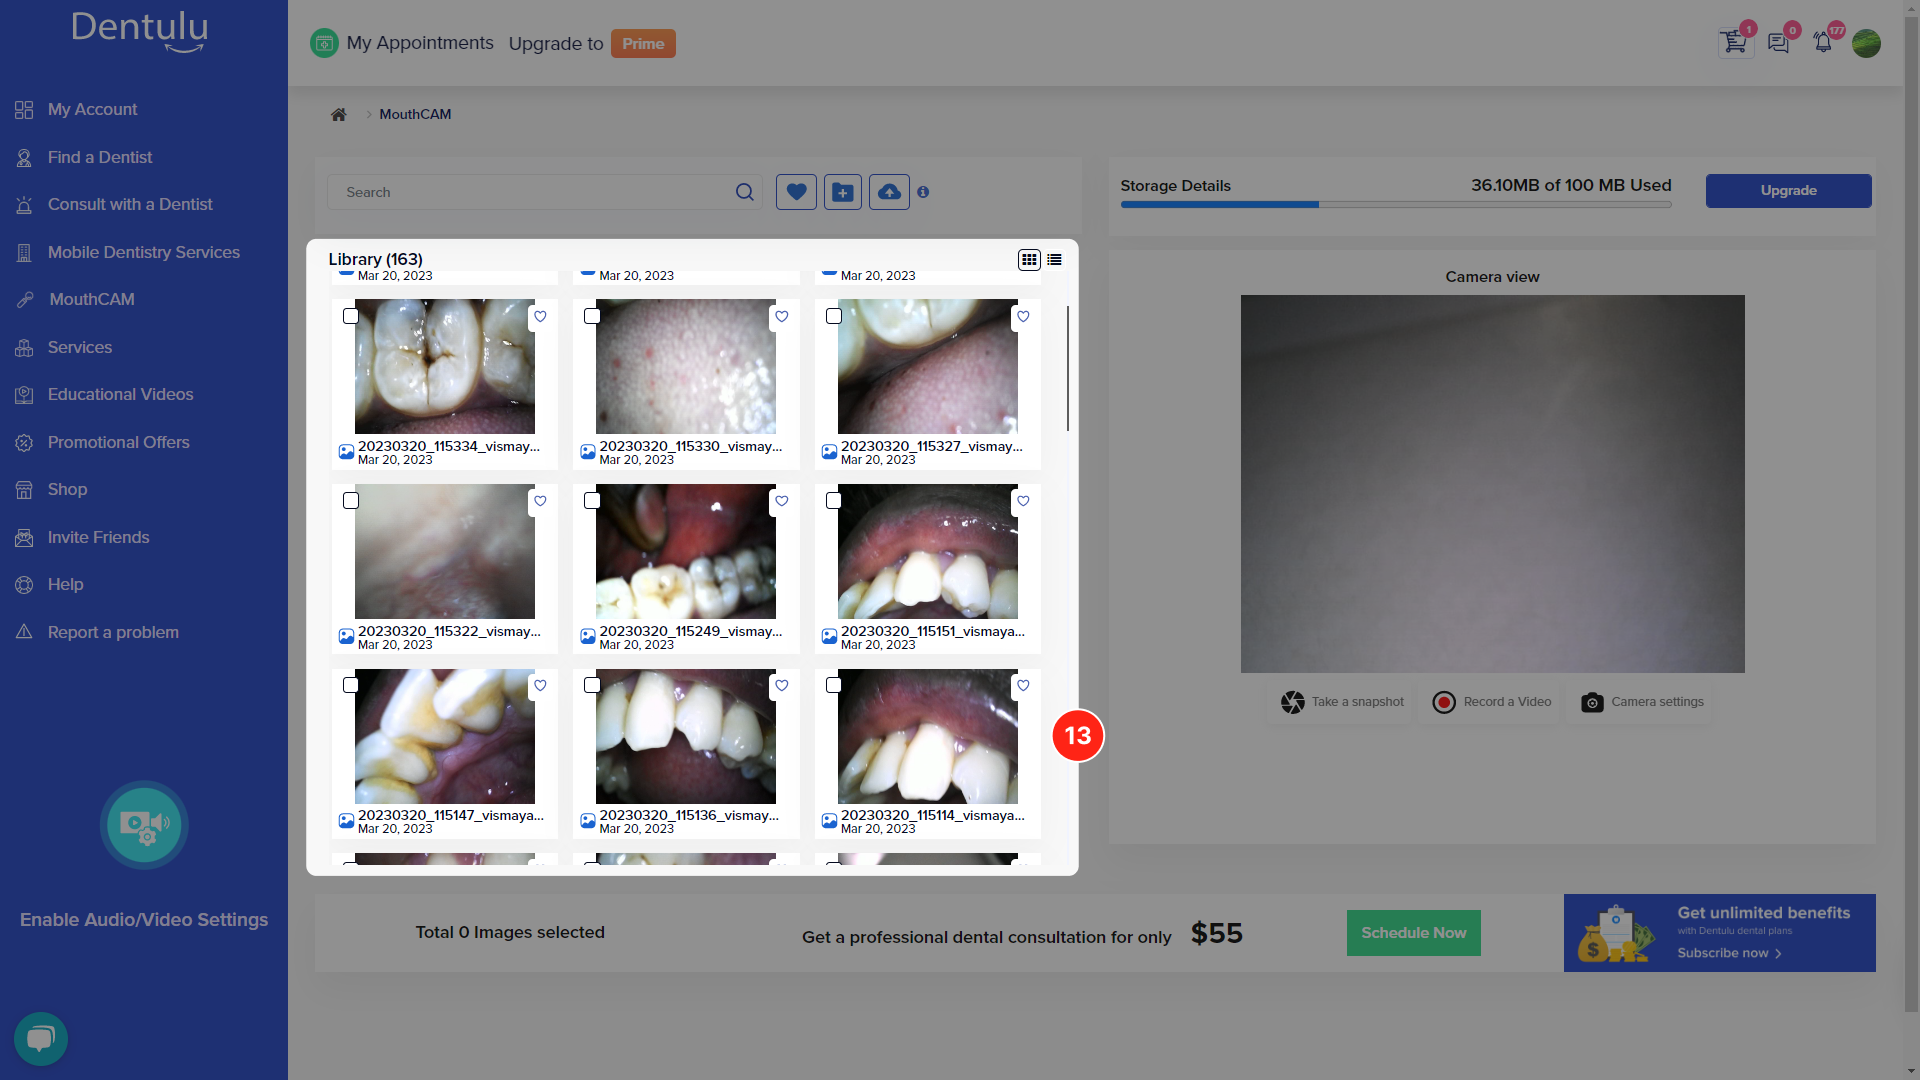
Each image can be clicked open to view its original size.

Image Management Options
You have the option to perform various actions on multiple selected images, including copying, deleting, moving, sharing, adding to favorites, and downloading.
We have provided multiple actions at the bottom of each image you capture:
 Add to Favorites: Keep all of your favorite or most important images easy to locate by adding to your favorites.
 Share: Allows you to securely share your image through our HIPAA compliant platform with your dentist or anyone else you choose.
 Download: You can download a copy of the images for your reference.
 Delete: You can choose to delete select image or images.
 Edit: We have provided basic editing tools to ensure you can make markings on the images.
 Details: Provides you with details of the images when you open it, which you may tag and write notes for future references.

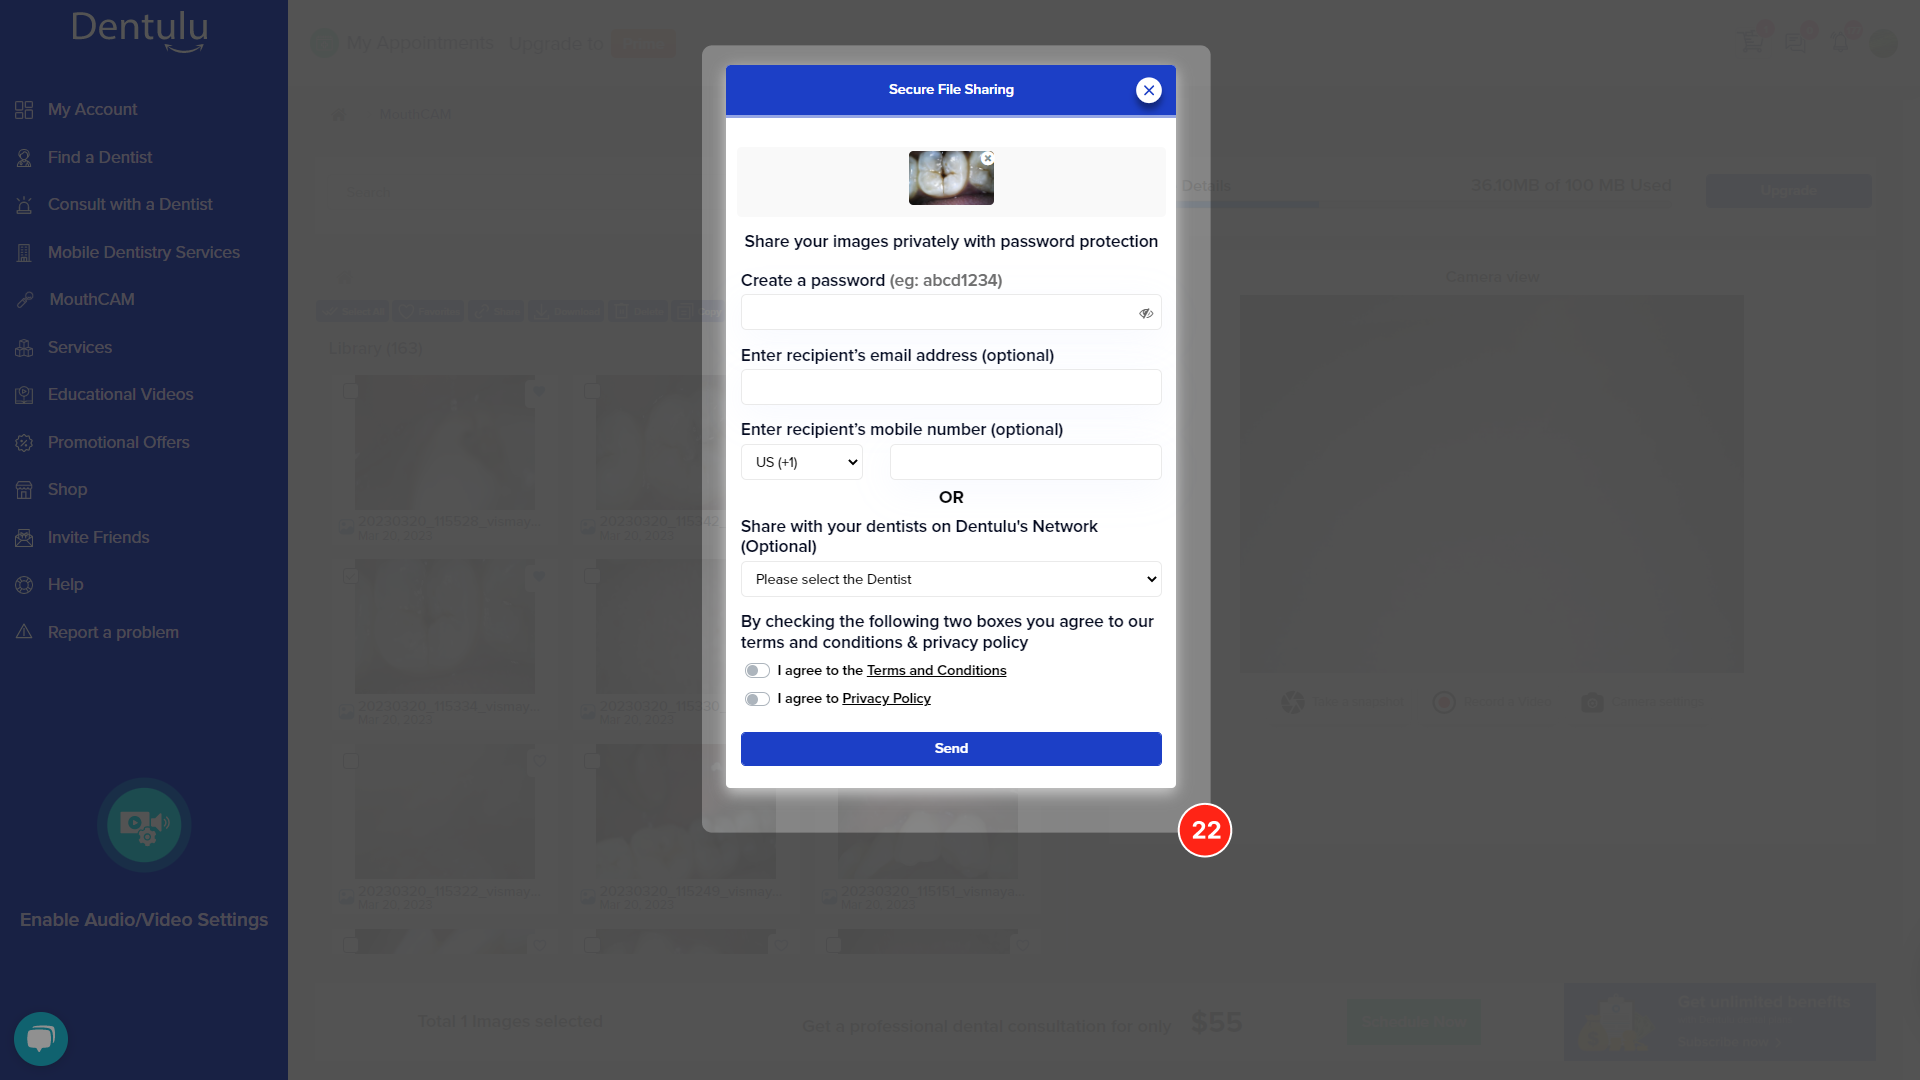
Sharing Images Securely
A. Select an image first
B. Click on the share button to open a pop-up window (as shown in Image 22)
C. Create a secure password (as shown in Image 22)
D. Retype the password
E. Enter the email address or phone number of the recipient, or select a dentist from your list to share the image with
F. Agree to the Teledentistry consents and click send
G. The recipient will receive an email or text message with a link and secure password to view the file securely through our HIPAA-compliant platform

Dental & Professionals
Initial prerequisites
To get started using a MouthCAM wired device you may need some basic set up.
-
1. Mac or Windows computer. It could be a laptop or desktop with a USB connector.
-
2. Latest updated operating system.
-
3. Please check if your computer has a browser
- Mac - Safari or Chrome or Firefox
- Windows - Chrome or Firefox or Edge browser
Installing MouthCAM software
Download the MouthCAM software from here
After downloading the MouthCAM installer.msi file, right click, open and run as administrator on a Windows computer.
Please proceed by selecting the following button
Please proceed by selecting the following button
Please proceed by selecting the following button
After the installation finishes, please click on the 'Close' button to complete the process and move forward
If a warning screen appears on your Windows screen for uknown publisher as described below, please disregard it and click "Yes" to proceed.
Now go to search and find “MouthCAM” and open the software
Launch the MouthCAM software by selecting the MouthCAM icon. Once clicked, the application will operate discreetly in the backdrop of your other computer programs.
The MouthCAM software is now active and running.
You are now ready to begin using the Dentulu web application along with the MouthCAM device.
Getting prepared
To get started follow the initial instructions
-
1. Ensure that your desktop computer or laptop is switched on.
-
2. Open any of the browsers - we recommend using Google Safari, Chrome, Firefox Mozilla or Edge browsers for optimum performance. The camera will work in other browsers as well but may need additional layers of setup which we do not recommend.
-
3. Ensure that you have given permissions to app.dentulu.com to access camera.
- How to give access to your camera
- Chrome Click Here
- Firefox Click Here
- Edge Click Here
Dentulu Portal:
Go to https://app.dentulu.com
Logging on to Dentulu
Login with your login credentials
Username: ****************
Password: ****************
Accessing MouthCAM
-
A. To access MouthCAM, click on the left side menu
-
B. You will be directed to the MouthCAM dashboard where you can view previously taken images
-
C. The dashboard includes options to search and organize your images
-
D. You can also connect to the MouthCAM device from the dashboard
Connecting Your Camera
Plug your camera to one of the USB ports on your computer.
-
A. On screenshot 3 it shows that you are still not connected to the computer.
-
B. Once you are connected screenshot 4 shows you the cameras attached to your computer.
-
C. Click on the device that says WebCAM, differentiating it from any other camera you might already be connected to.
Preview Image
As soon as the camera is connected, you will be able to see a preview of the images on your screen.
Capturing images
Please be advised that the capture button on your device cannot be used to take images due to browser restrictions. Instead, we have provided a capture button, as shown in Image 9, for your convenience. You may use this button to capture any number of images required
Image 10 shows you how to record a video. Once you click, you can record videos up to 2 min in length. You can record multiple videos and save them all in one go or discard them as you wish.
Camera Settings
Did you know that you can also use other USB cameras with Dentulu MouthCAM dashboard, as it can connect to any USB camera?
Camera settings allow you the convenience to change the camera attached to your computer!
Viewing captured images
On the left-hand side of the MouthCAM dashboard, you will find all the images you have taken using the MouthCAM device.
Each image can be clicked open to view its original size.
Image Management Options
You have the option to perform various actions on multiple selected images, including copying, deleting, moving, sharing, adding to favorites, and downloading.
We have provided multiple actions at the bottom of each image you capture:
Add to Favorites: Keep all of your favorite or most important images easy to locate by adding to your favorites.
Share: Allows you to securely share your image through our HIPAA compliant platform with your dentist or anyone else you choose.
Download: You can download a copy of the images for your reference.
Delete: You can choose to delete select image or images.
Edit: We have provided basic editing tools to ensure you can make markings on the images.
Details: Provides you with details of the images when you open it, which you may tag and write notes for future references.
Sharing Images Securely
A. Select an image first
B. Click on the share button to open a pop-up window (as shown in Image 22)
C. Create a secure password (as shown in Image 22)
D. Retype the password
E. Enter the email address or phone number of the recipient, or select a dentist from your list to share the image with
F. Agree to the Teledentistry consents and click send
G. The recipient will receive an email or text message with a link and secure password to view the file securely through our HIPAA-compliant platform
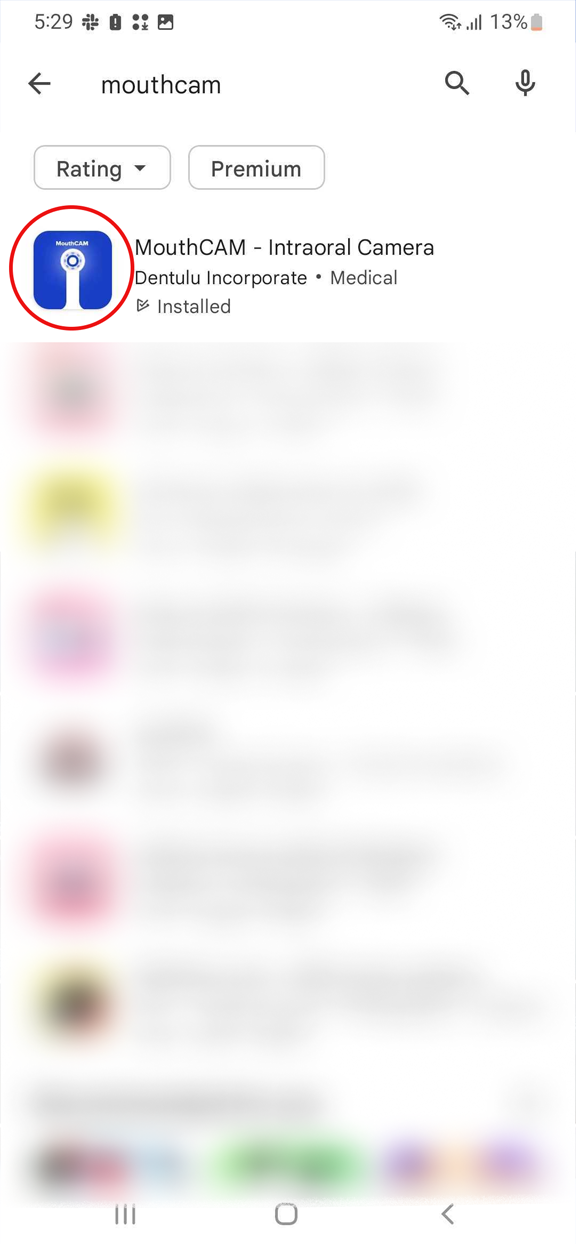
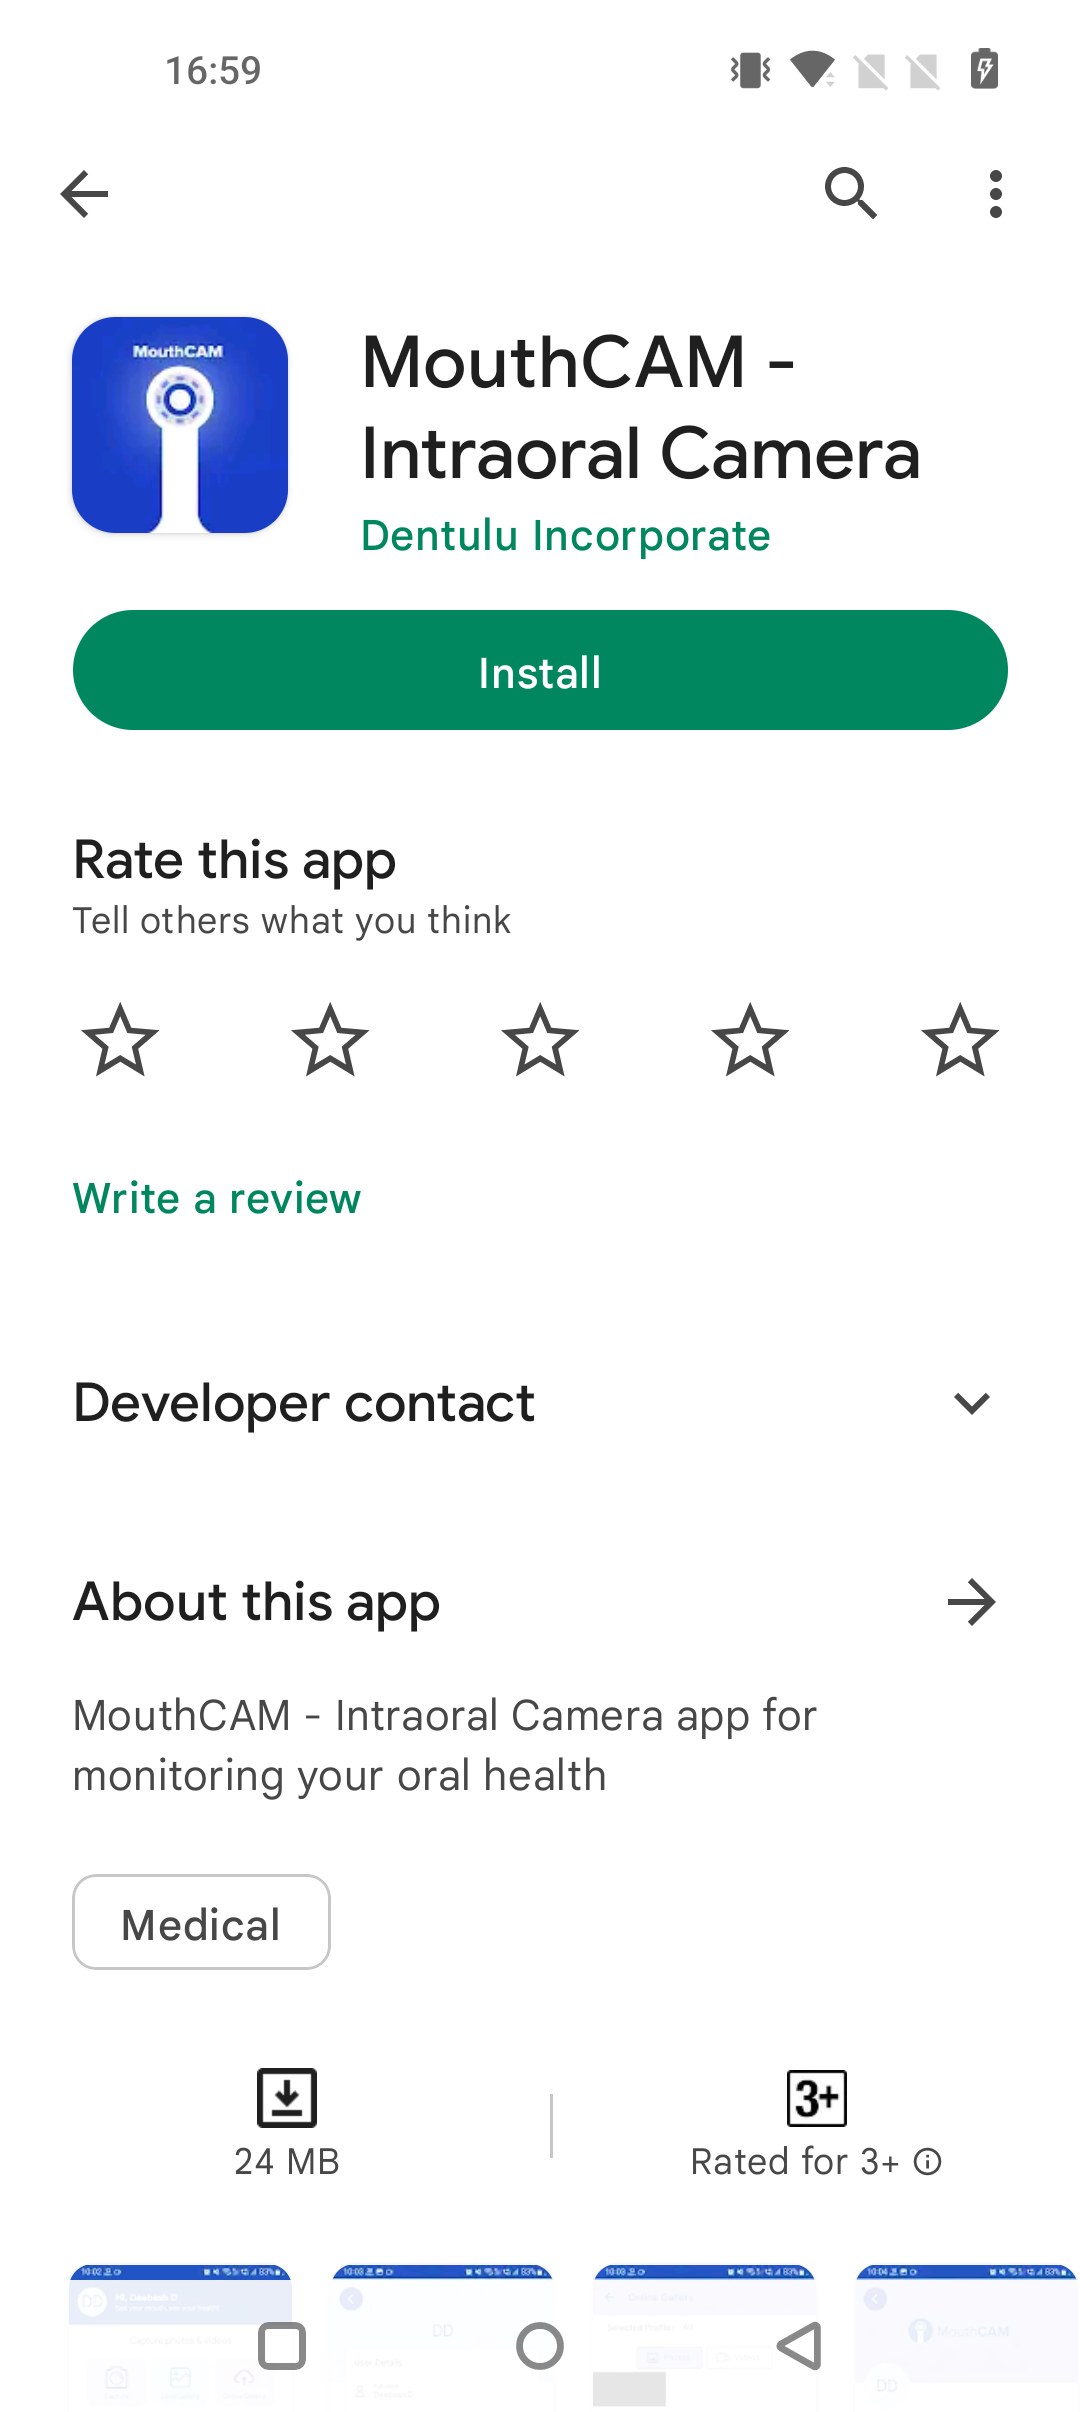
 Download app
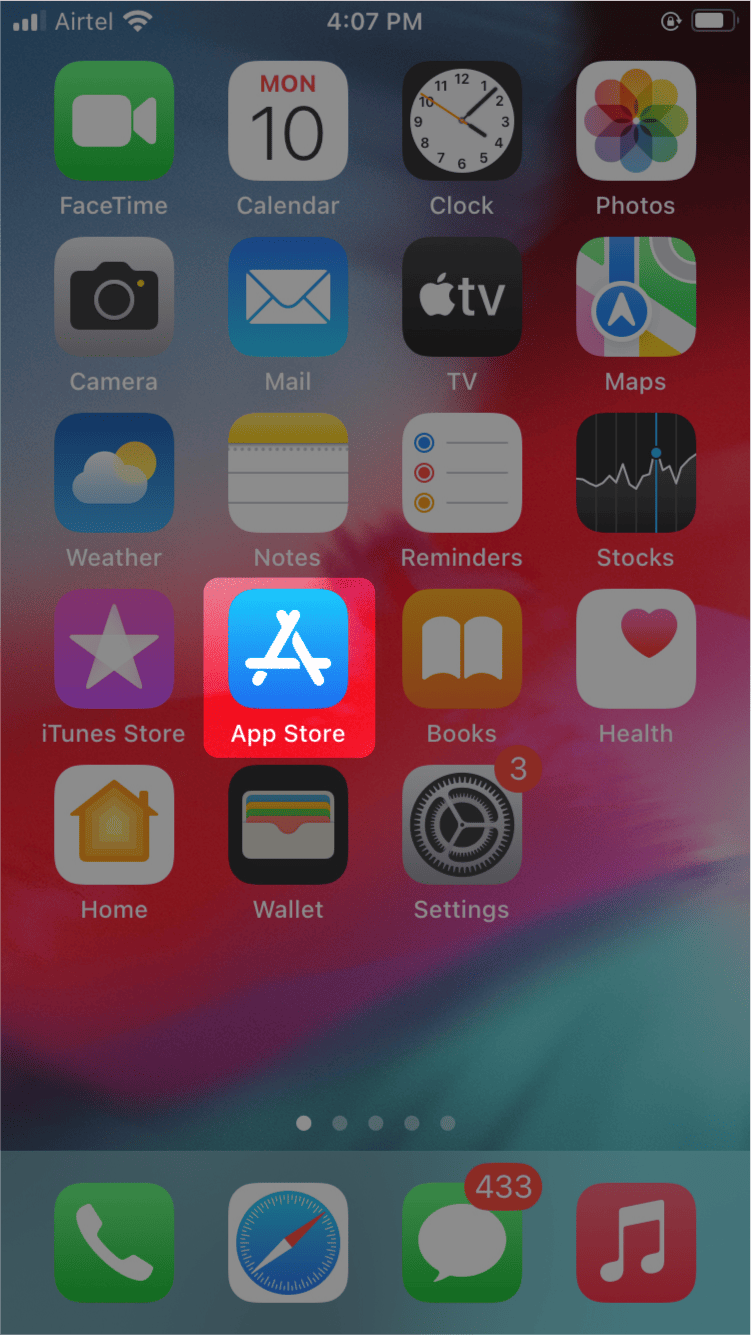
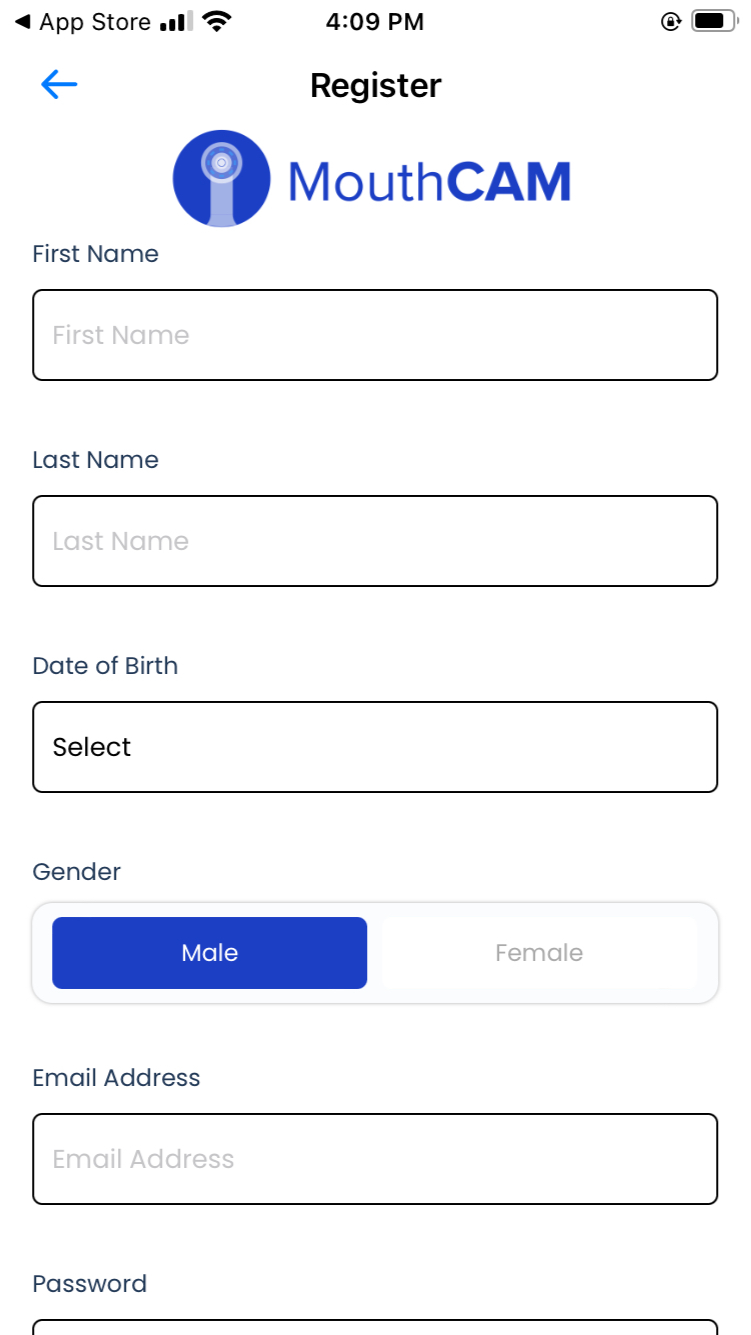
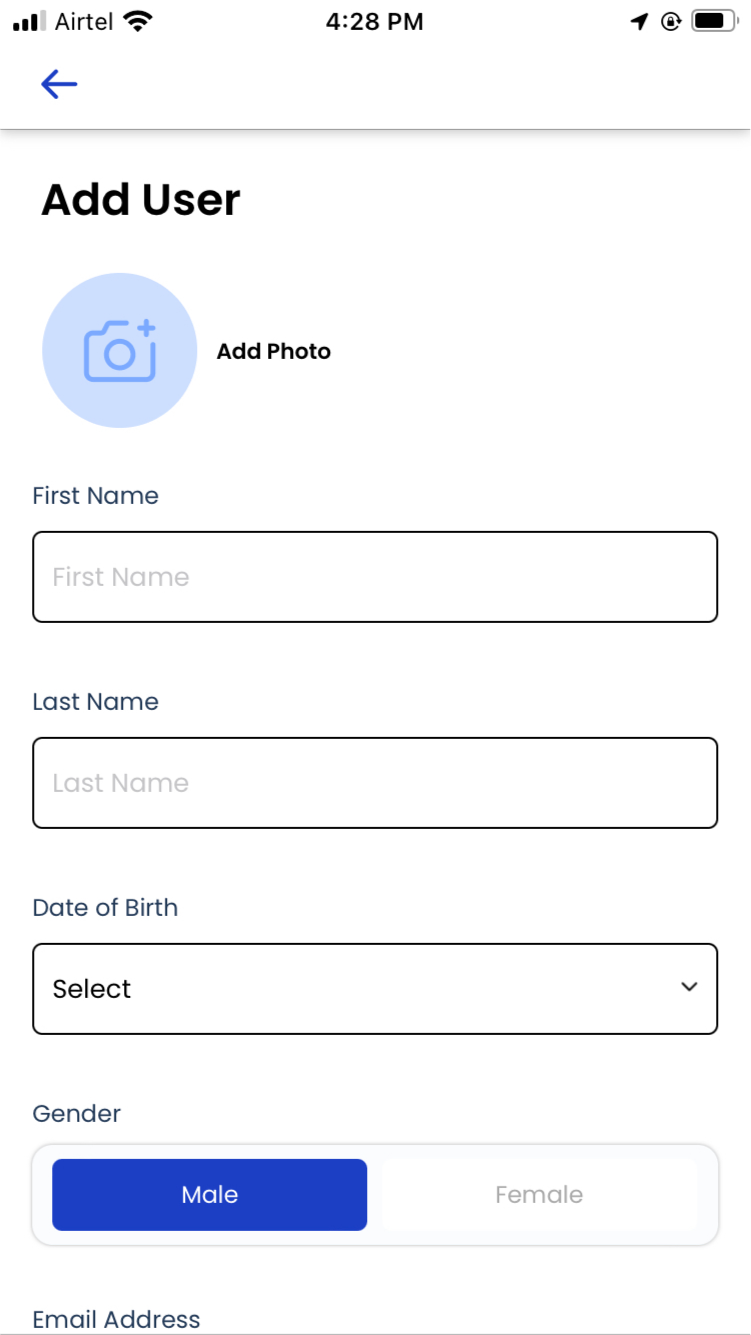
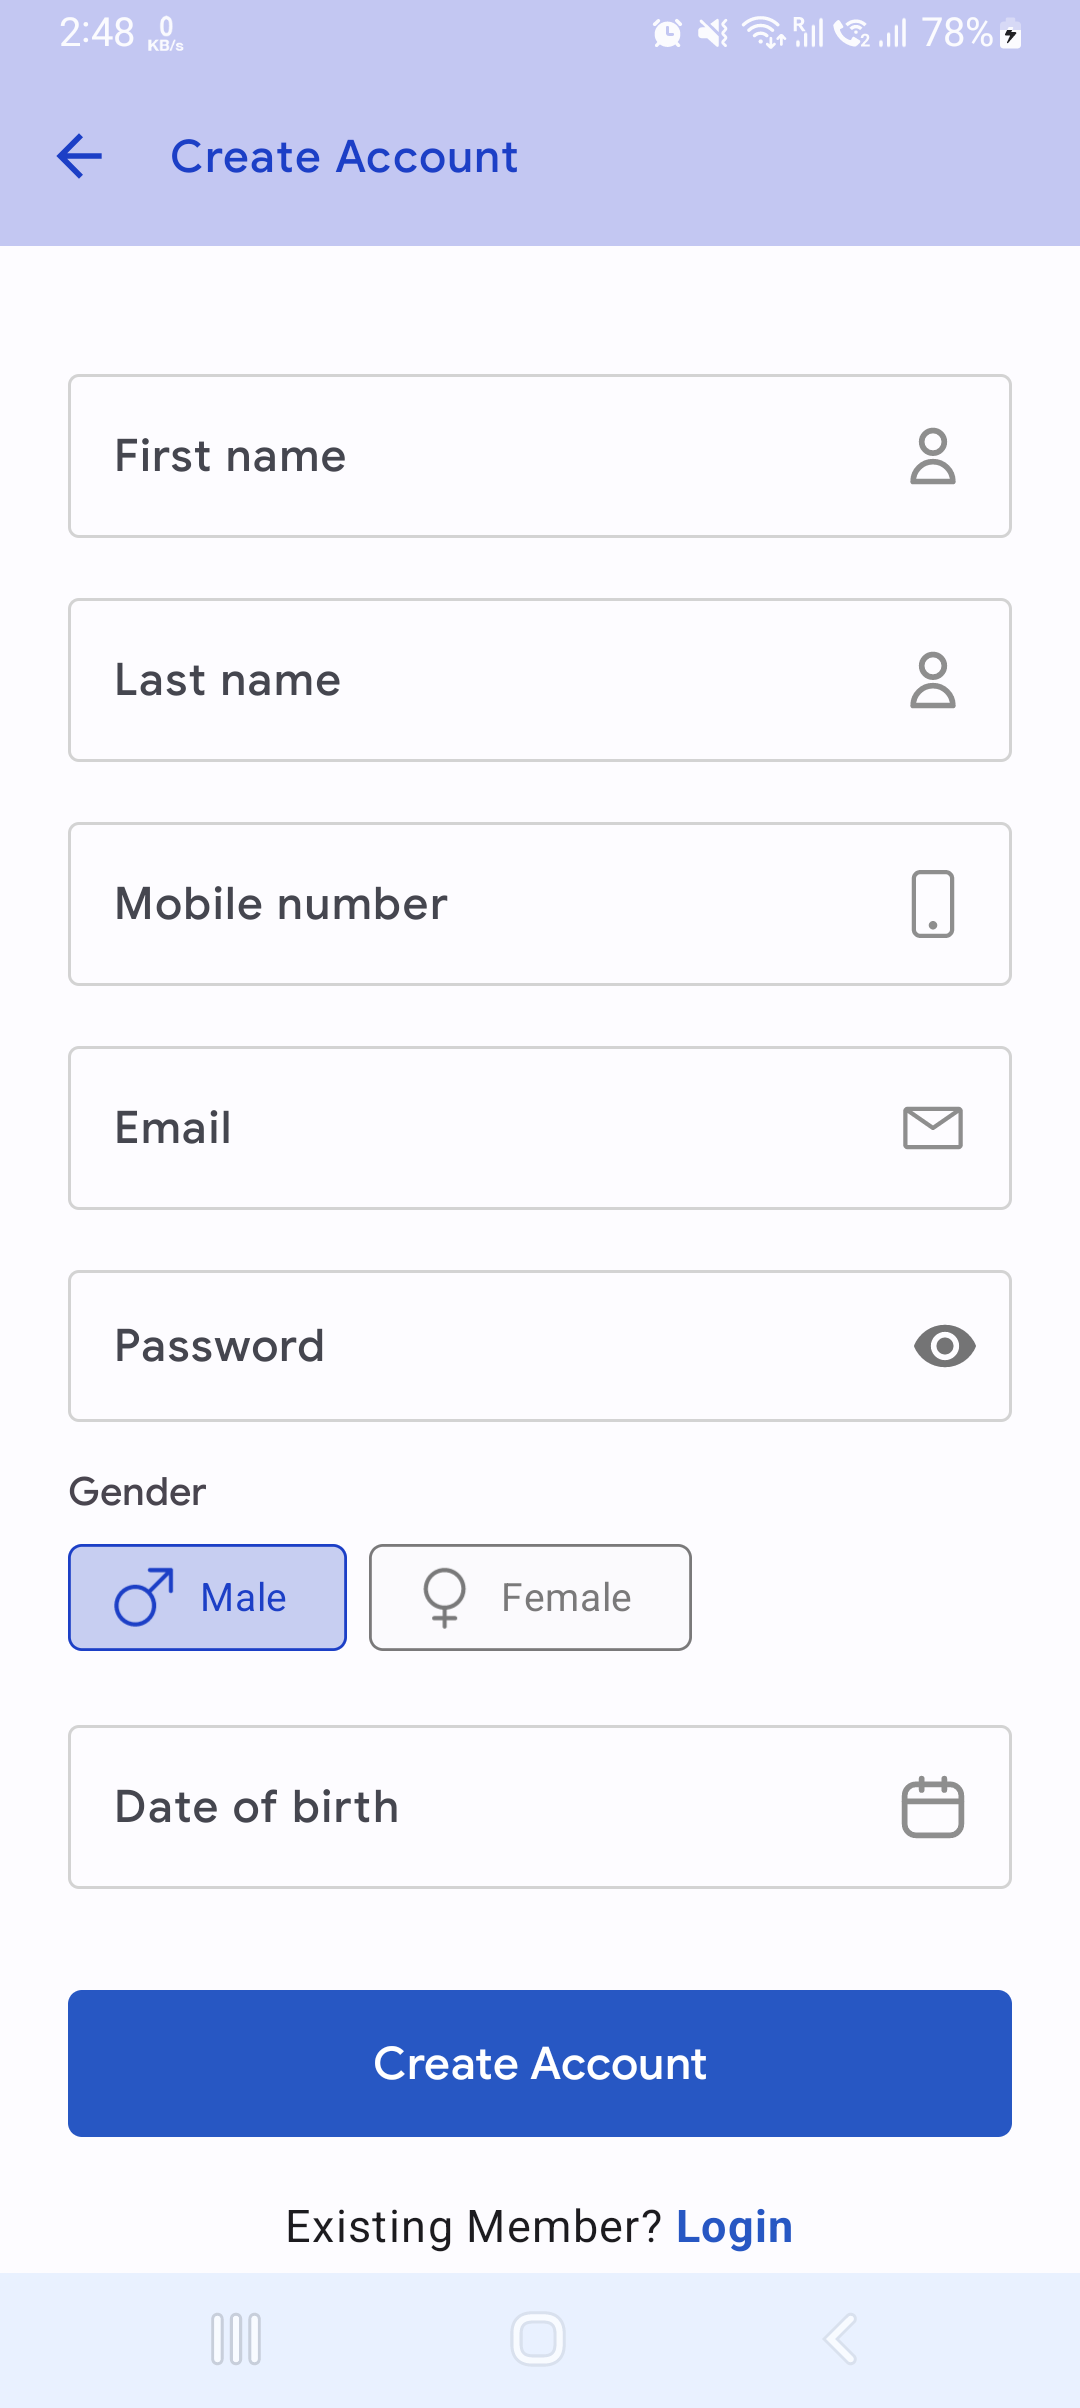
2. Create new profile
Create a new account by providing your First name, Last name, Mobile Number, Email, Password, Gender, DOB
Connecting Your Wireless Camera
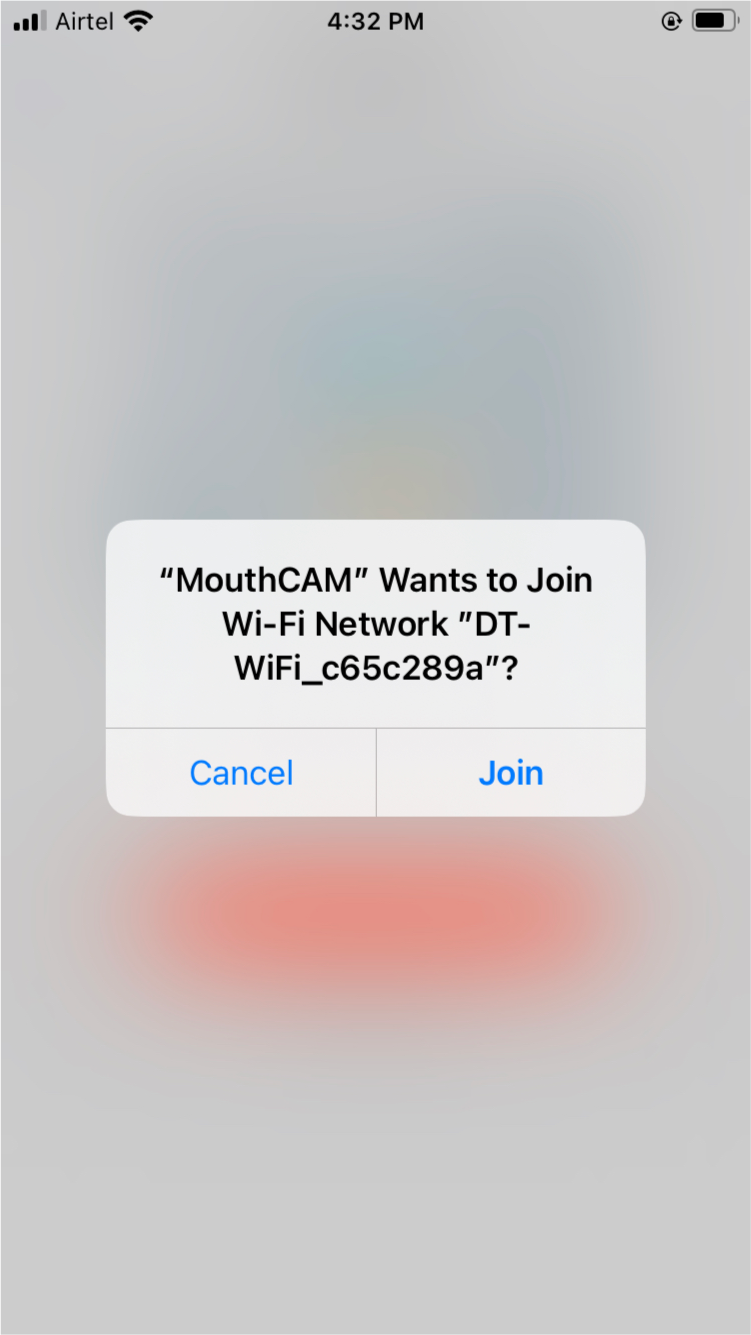
IMPORTANT! Please make sure your MouthCam is fully charged and turned on. You will find the On/Off button on the front of the camera and a green light will appear when the camera is turned on. Go to your settings section and choose the MouthCam WiFi network.
Depending on the type of MouthCam you have purchased you will see the following WIFI networks to choose from: Examples of Wifi Networks:
"DT_WiFiabcdef232 (random numbers after WiFi)" OR "Dentulu" OR "MouthCAM"
Note: Usually, it only takes a few seconds to connect your camera. You may see a message saying there is no internet connection, but don't worry—your camera will continue to work without one. All the photos and videos you take with your MouthCam will be saved to your phone and automatically uploaded to the cloud as soon as you're done using your camera.
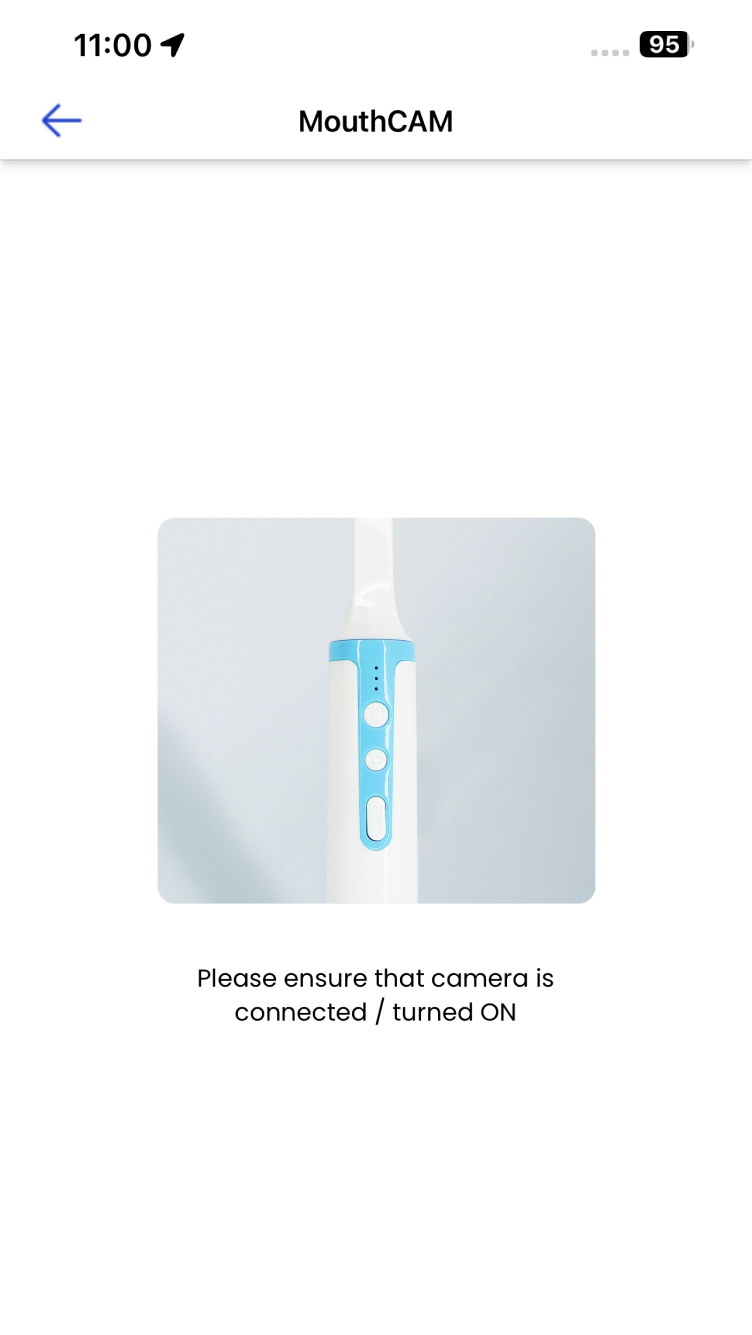
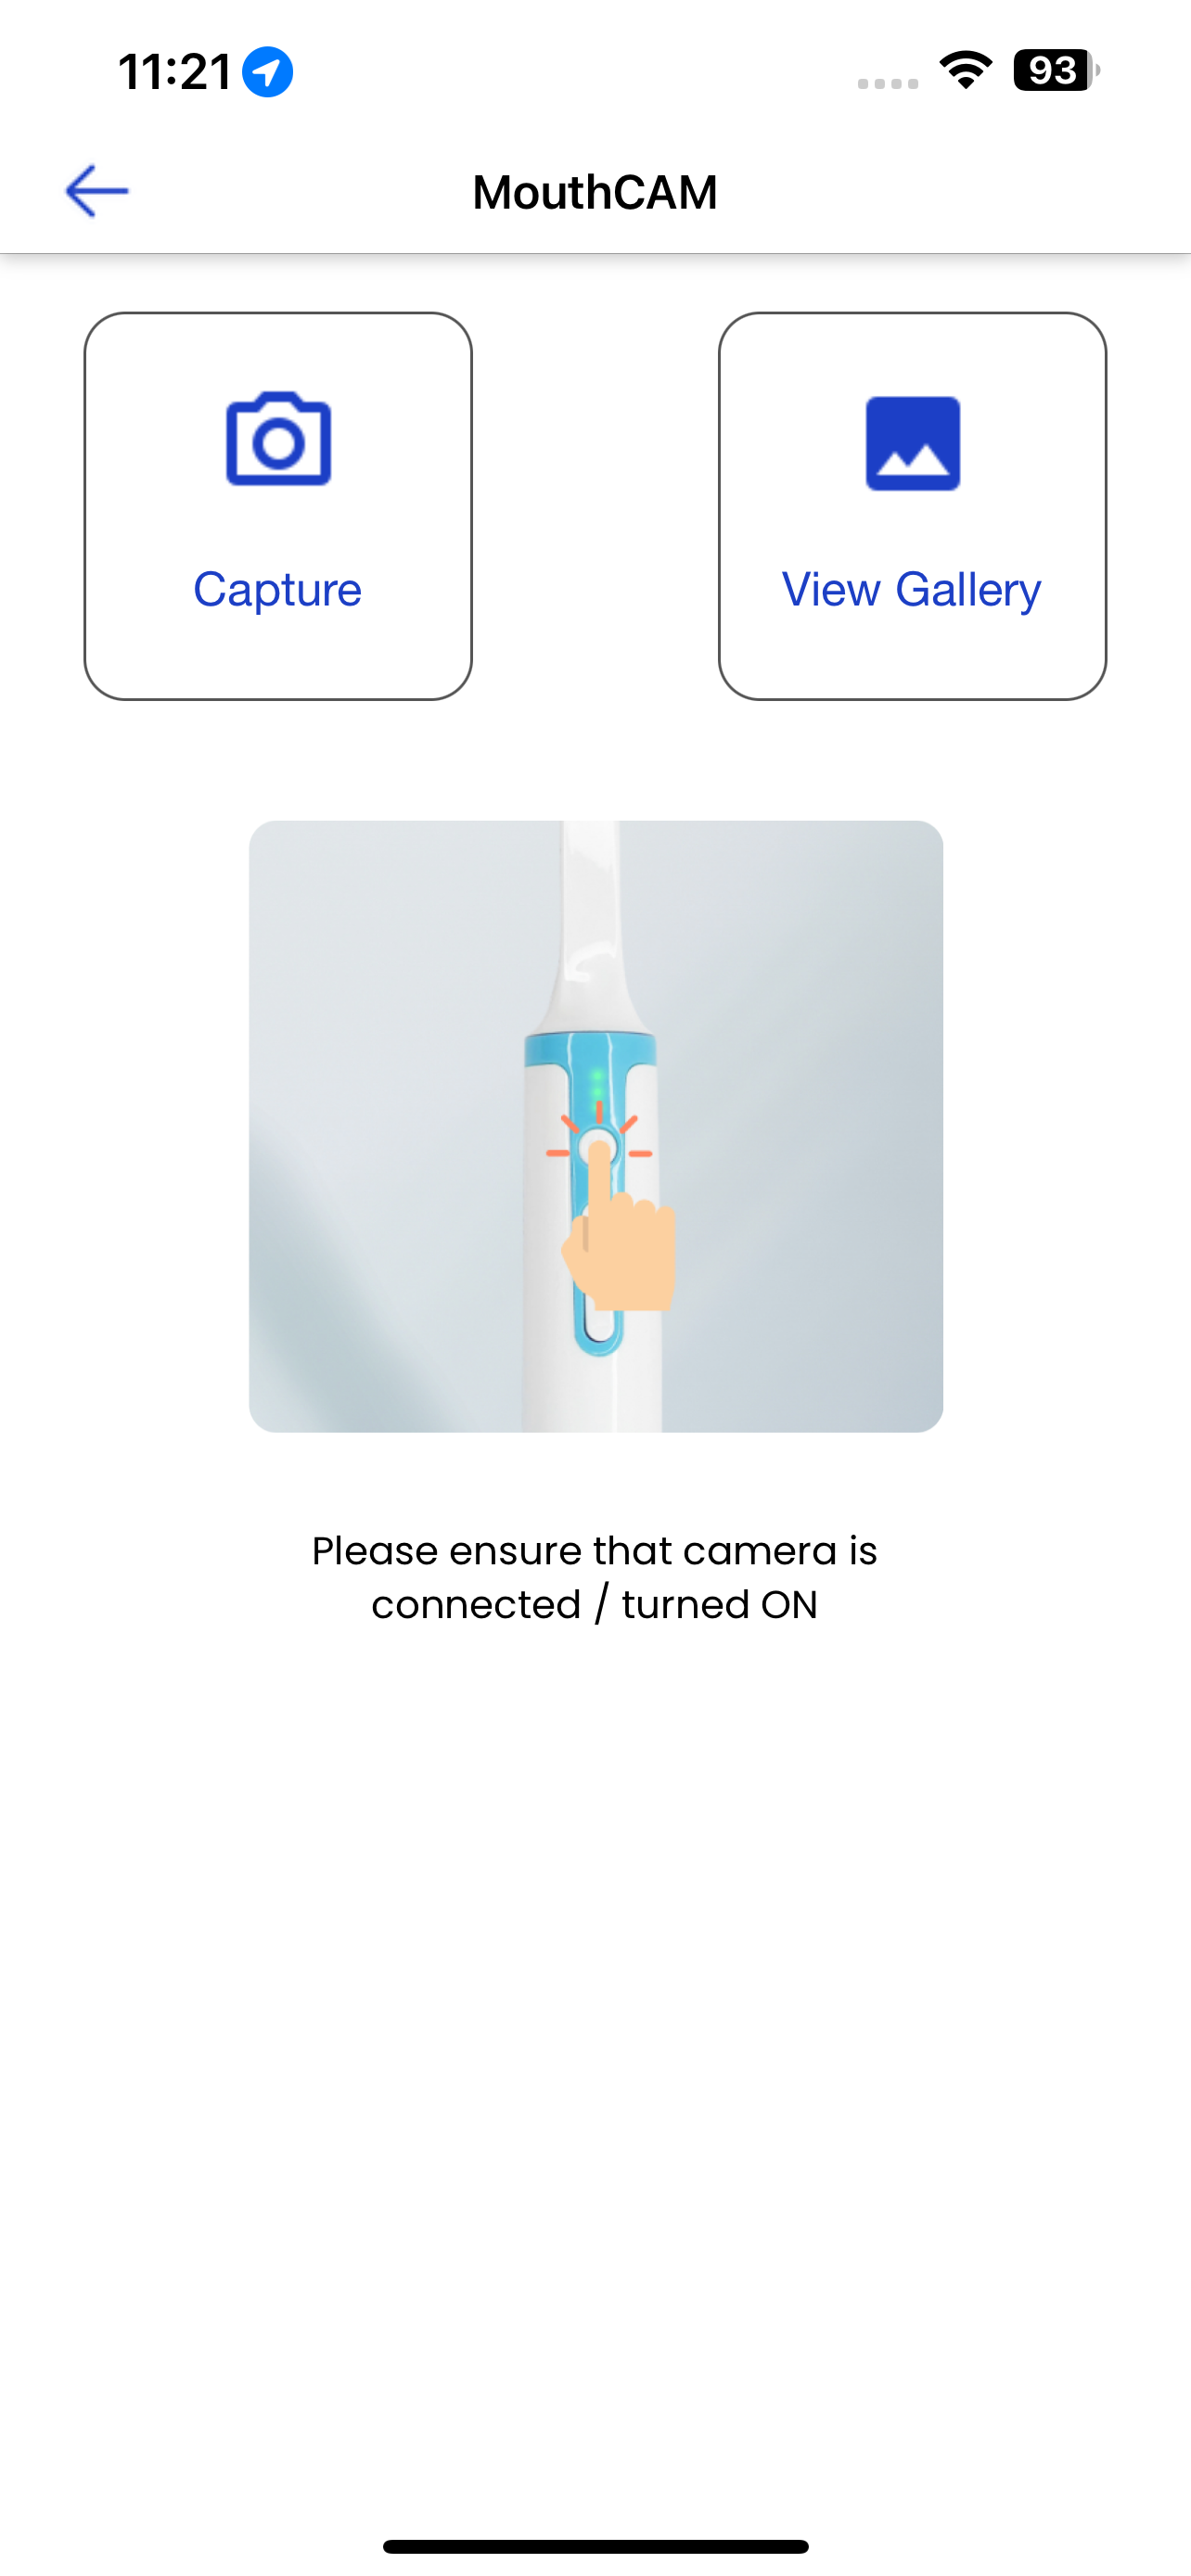
Step 1: After clicking the capture button, you will be given the option to connect with the Wi-Fi camera. To do so, please switch on the intra-oral camera by pressing the button on the device as shown in the image. You will know the camera is on and ready to pair when you see a green light blinking.
Note that the MouthCam is not a Bluetooth device, but uses a WIFI connection for a stronger and safer connection.
Step 2: Choose a user profile to enable the recording features to save captured images and videos under a particular user profile.
Step 3: After connecting the device, the ‘Wireless Camera’ option will be available on the list
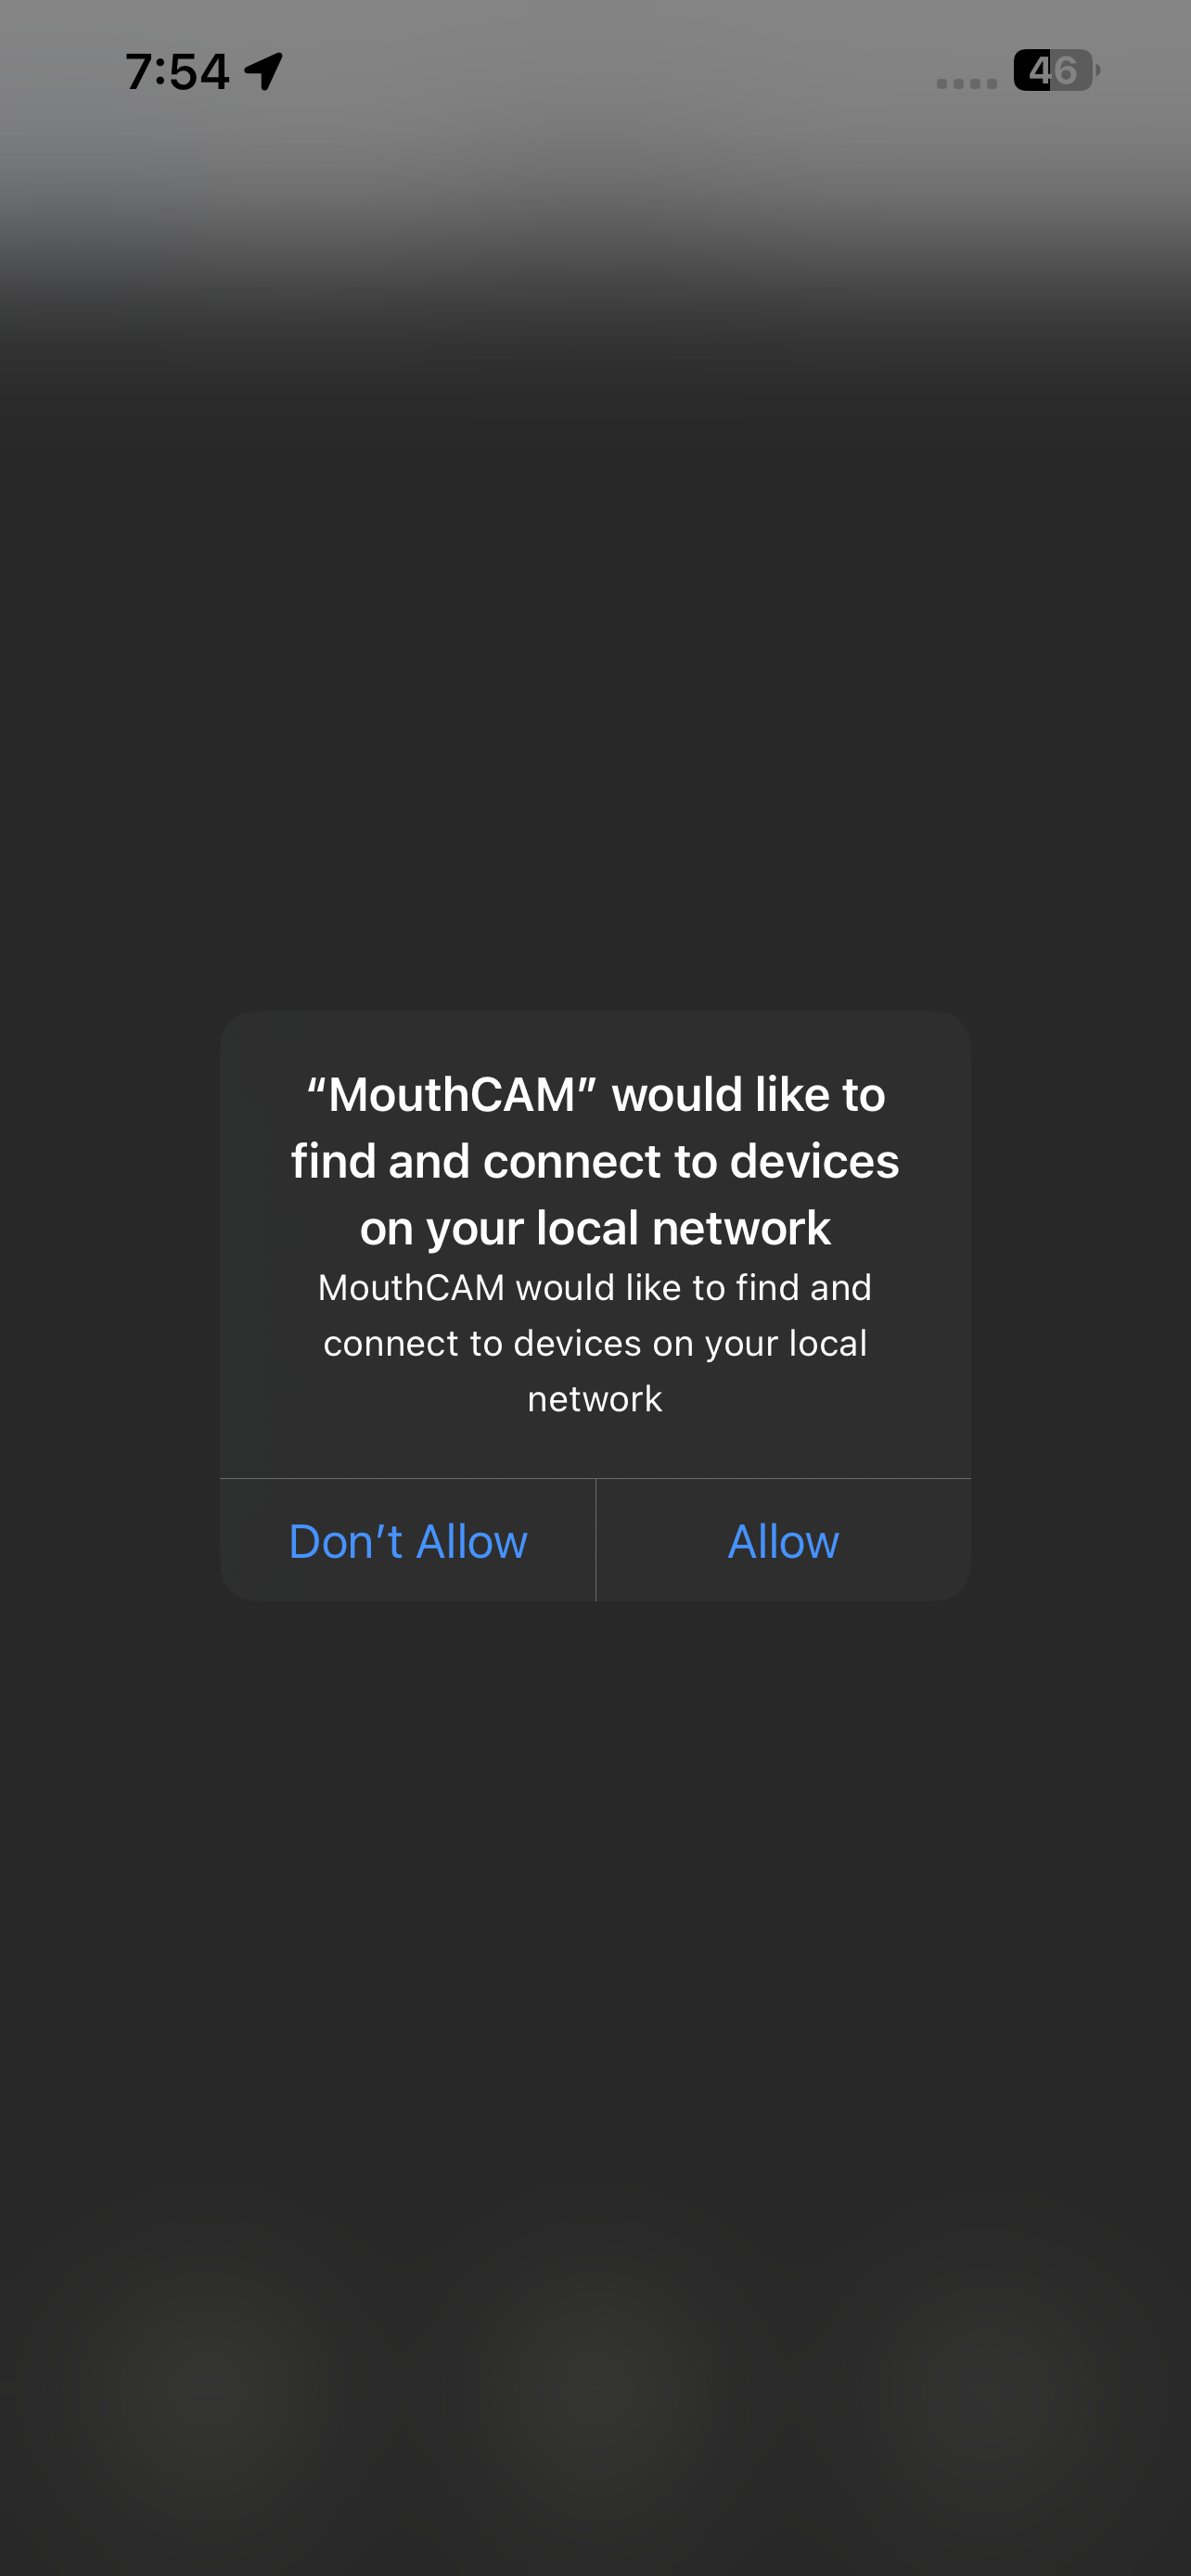
Please grant all required permissions on your phone. Upon your first successful connection with MouthCAM, you will receive the following message. Ensure you allow this to enable a successful connection with MouthCAM.
MouthCAM would like to find and connect to devices on your local network.

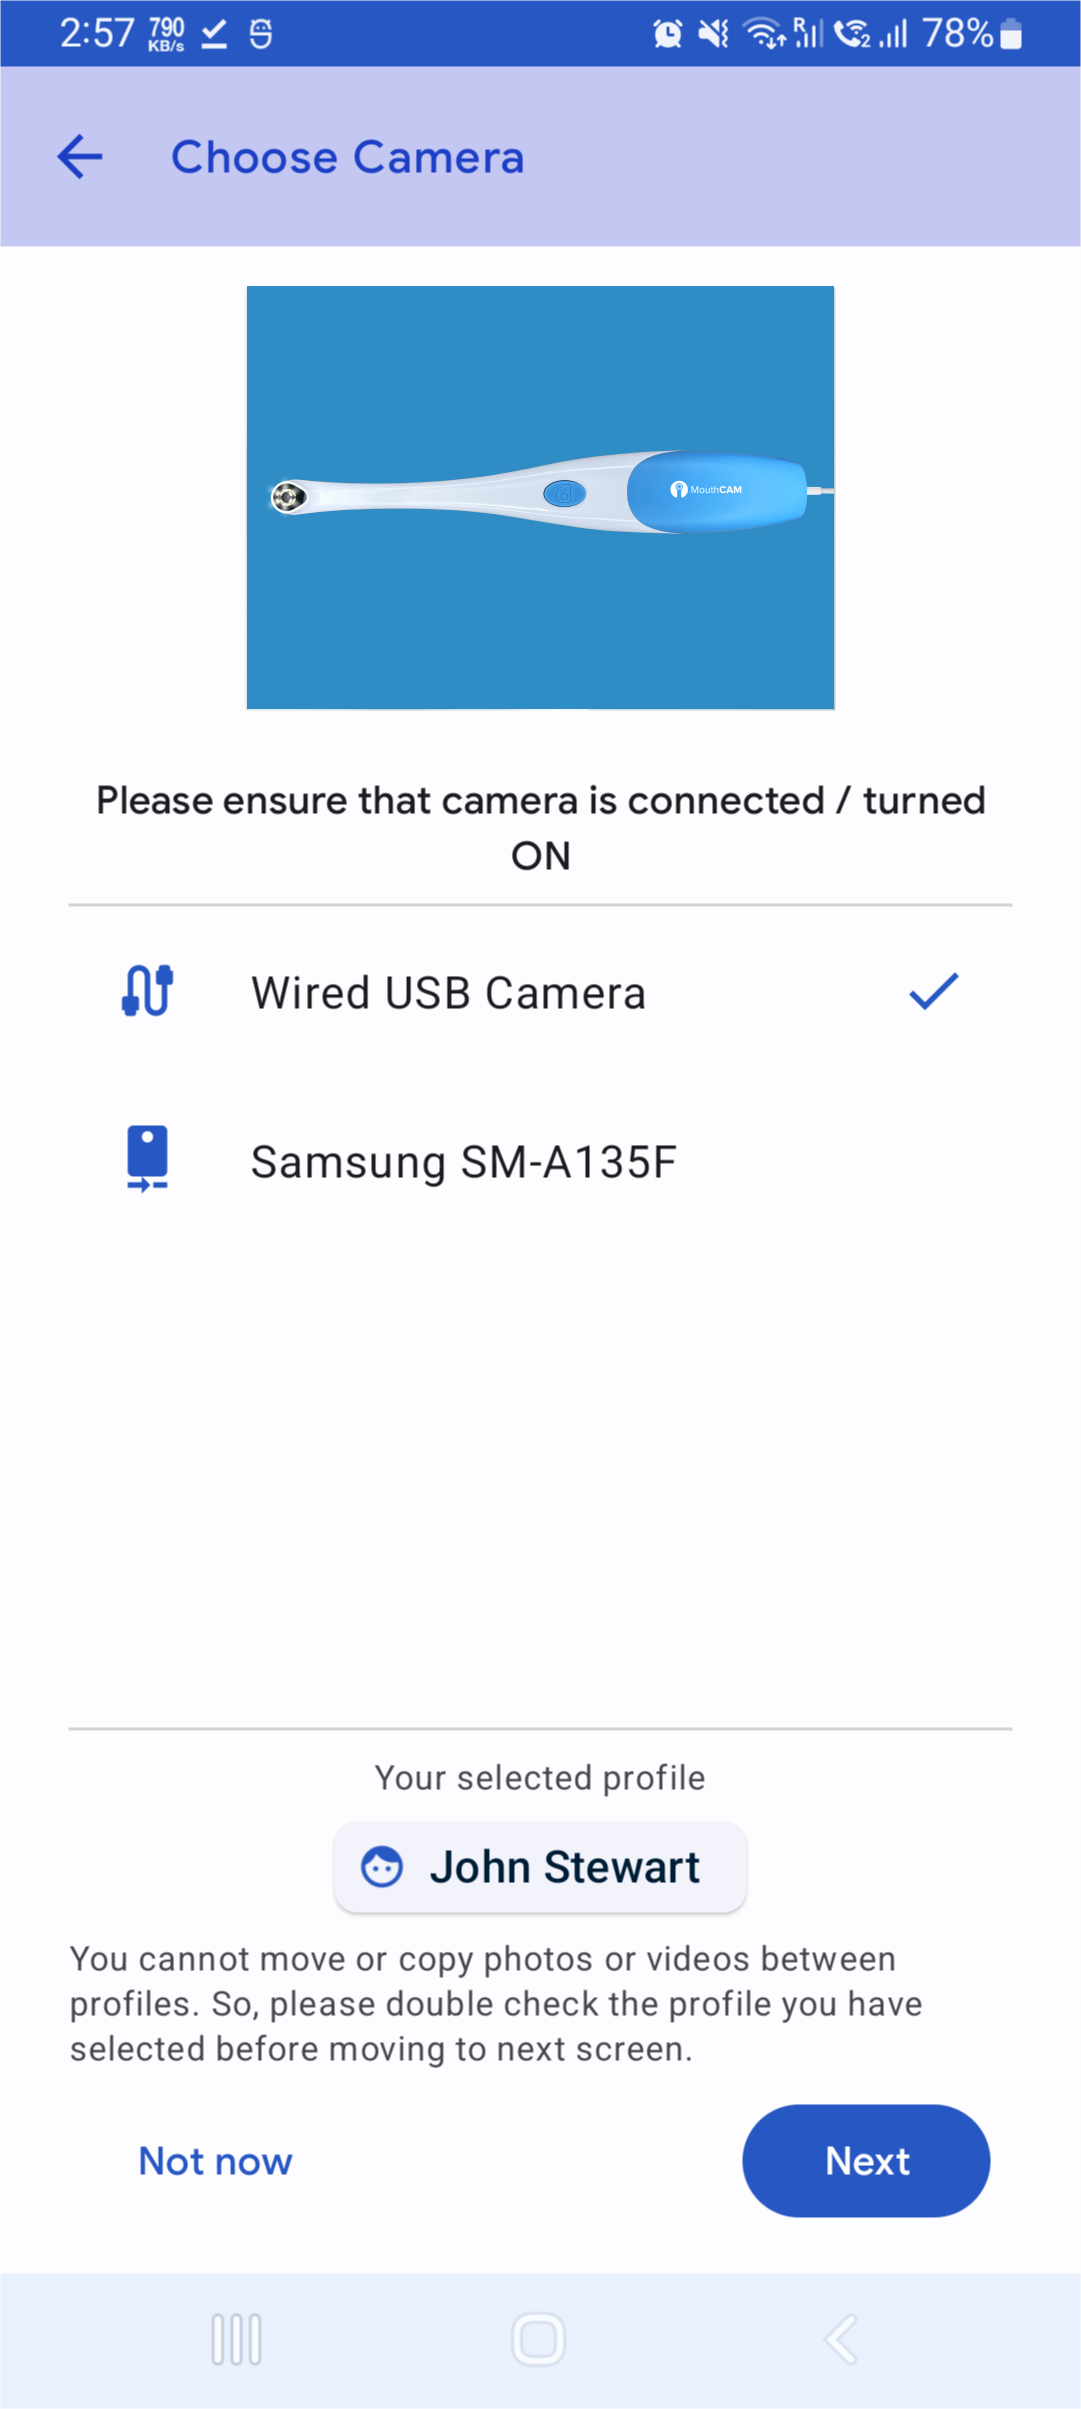
Step 4: Please check for the USB camera on the list as shown in the image below.
Select the Wired USB Camera and click on ‘Next’ and start capturing images and videos.
Ready to use your camera
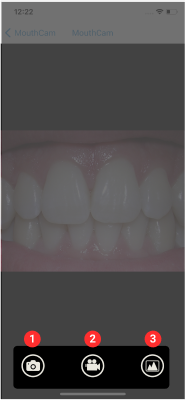
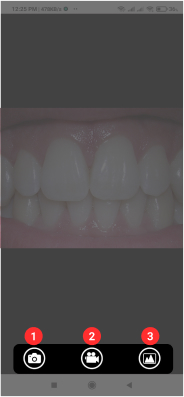
There are three buttons at the bottom of the preview page: The first button (1) will take photos on every click. The second button (2) will record up to two minutes of video and audio. The third button (3) will take you to the gallery view to preview the captured images and videos.
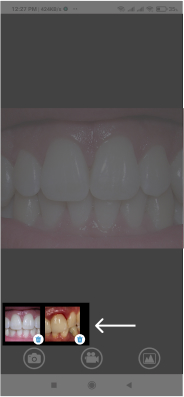
Taking and Deleting Pictures
Click the capture button to start taking pictures. You can preview or delete any pictures by clicking the delete button on the bottom right corner of each image.
Viewing Images in Your Gallery
To view the images and videos you have captured, click on the gallery button.


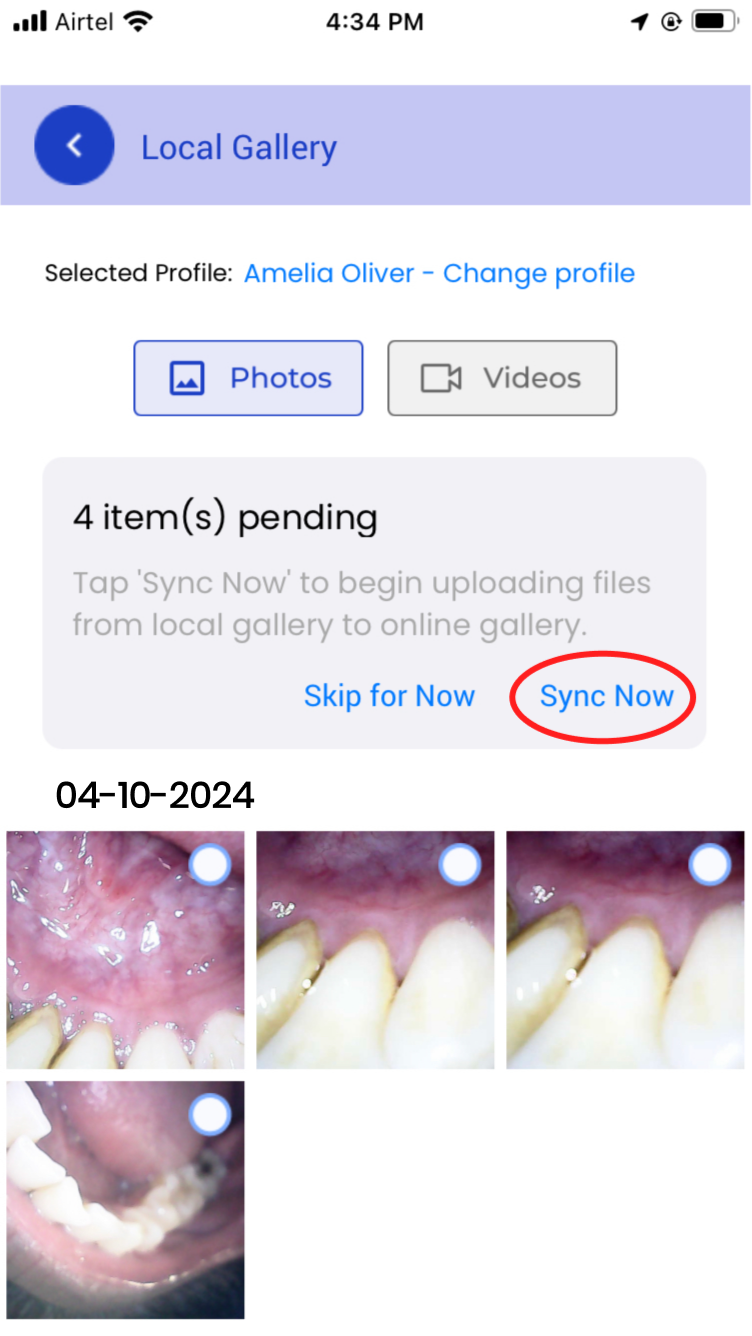
Syncing Your Gallery
Note: To ensure that you are never at risk of losing your images or videos, Dentulu has enabled a feature that allows you to sync your content to your cloud!
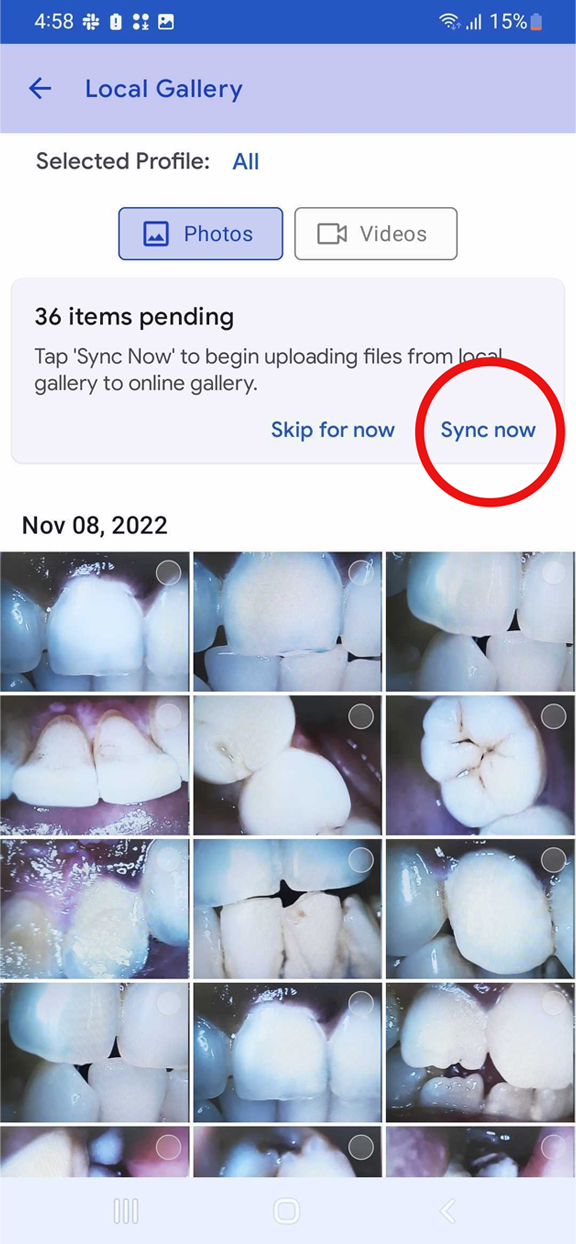
Step 1: Enter the Local gallery in the dashboard
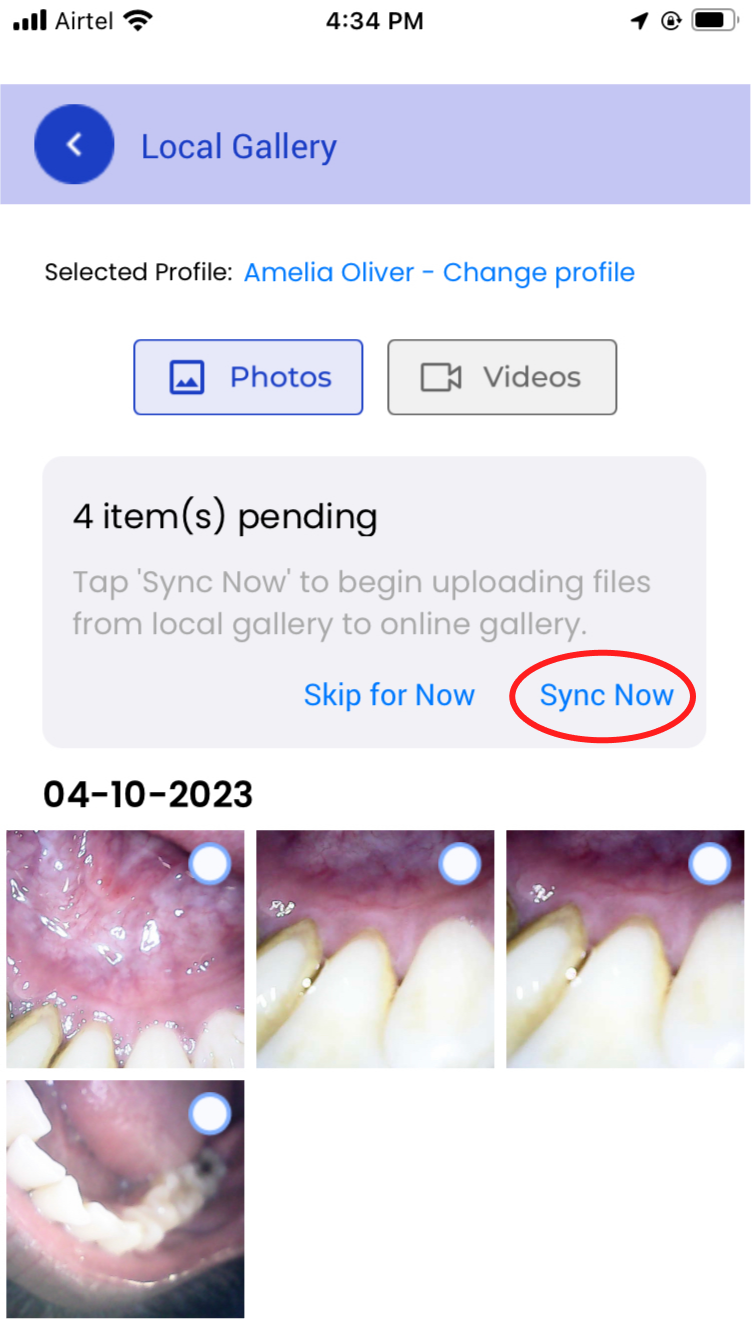
Step 2: Tap the ‘Sync now’ button in the dialogue box to sync all your images and videos to cloud storage.
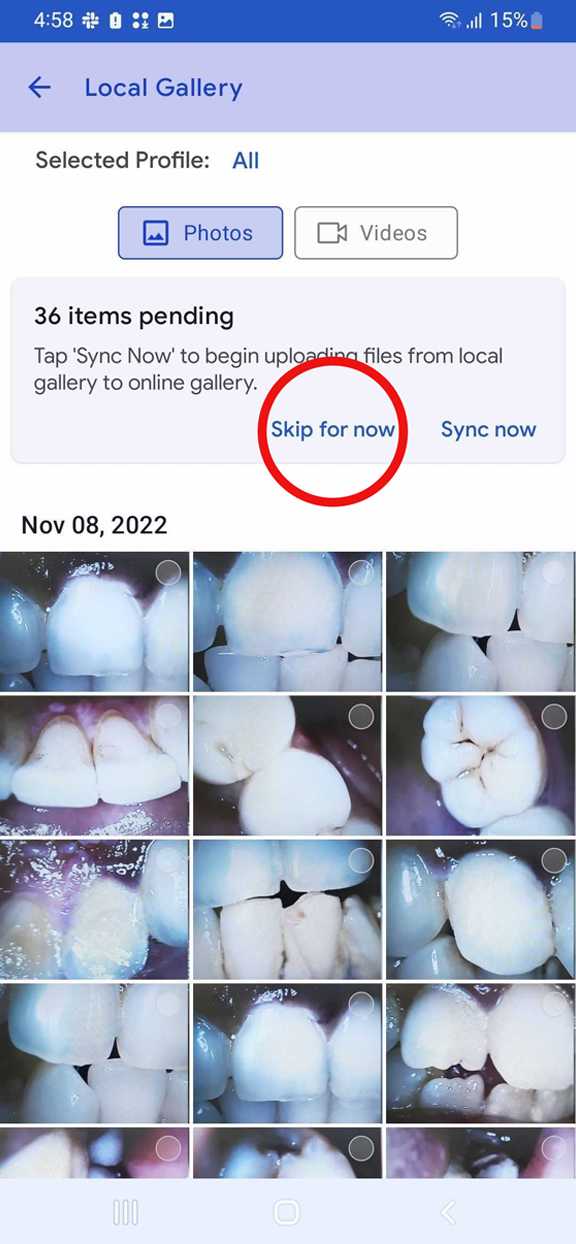
Step 3: You can tap ‘Skip for now’ if you wish not to sync your images and/or videos at this time.
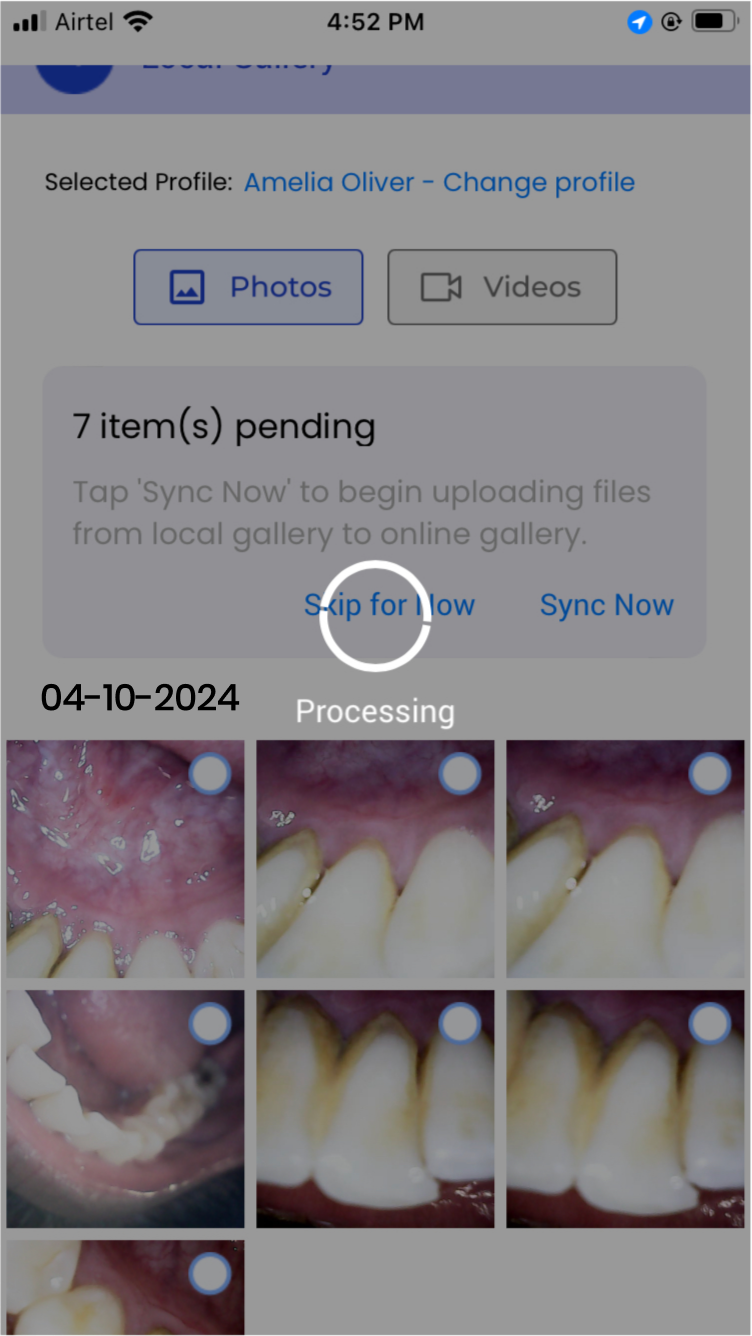
Step 4: Once you click on the sync button your images and videos will start syncing and it will show ‘Syncing in progress'.
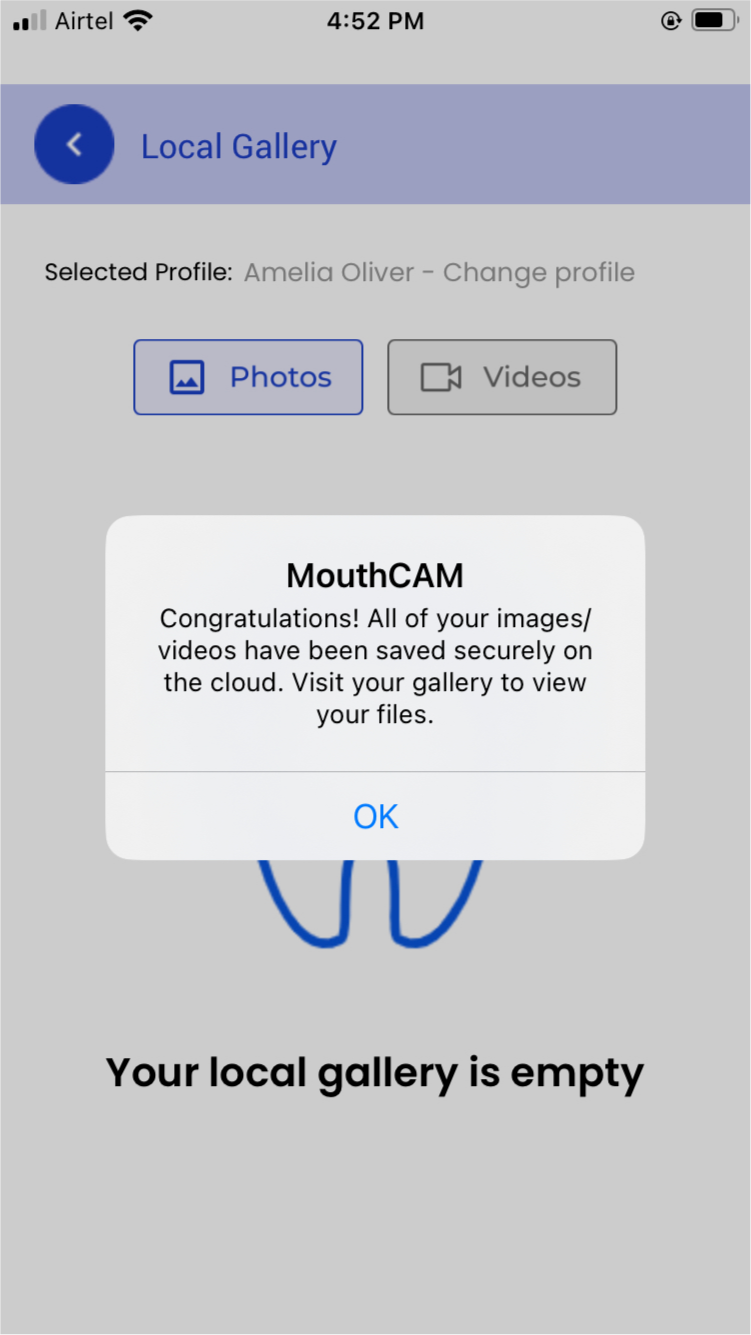
Step 5: Once you sync the items you will get the “The gallery is empty” message in the Local gallery.
Tips: You can also sync the gallery by tapping on ‘All’ on the ‘Selected profile’ available on the Local gallery.
Step 6: Before syncing, you can delete any unwanted images or videos by long pressing to select the image or video and selecting the delete option.
Step 7: If you want to deselect an image or video, you can tap on the ‘Clear’ button.
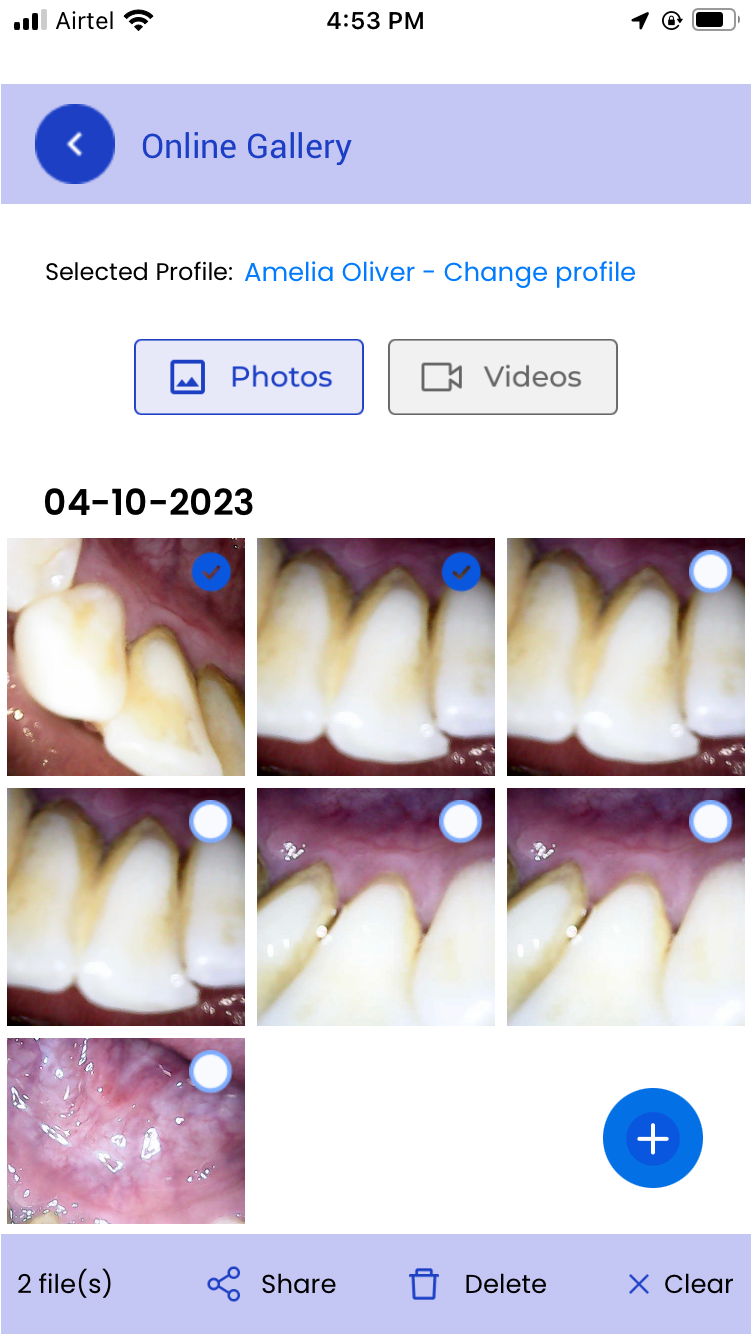
Step 8: Tap on the online gallery to see the images and videos reflected from the Local Gallery.
Image Management Options
You have the option to perform various actions on multiple selected images, including copying, deleting, moving, sharing, adding to favorites, and downloading.
We have provided multiple actions at the bottom of each image you capture:
Add to Favorites: Keep all of your favorite or most important images easy to locate by adding to your favorites.
Share: Allows you to securely share your image through our HIPAA compliant platform with your dentist or anyone else you choose.
Download: You can download a copy of the images for your reference.
Delete: You can choose to delete select image or images.
Edit: We have provided basic editing tools to ensure you can make markings on the images.
Details: Provides you with details of the images when you open it, which you may tag and write notes for future references.

Sharing Images Securely
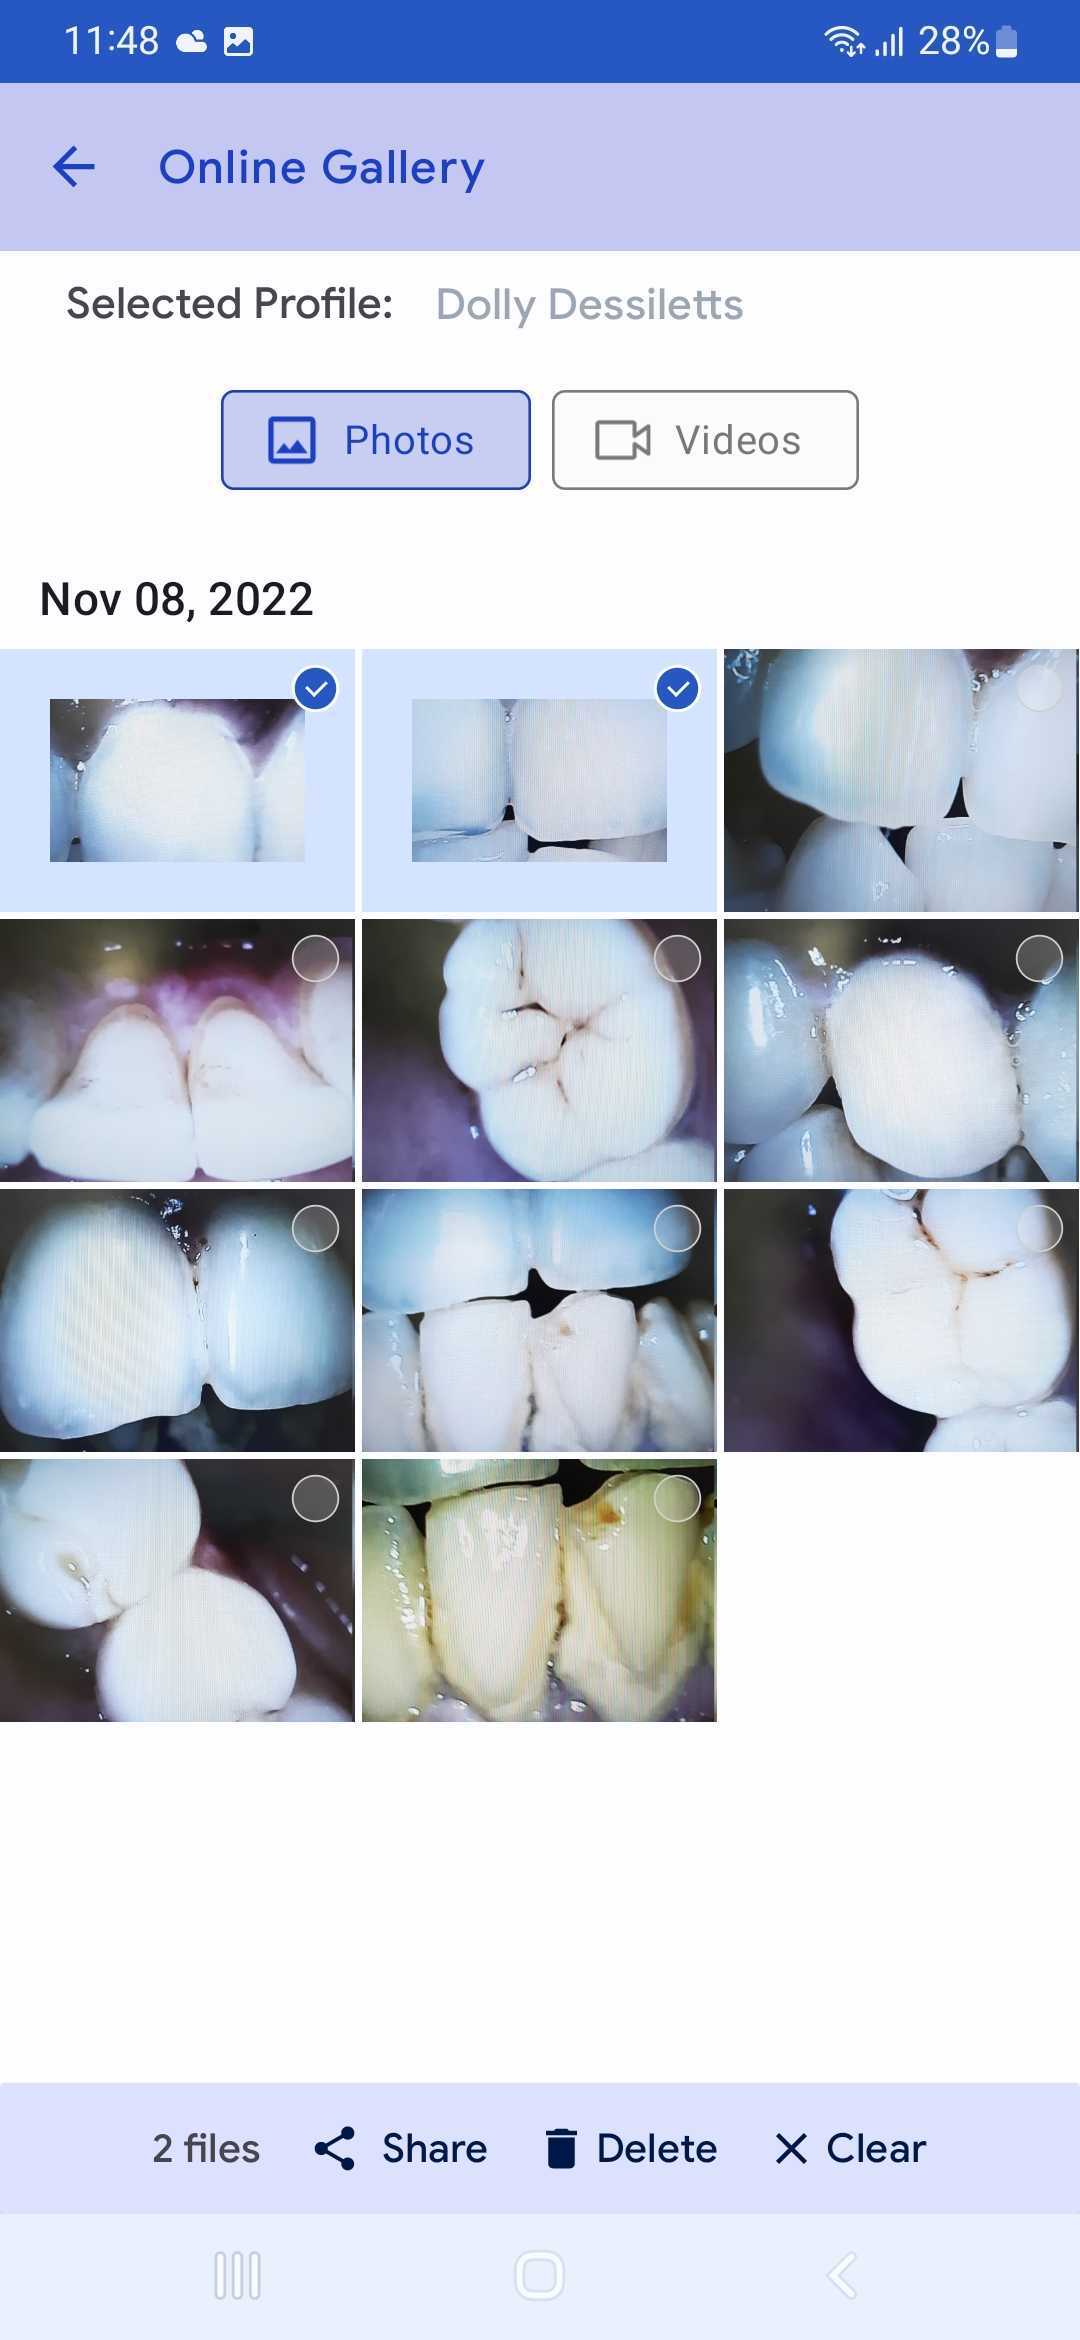
Step 1: Enter into the ‘Online gallery’ to access the images and/or videos on the cloud storage.
A: Select an image first
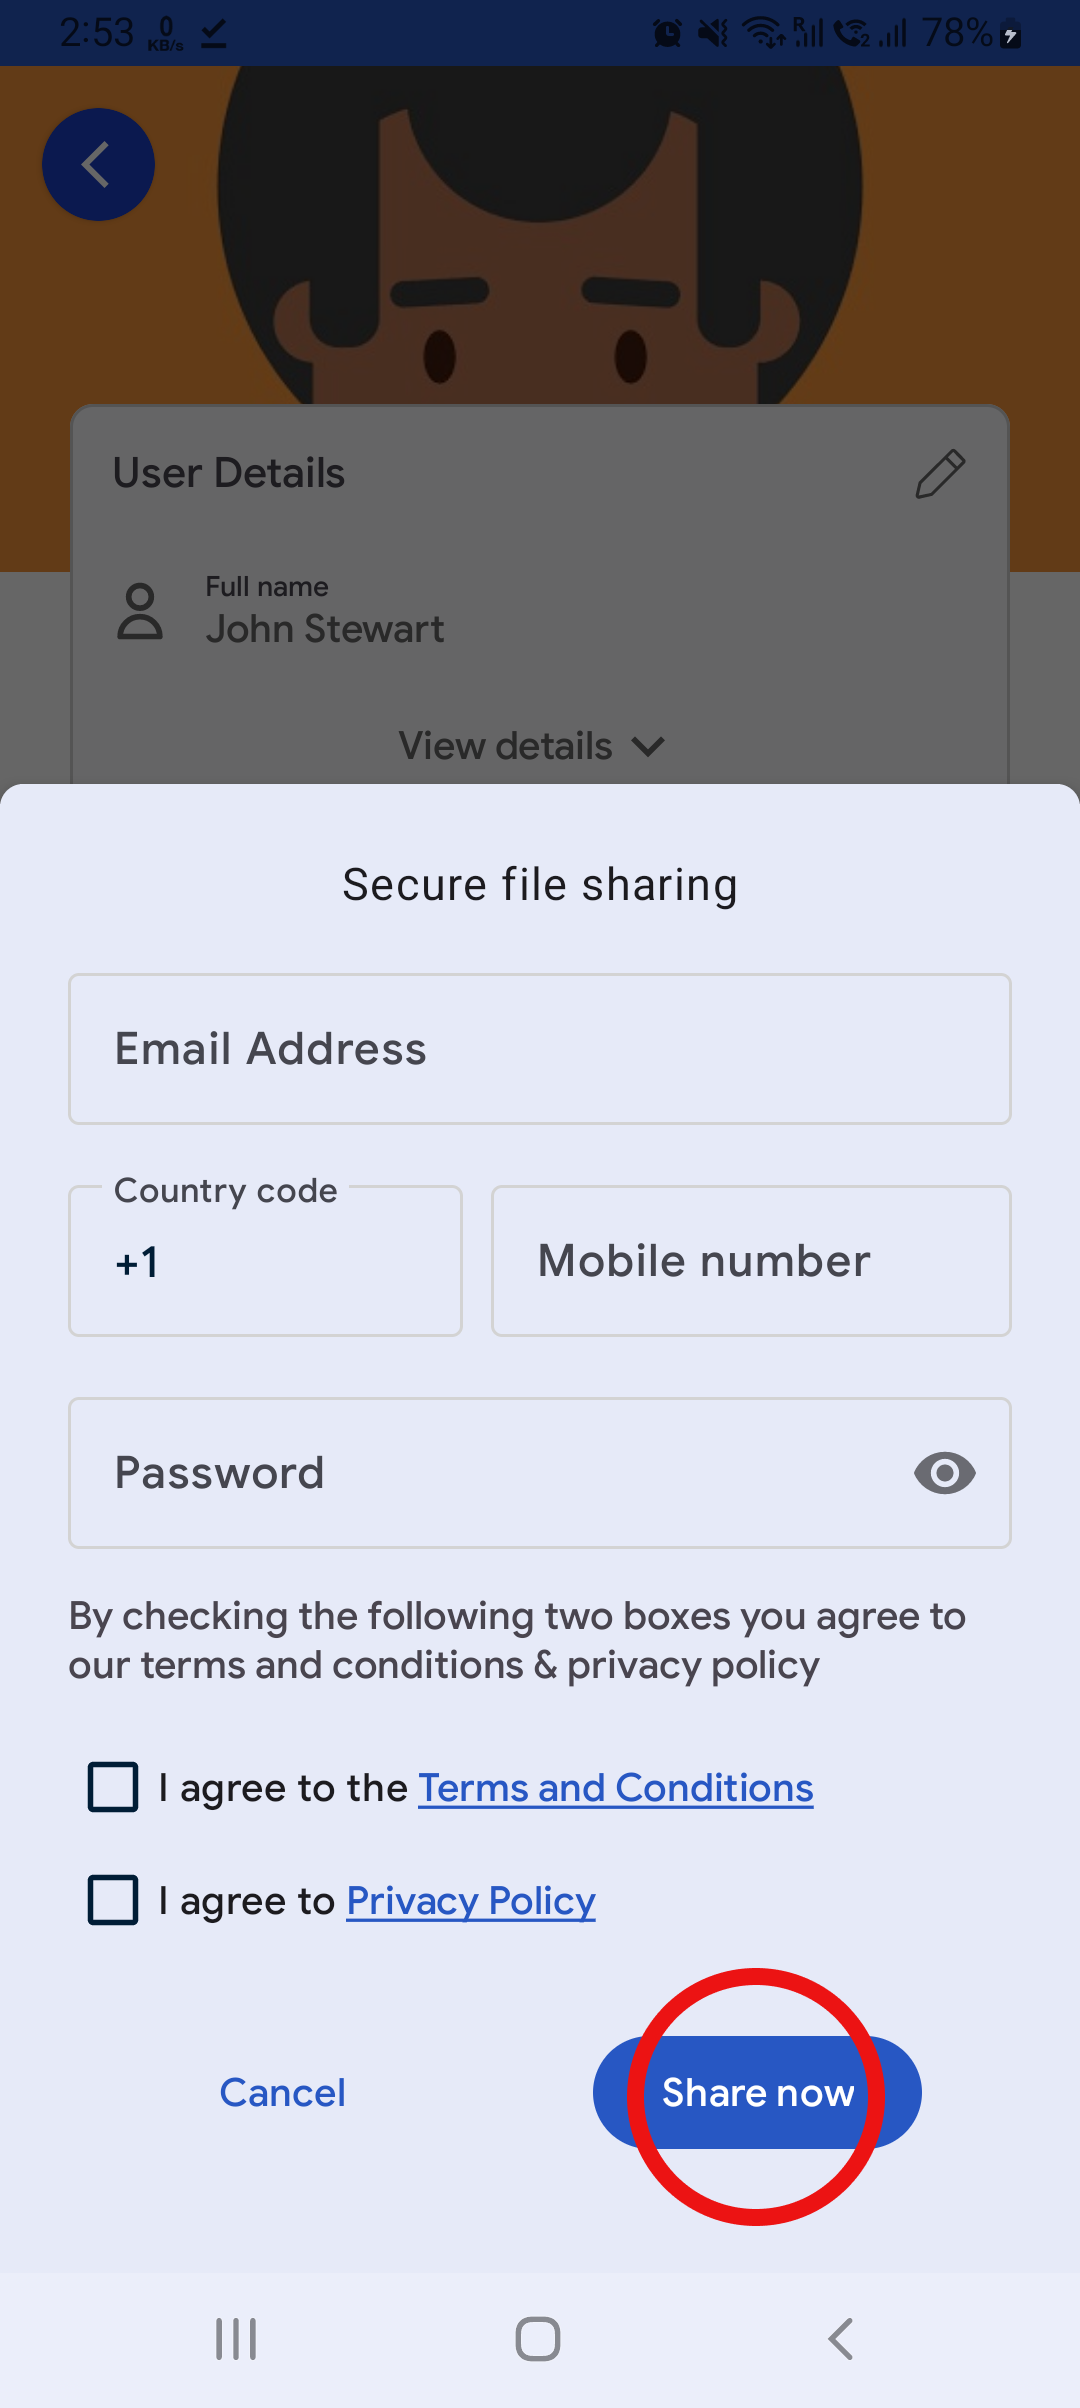
B: Click on the share button to open a pop-up window
C: Retype the password
D: Enter the email address or phone number of the recipient, or select a dentist from your list to share the image with
E: Agree to the Teledentistry consents and click send
F: The recipient will receive an email or text message with a link and secure password to view the file securely through our HIPAA-compliant platform.
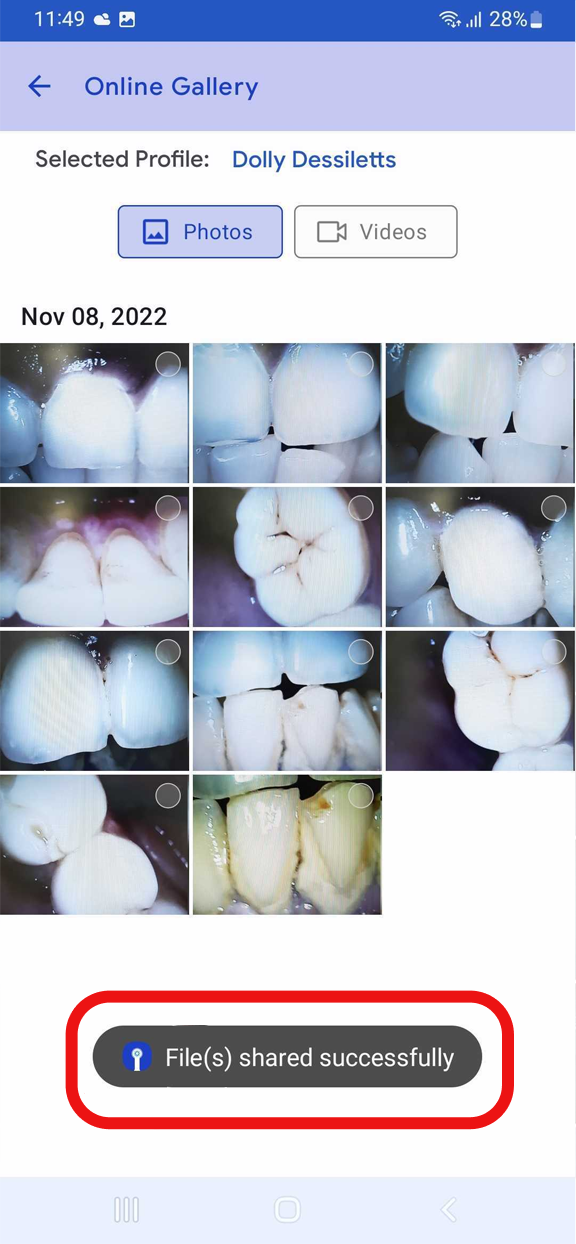
Step 2: Once the files have been successfully shared, you will receive the ‘File(s) shared successfully’ pop-up.
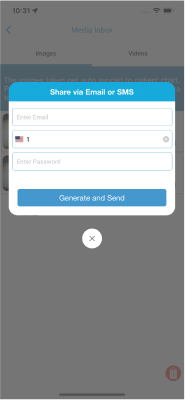
Set password
If you want to share your dental records with one of Dentulu's network of dentists, click on the "To Dentist" option. Enter a password that is at least six characters long and contains a mix of letters, numbers, and symbols. Then click "Generate and Send."
Dental & Professionals
Create new profile
Create a new account by providing your First name, Last name, Mobile Number, Email, Password, Gender, DOB
Connecting Your Wireless Camera
THINGS TO REMEMBER
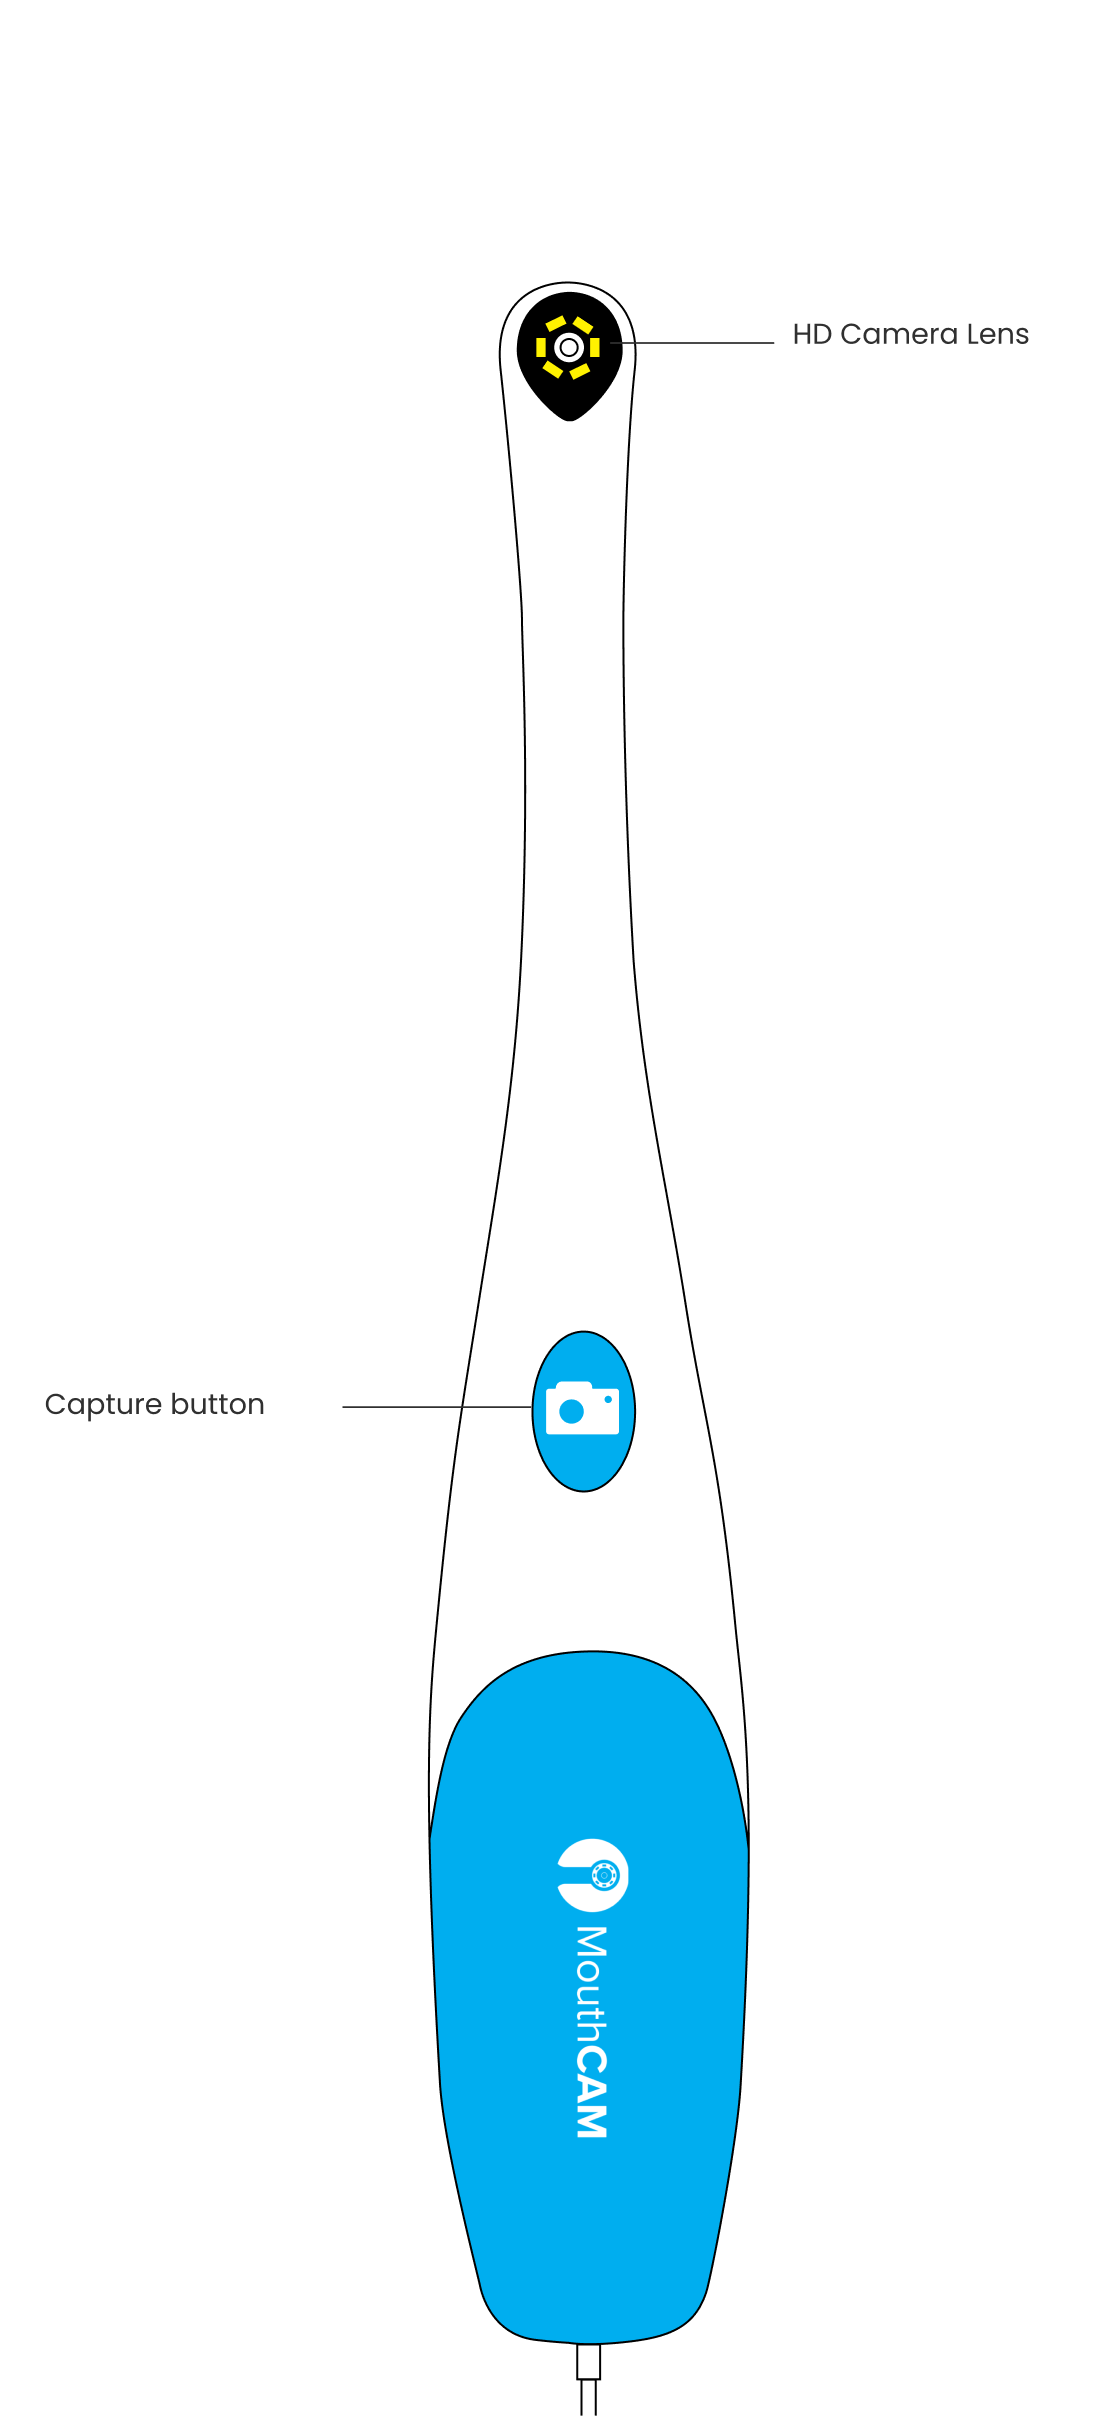
The device is equipped with three buttons:
- Top Button (Power): This is the power button. To switch on the device, press and hold this button. A single press will turn off the device.
- Center Button (Capture): This button is used for capturing images. Simply click it once to take a photo. Long press of the capture button for few seconds will enable the video recording.
- Bottom Button (Obsolete): The bottom button is no longer functional with the current device features. It will be removed in future updates.
Step 1: After clicking the capture button, you will be given the option to connect with the Wi-Fi camera. To do so, please switch on the intra-oral camera by pressing the button on the device as shown in the image. You will know the camera is on and ready to pair when you see a green light blinking.
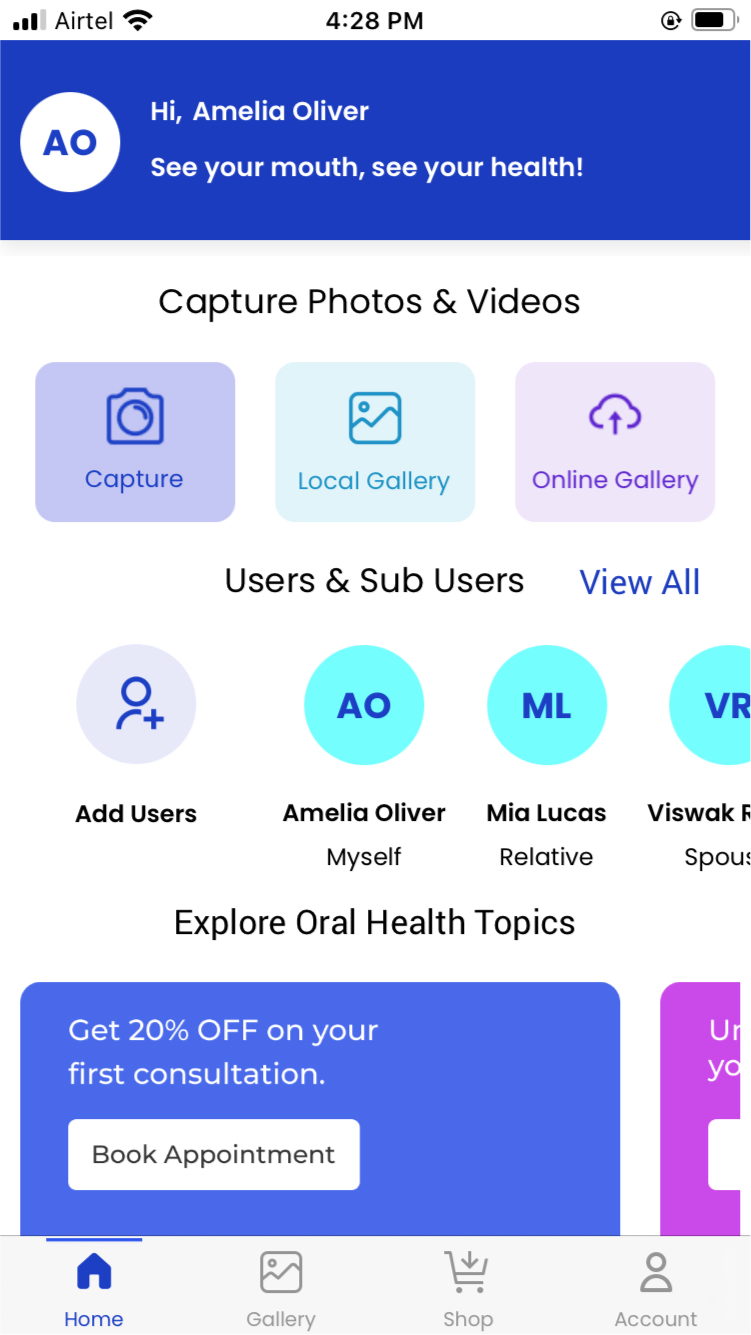
Step 2: Choose or create a user profile to save captured images and videos under a particular user profile.
Please follow on screen instructions to create a user profile.
Once you select the profile it will redirect you to the connection screen.

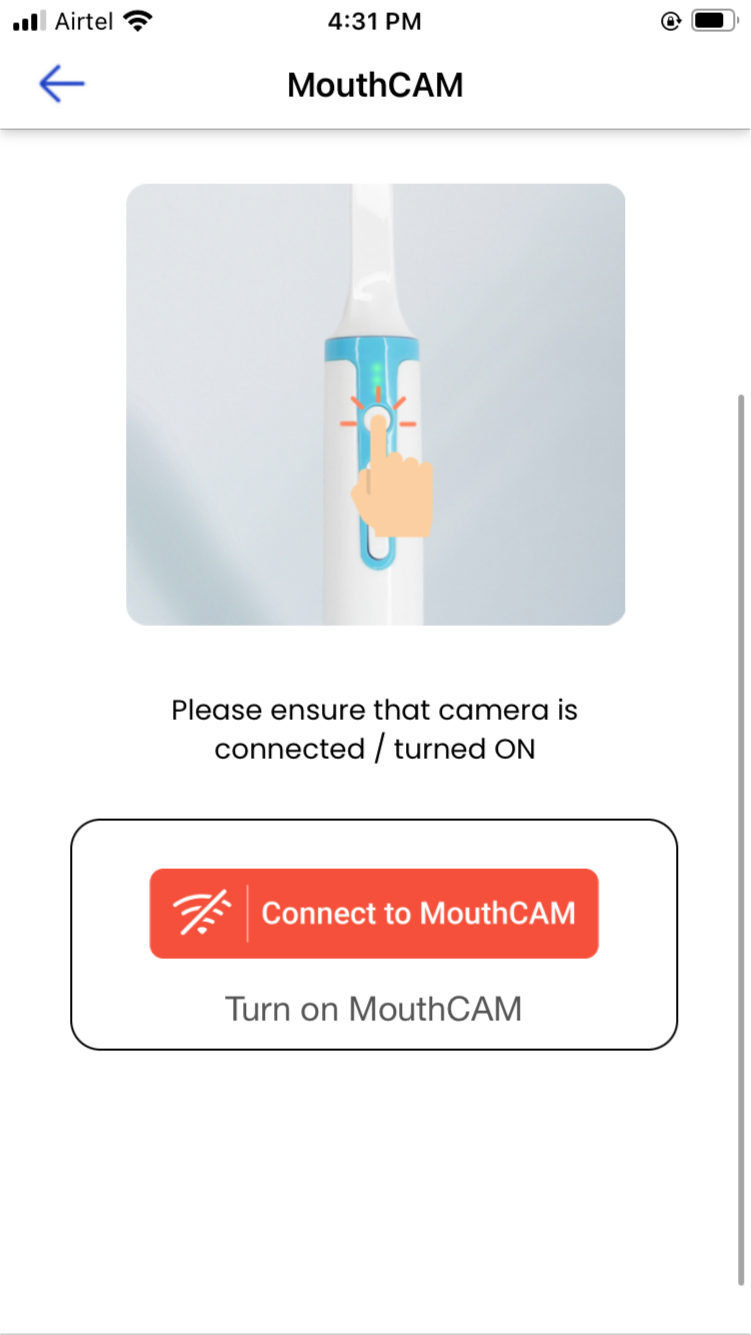
Step 3: Once you have selected the user profile, you will be redirected to the MouthCAM connecting screen as show in the image below. Click on the "Connect to MouthCAM" Button and wait for few seconds. It will ask for your permission to connect with MouthCAM.
There will be two different types of options show to you on screen. Either DTWiFi_234234 (some random numbers) or MouthCAM 2. You can select any one of them and wait for few seconds.
The device will automatically connect with your device. Please note that the internet on your phone may be temporarily unavailable while you are using MouthCAM wireless device.
Step 4: After connecting the device, the ‘Wireless Camera’ option will be available on the list, please grant all required permissions on your phone. Upon your first successful connection with MouthCAM, you will receive the following message. Ensure you allow this to enable a successful connection with MouthCAM.
"MouthCAM would like to find and connect to devices on your local network"
Click on Start Camera button to start capturing the images and videos.
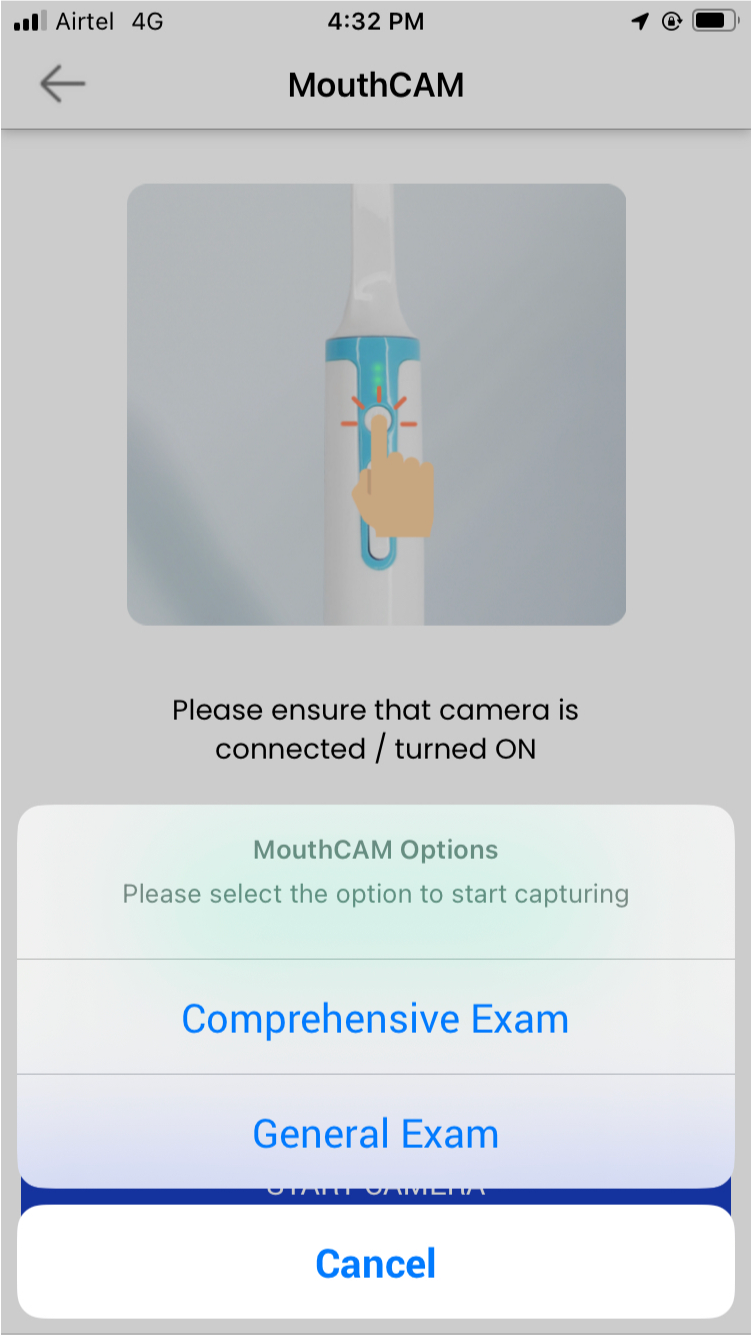
Step 5: As soon as you click on start camera it will ask you for two types of examination you can do. One is comprehensive examination or general examination.
Please select your choice and continue by following onscreen instructions to capture images successfully.
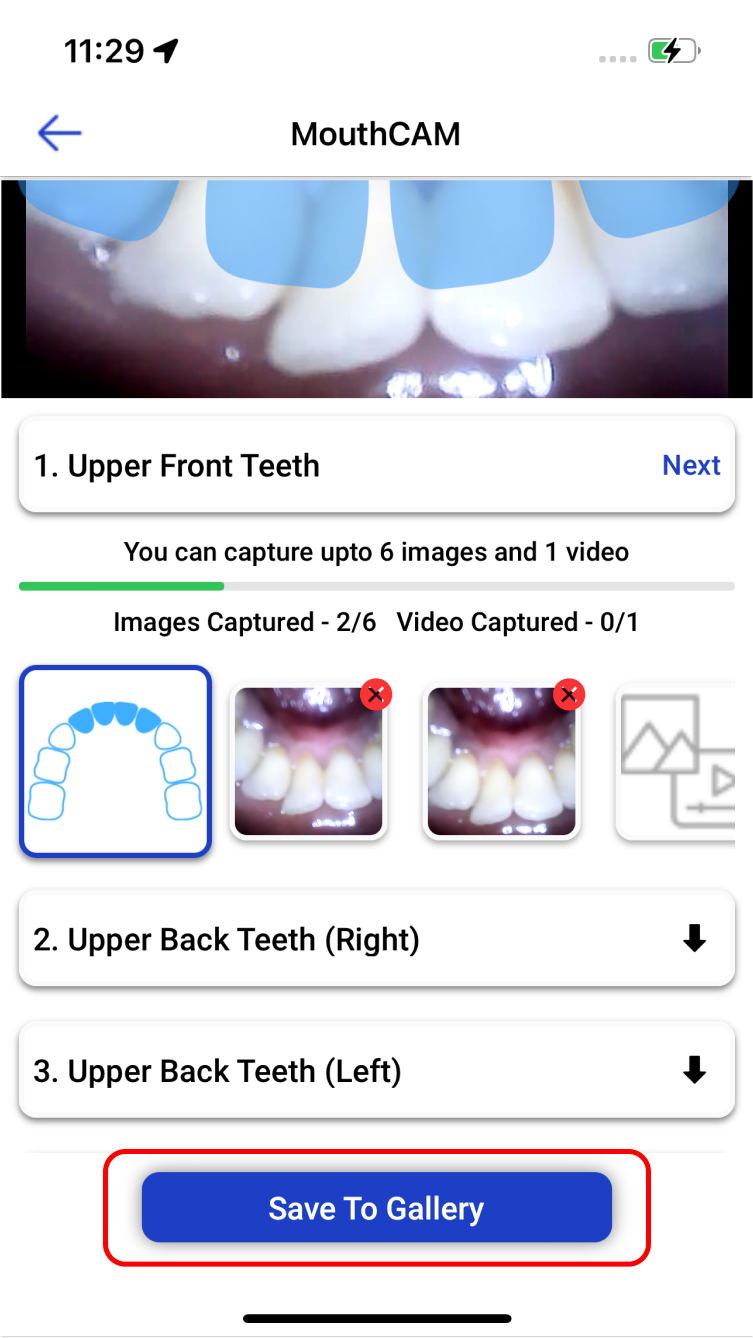
Step 6: All captured images will be saved directly to your device. The next set of instructions will guide you on how to sync these images securely to our HIPAA-compliant cloud storage and safely share them with your dental provider.

Ready to use your camera
There are three buttons at the bottom of the preview page: The first button (1) will take photos on every click. The second button (2) will record up to two minutes of video and audio. The third button (3) will take you to the gallery view to preview the captured images and videos.
Taking and Deleting Pictures
Click the capture button to start taking pictures. You can preview or delete any pictures by clicking the delete button on the bottom right corner of each image.
Viewing Images in Your Gallery
To view the images and videos you have captured, click on the gallery button.
Syncing Your Gallery
Note: To ensure that you are never at risk of losing your images or videos, Dentulu has enabled a feature that allows you to sync your content to your cloud!
Step 1: Enter the Local gallery in the dashboard
Step 2: Tap the ‘Sync now’ button in the dialogue box to sync all your images and videos to cloud storage.
Step 3: You can tap ‘Skip for now’ if you wish not to sync your images and/or videos at this time.
Step 4: Once you click on the sync button your images and videos will start syncing and it will show ‘Syncing in progress'.
Step 5: Once you sync the items you will get the “The gallery is empty” message in the Local gallery.
Tips: You can also sync the gallery by tapping on ‘All’ on the ‘Selected profile’ available on the Local gallery.
Step 6: Before syncing, you can delete any unwanted images or videos by long pressing to select the image or video and selecting the delete option.
Step 7: If you want to deselect an image or video, you can tap on the ‘Clear’ button.
Step 8: Tap on the online gallery to see the images and videos reflected from the Local Gallery.
Image Management Options
You have the option to perform various actions on multiple selected images, including copying, deleting, moving, sharing, adding to favorites, and downloading.
We have provided multiple actions at the bottom of each image you capture:
Add to Favorites: Keep all of your favorite or most important images easy to locate by adding to your favorites.
Share: Allows you to securely share your image through our HIPAA compliant platform with your dentist or anyone else you choose.
Download: You can download a copy of the images for your reference.
Delete: You can choose to delete select image or images.
Edit: We have provided basic editing tools to ensure you can make markings on the images.
Details: Provides you with details of the images when you open it, which you may tag and write notes for future references.
Sharing Images Securely
Step 1: Enter into the ‘Online gallery’ to access the images and/or videos on the cloud storage.
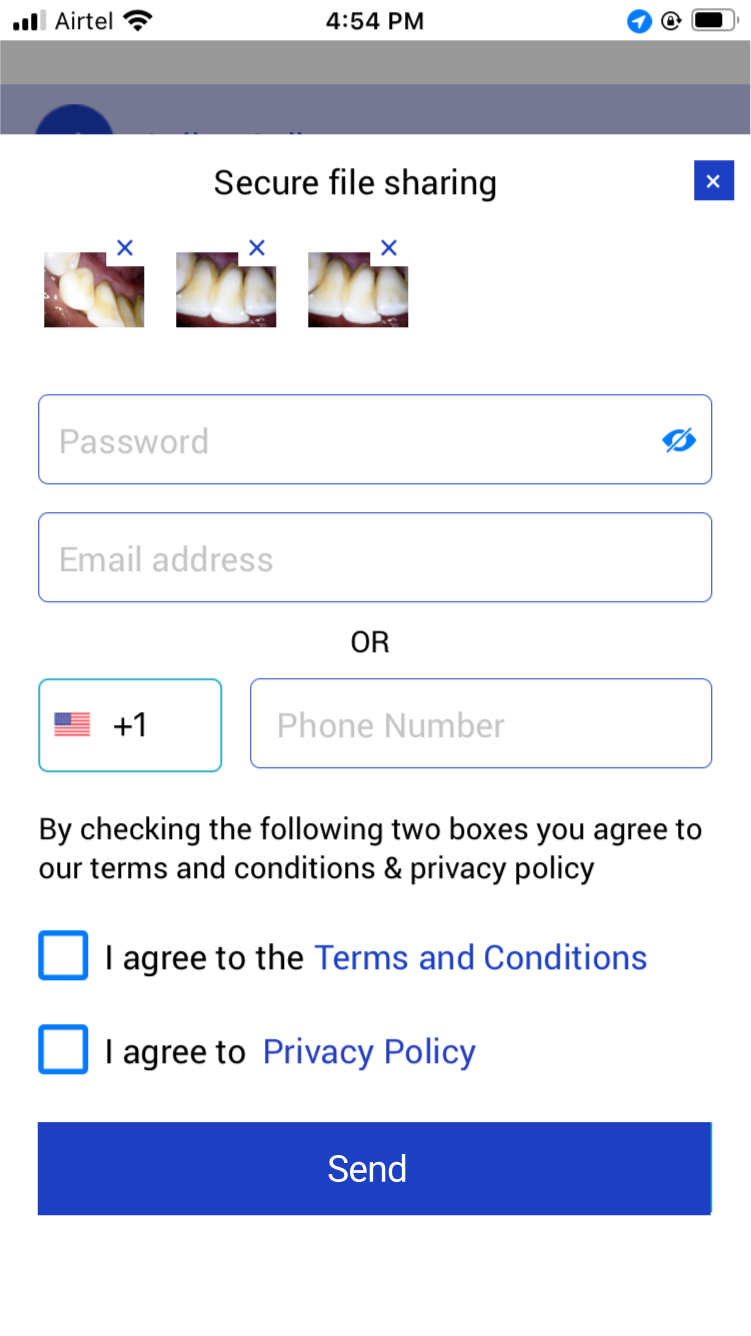
A: Select an image first
B: Click on the share button to open a pop-up window
C: Retype the password
D: Enter the email address or phone number of the recipient, or select a dentist from your list to share the image with
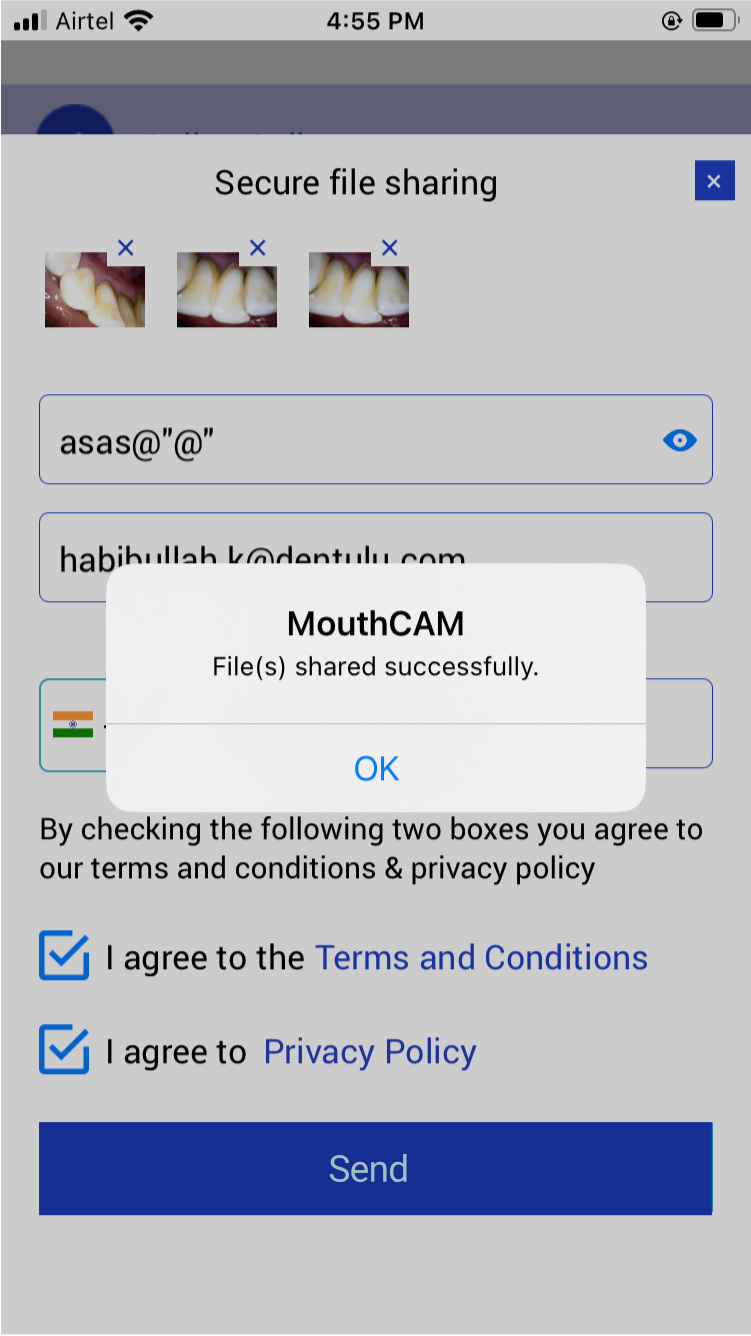
E: Agree to the Teledentistry consents and click send
F: The recipient will receive an email or text message with a link and secure password to view the file securely through our HIPAA-compliant platform.
Step 2: Once the files have been successfully shared, you will receive the ‘File(s) shared successfully’ pop-up.
Set password
If you want to share your dental records with one of Dentulu's network of dentists, click on the "To Dentist" option. Enter a password that is at least six characters long and contains a mix of letters, numbers, and symbols. Then click "Generate and Send."
 Wireless
  USB
USB 
Create Profile
Create a new account by providing your First name, Last name, Mobile Number, Email, Password, Gender, DOB
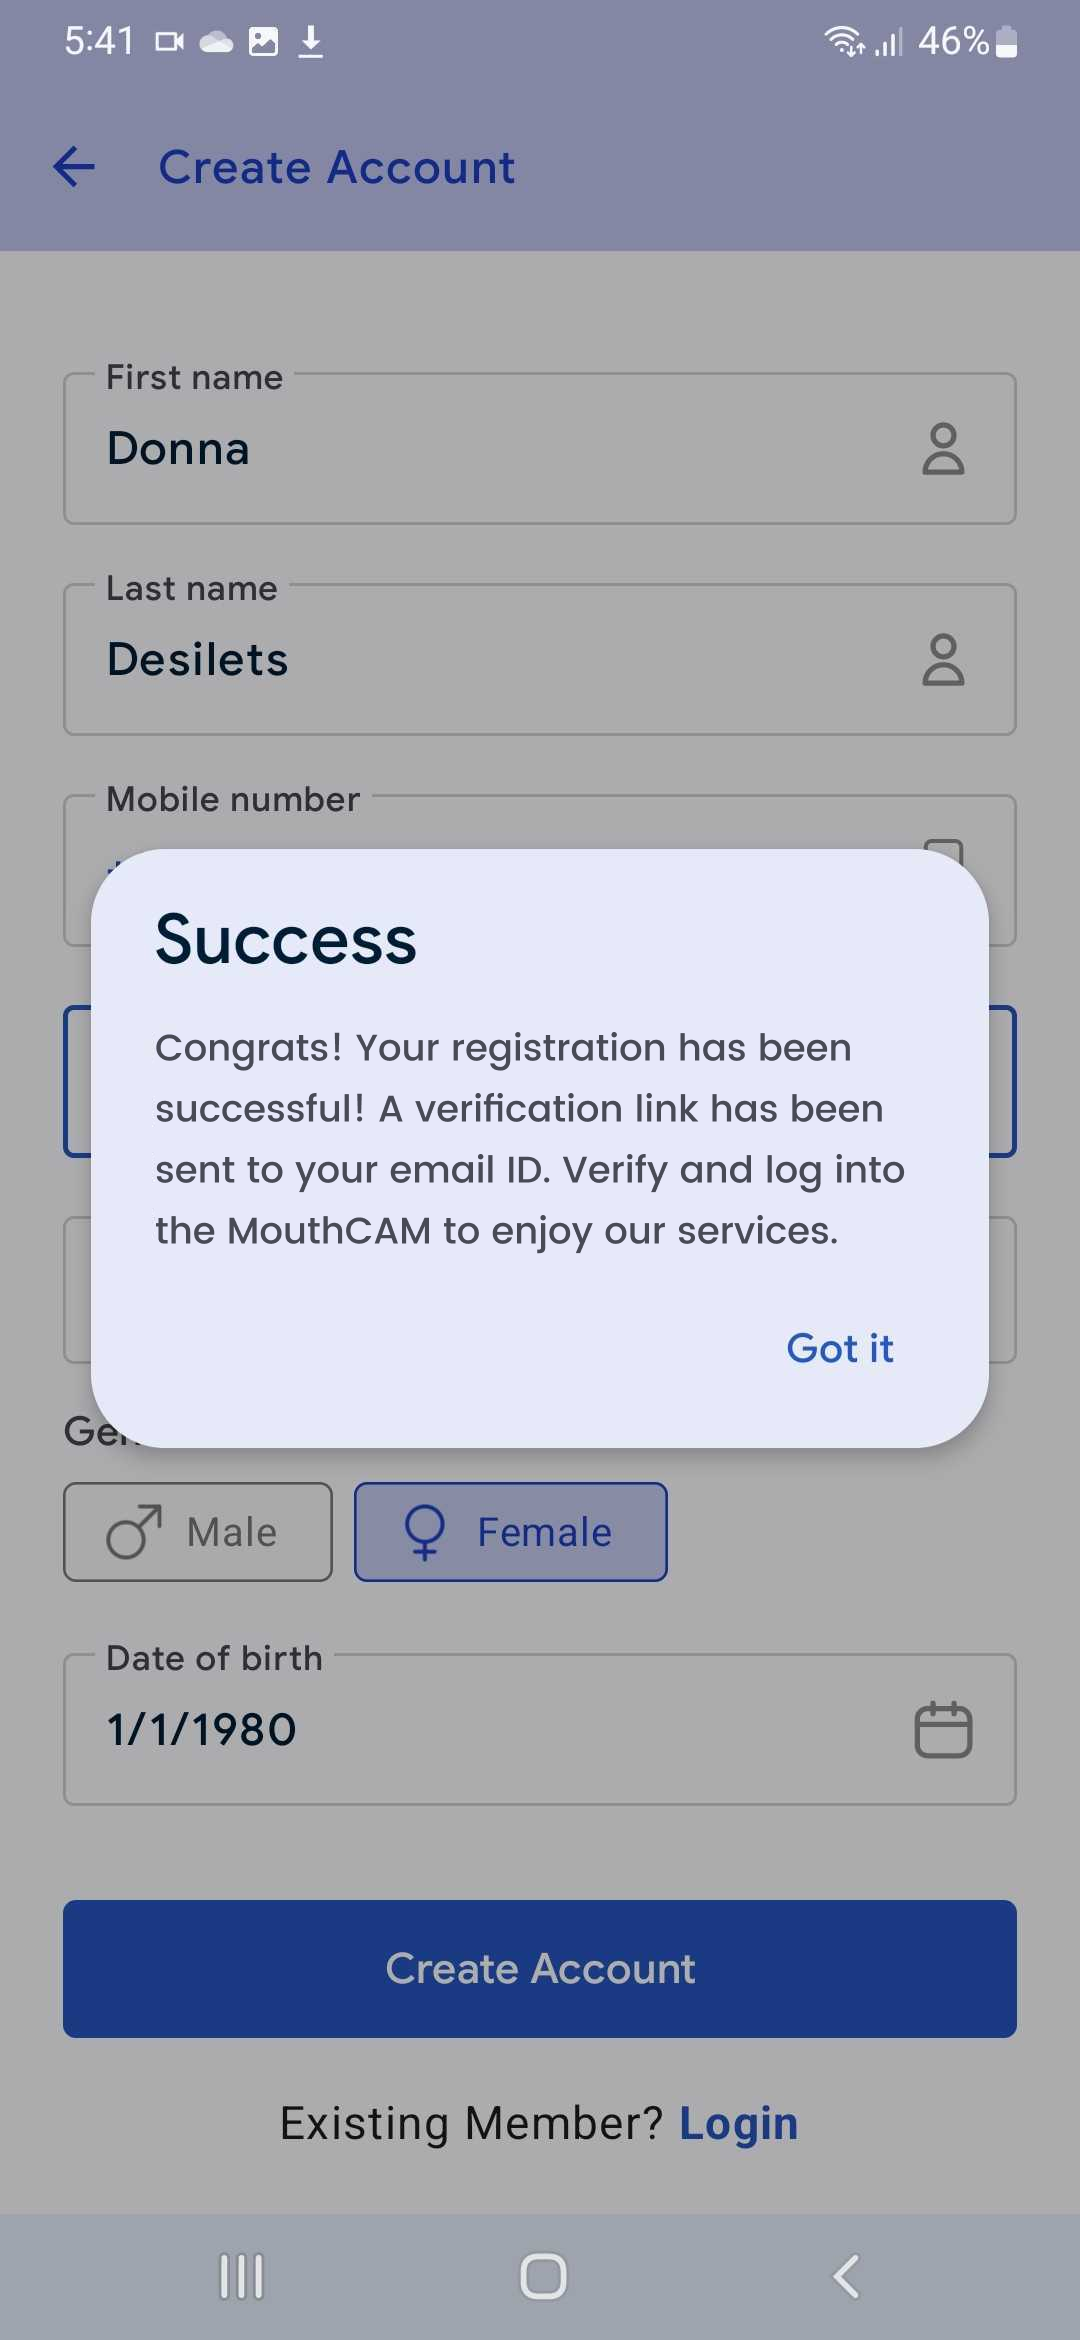
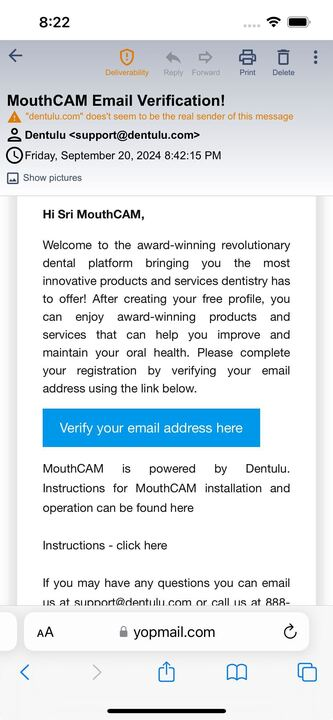
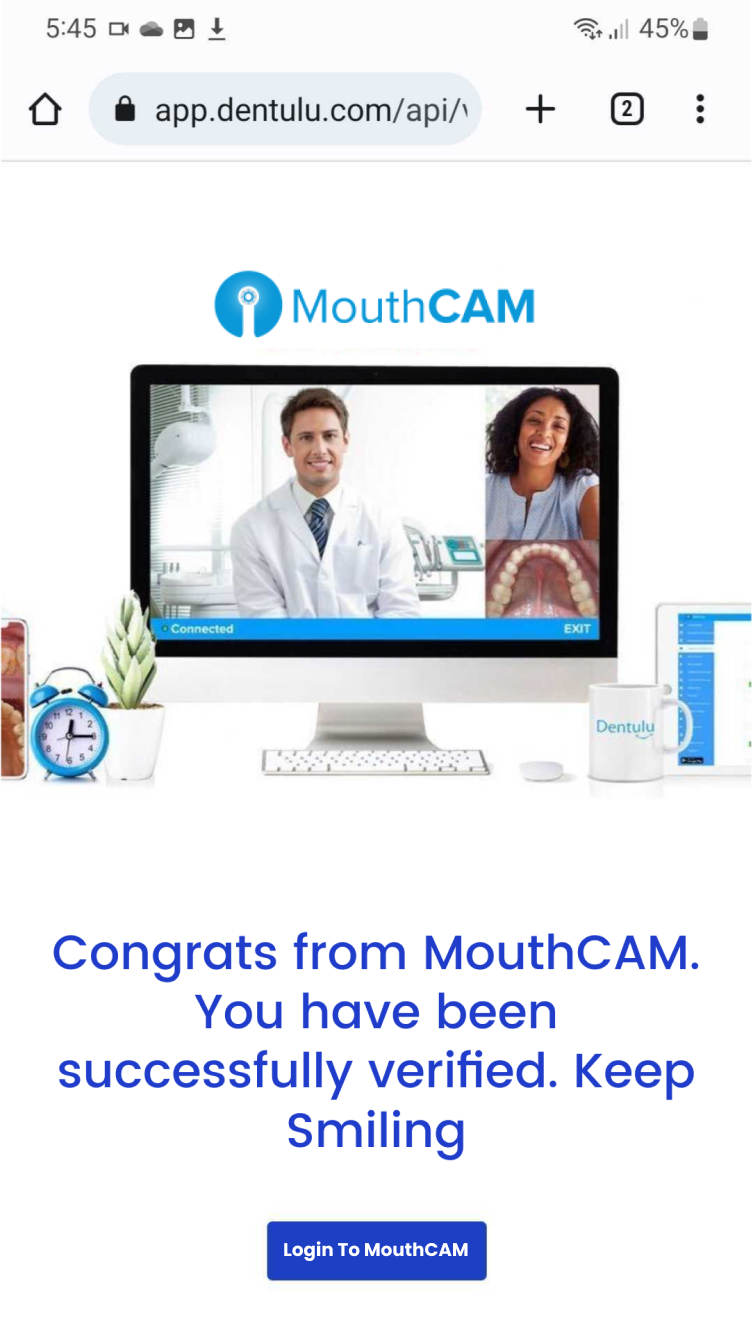
Verify Your Email Address
Check your email inbox to find the verification email with the activation link. Click the activation link to verify your email
Once you clicked on the link, it will redirect you to the Play Store or App Store
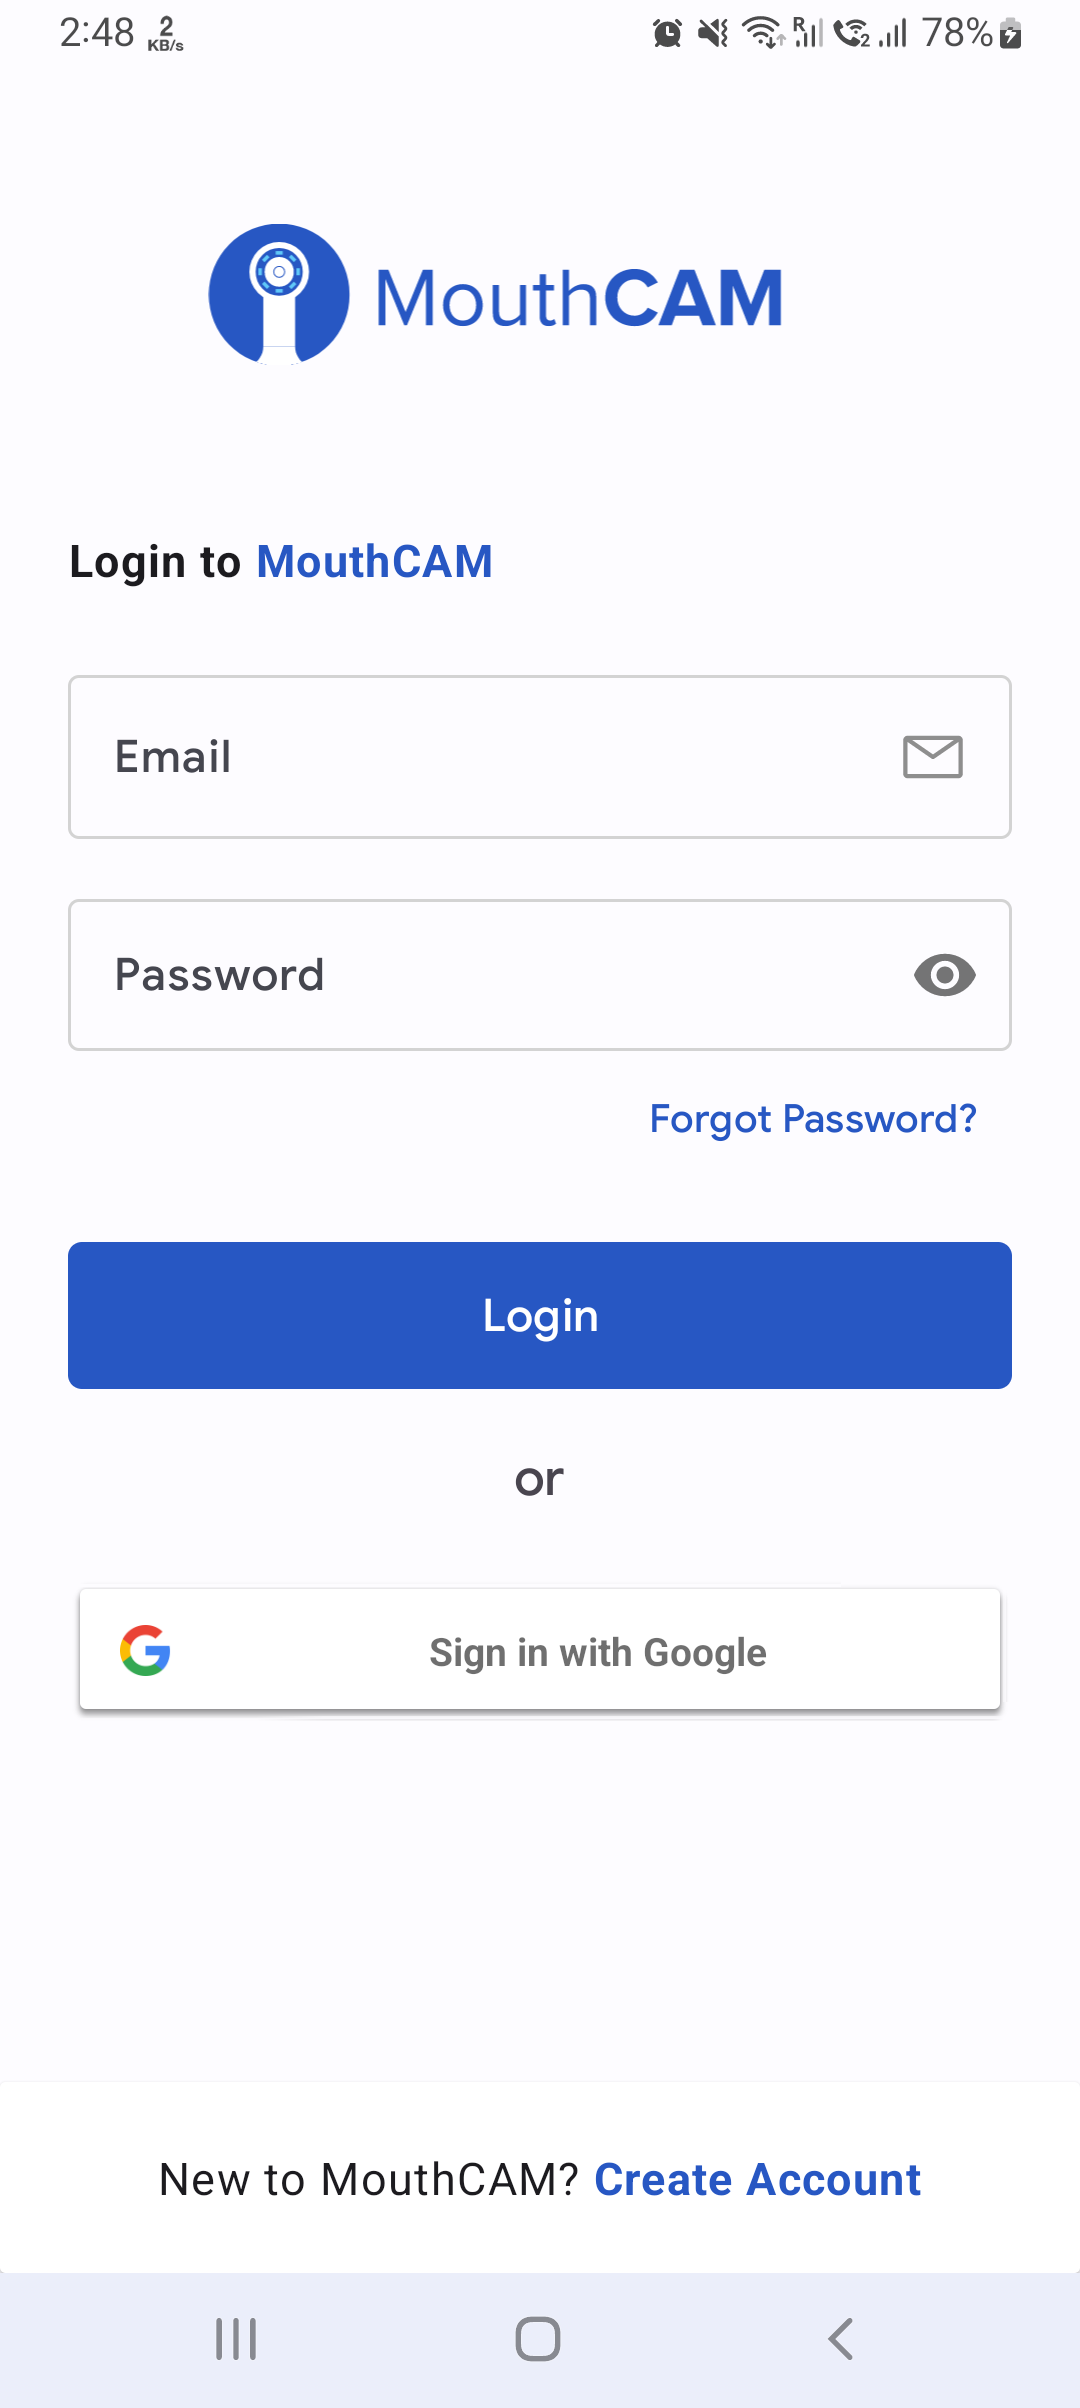
Login to Your Account
Use the registered email and password to log in
Connecting Your Wireless Camera
Step 1: After clicking the capture button, you will be given the option to connect with the Wi-Fi camera. To do so, please switch on the intra-oral camera by pressing the button on the device as shown in the image. You will know the camera is on and ready to pair when you see a green light blinking.
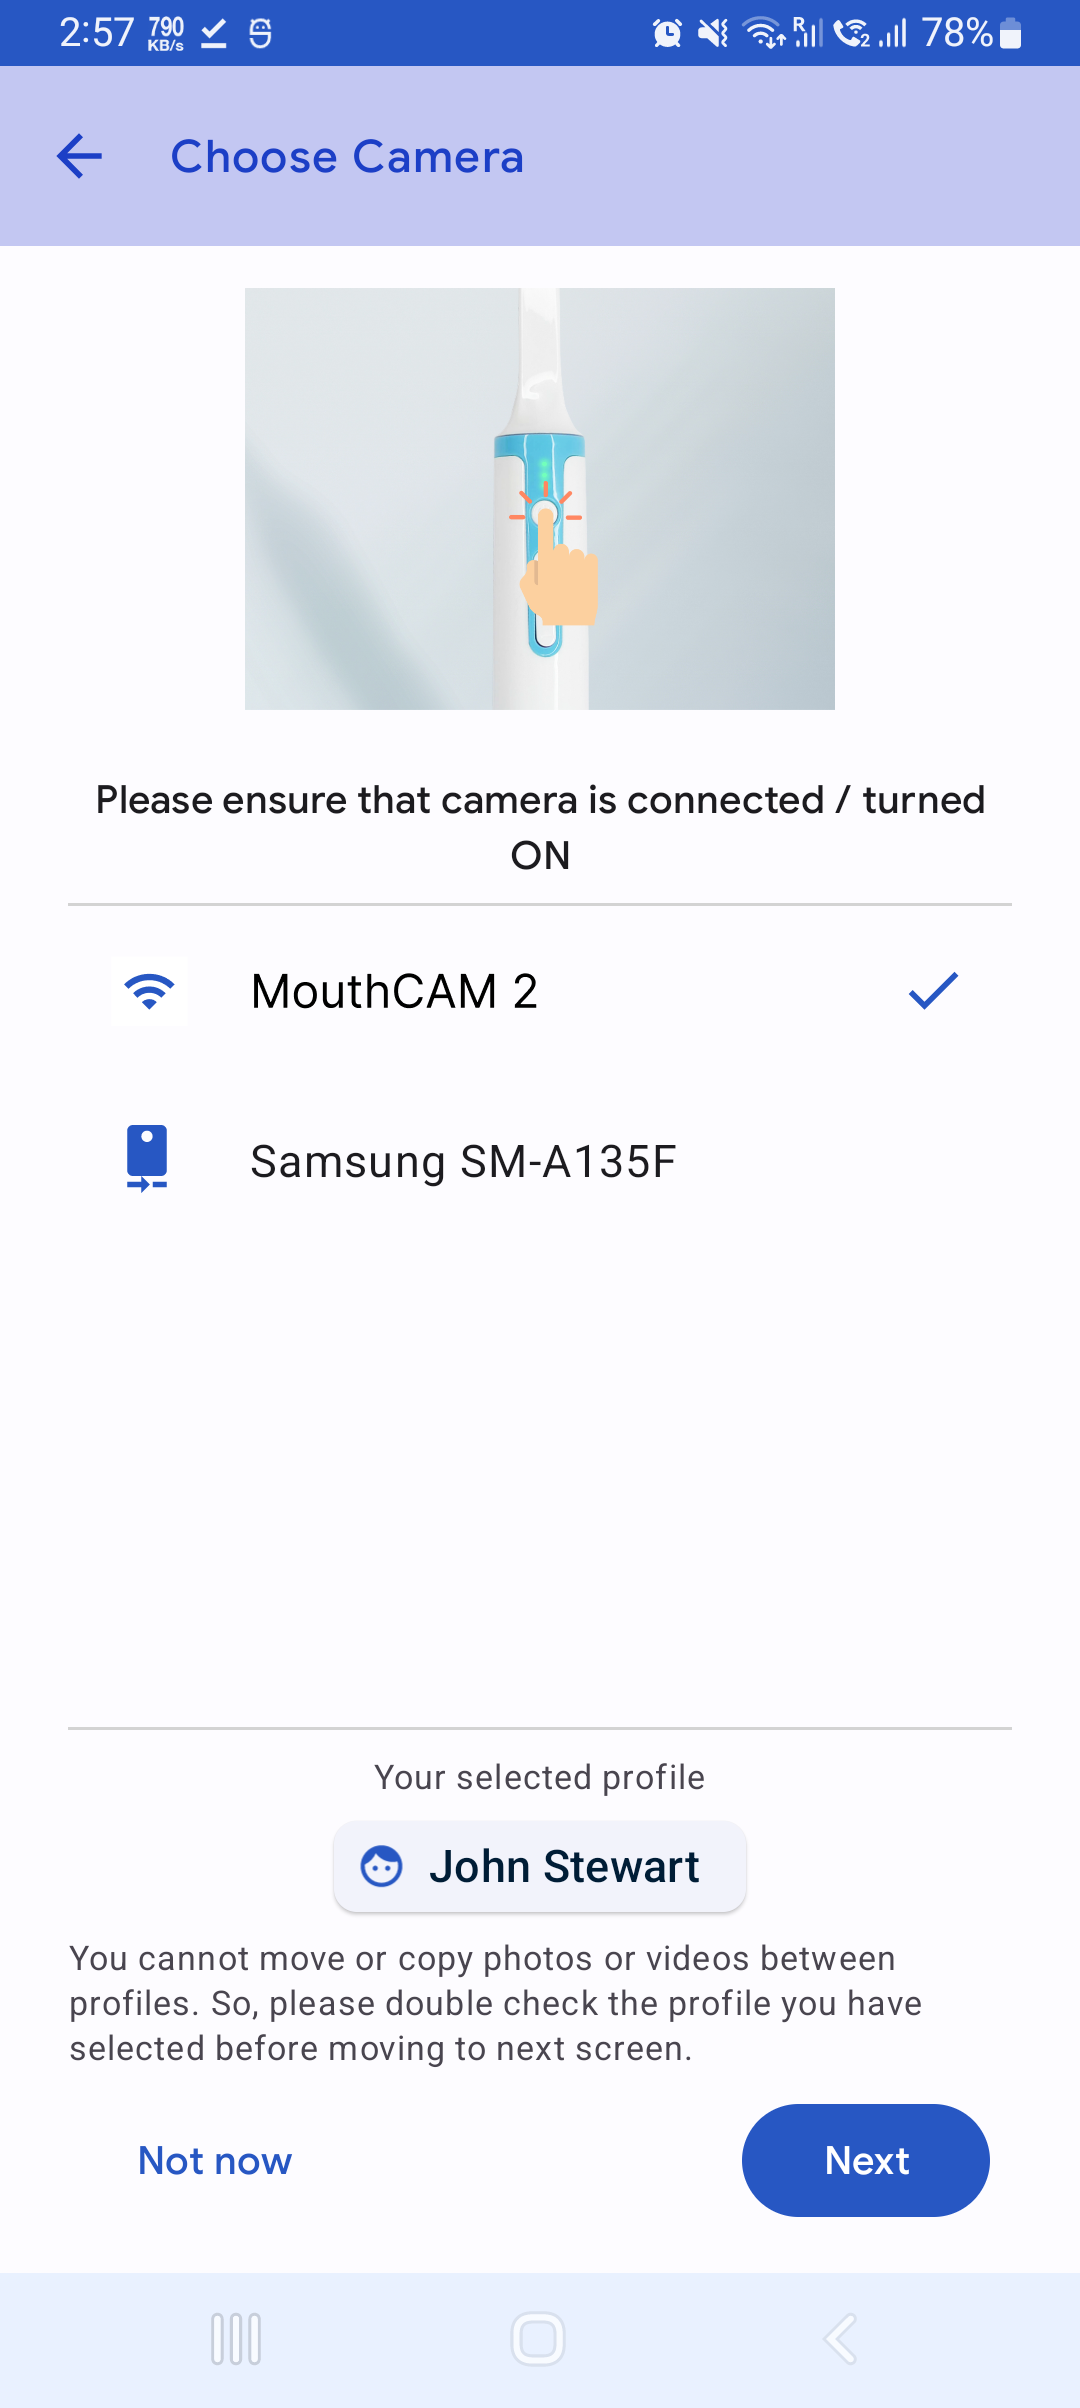
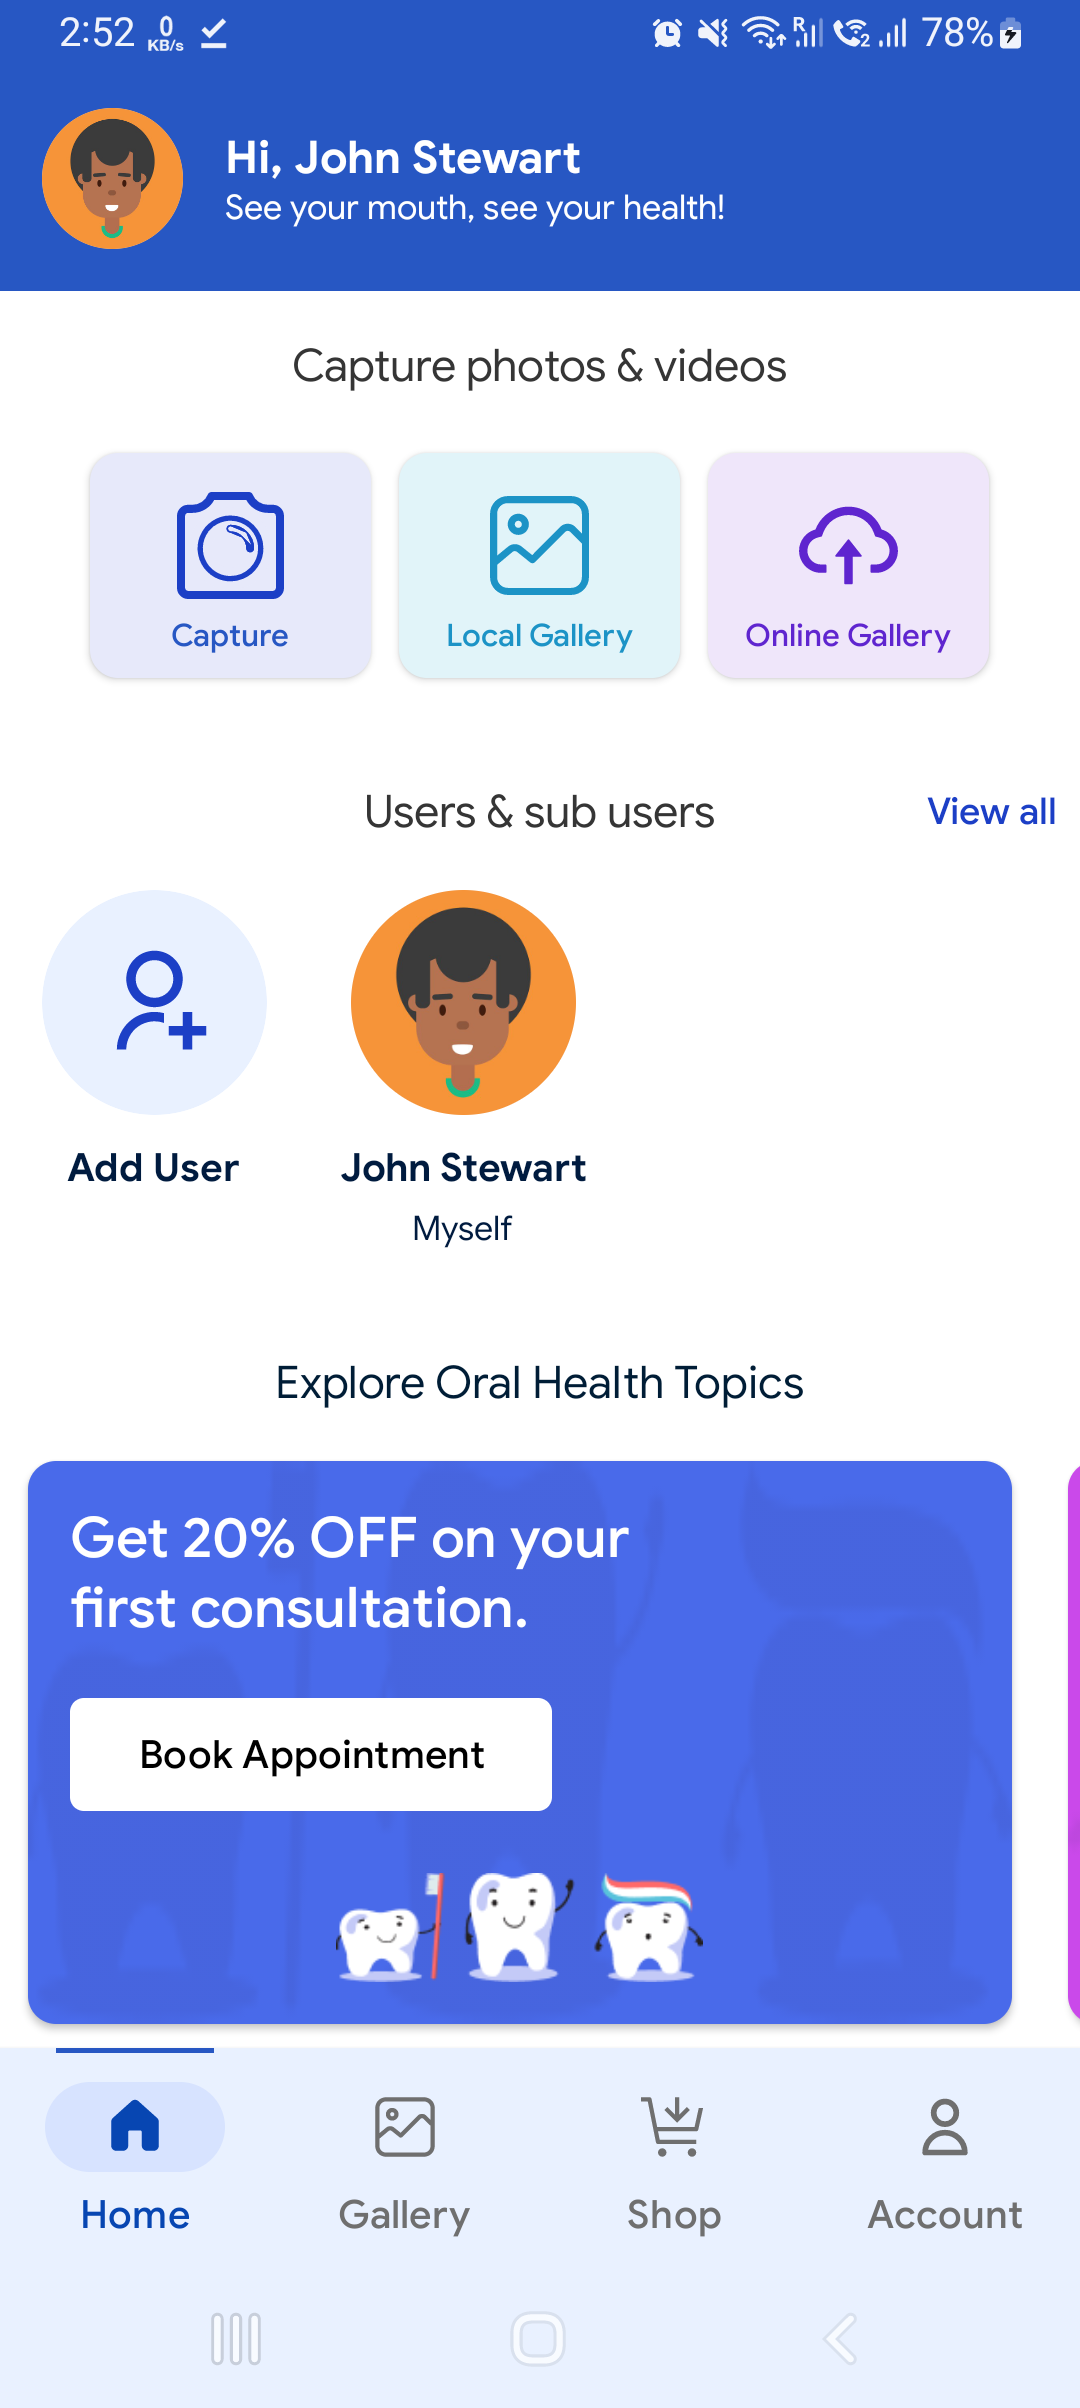
Step 2: Choose a user profile to enable the image/ video recording to save captured images/ videos under the particular user profile
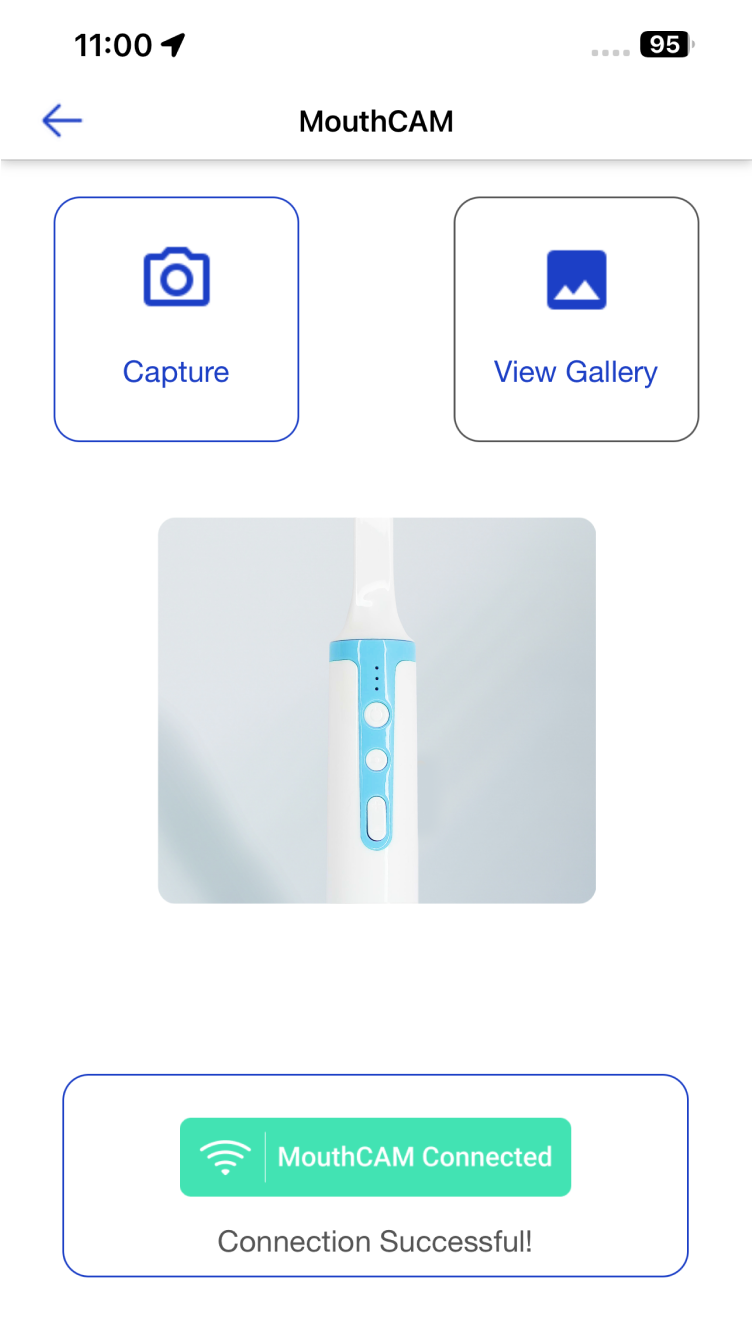
Step 3: Make sure MouthCAM is connected by checking the device lights
Step 4: After connecting the device, the ‘Wireless Camera’ option will be available on the list
Step 5: Click on ‘Next’ to begin capturing images or videos.
Tips: You can also use the button on the MouthCAM device for capturing. A single press will capture an image, while a double press will start or stop video recording.
Step 6: You can find all the captured images and videos here at the Local Gallery. Here, you can view or delete the unwanted images and videos.
Syncing Your Gallery
Step 1: Navigate to the "Local Gallery" section on the dashboard.
Step 2: Tap the ‘Sync now’ in the dialogue box to sync all your images/ videos to cloud storage
Step 3: You can tap ‘Skip for now' if you wish not to sync images/ videos
Step 4: Once you click on the sync button the images and/or videos will start syncing. It will show "Syncing in Progress."

Step 5: Once you sync the items you will get the “The gallery is empty” message in the Local gallery.
Tips: You can also sync the gallery by tapping on ‘All’ on the ‘Selected profile’ available on the Local gallery.
Step 6: Before syncing, you can delete any unwanted images or videos by long pressing to select the image or video you do not need.
Step 7: If you want to deselect images or videos, tap on the ‘Clear’ button.
Step 8: Tap on the online gallery to check the images or videos reflected from the Local Gallery.
Sharing Images Securely
A: Select an image first
B: Click on the share button to open a pop-up window (as show in Image 22)
C: Create a secure password (as shown in Image 22)
D: Retype the password
E: Enter the email address or phone number of the recipient, or select a dentist from your list to share the image with
F: Agree to the Teledentistry consents and click send
G: The recipient will receive an email or text message with a link and secure password to view the file securely through our HIPAA-compliant platform
Editing User Details
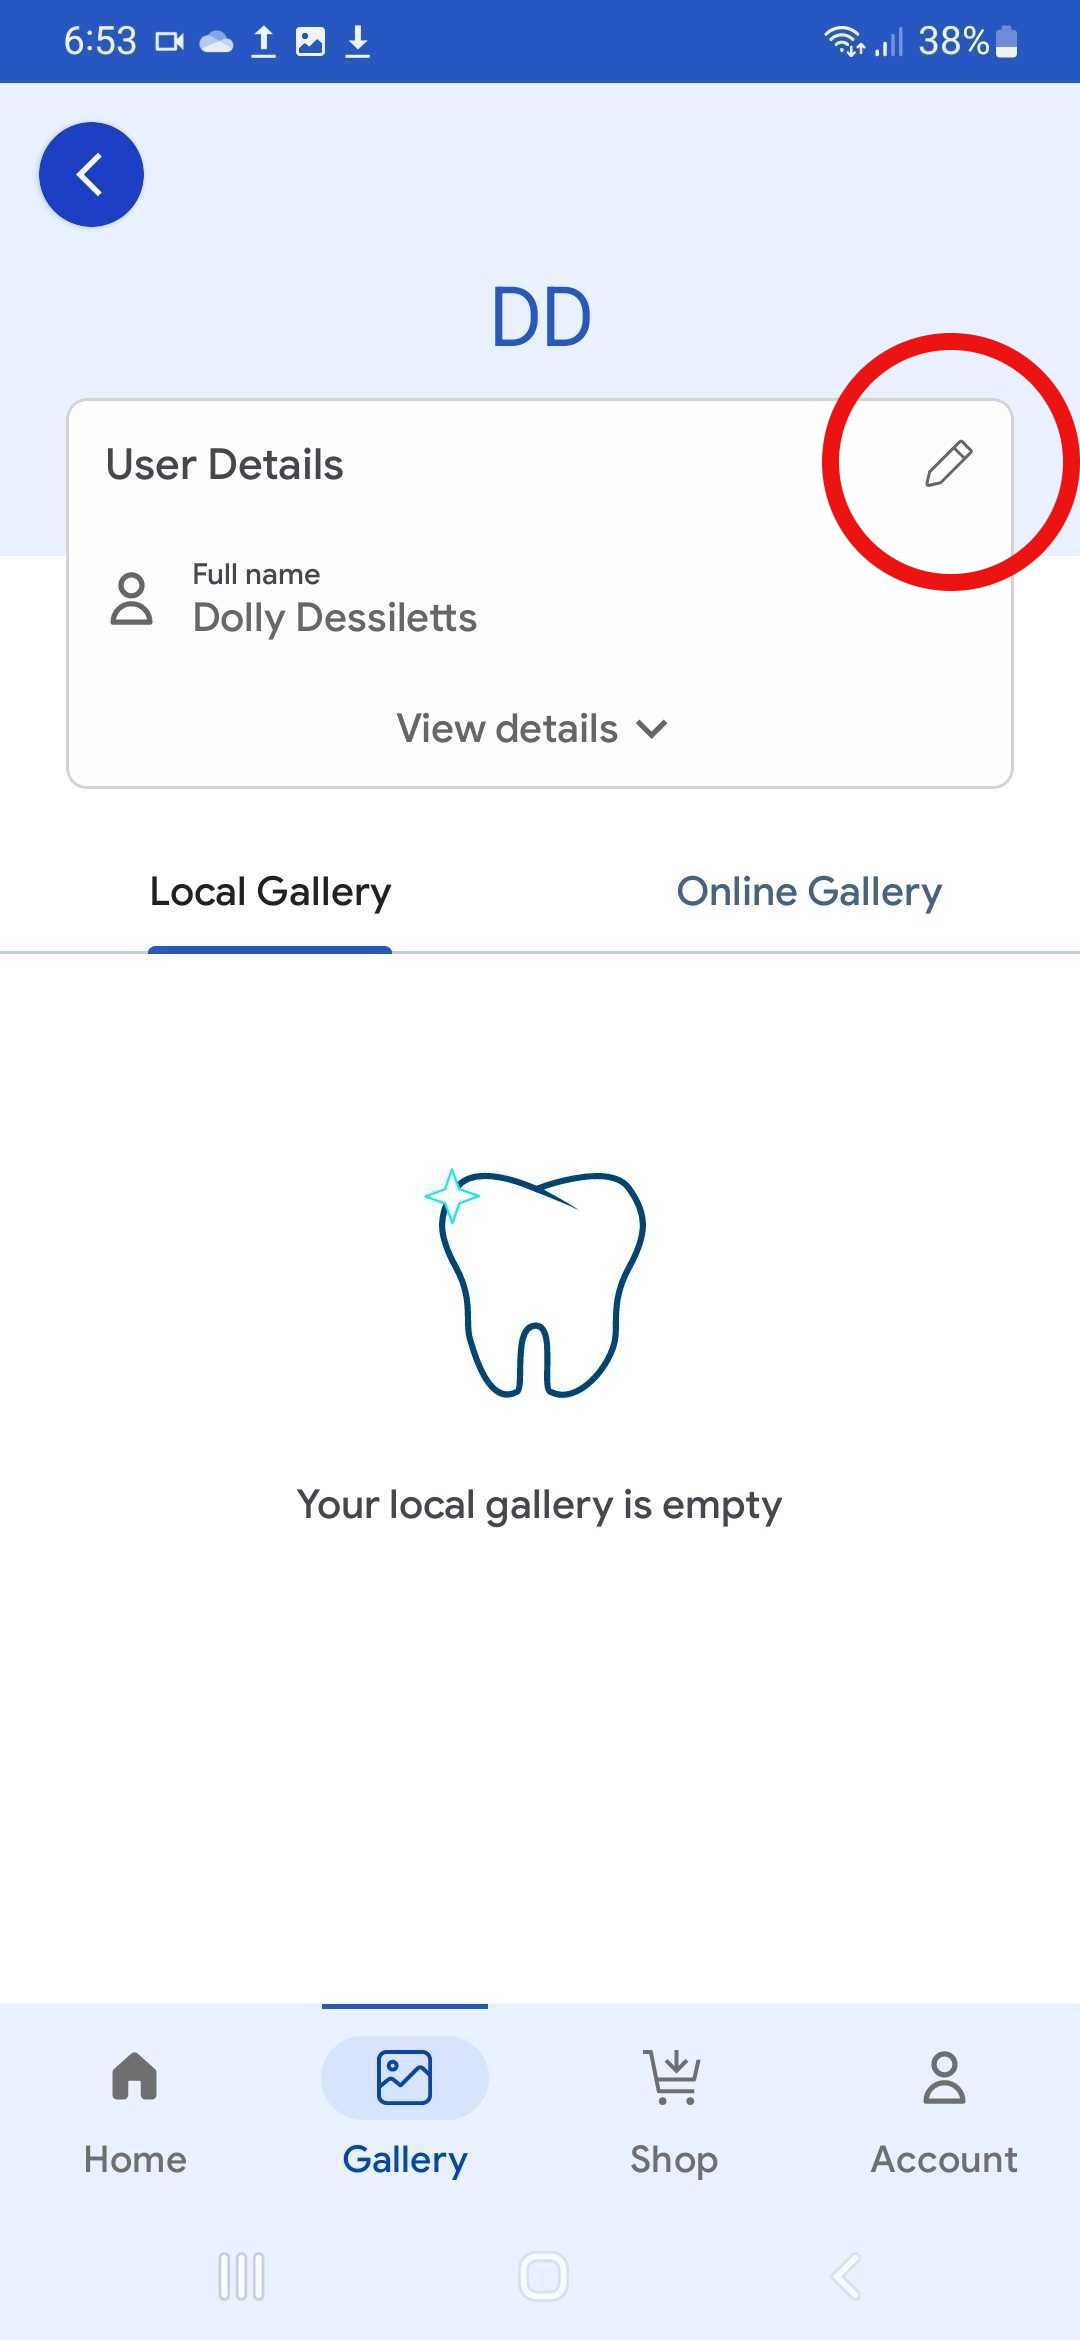
Step 1: The user details section displays the name, date of birth, email, mobile number, and gender. If you are viewing other profiles, you will also see the user's relationship with you.
Step 2: Click on "View Details" to access the full user details.

Step 3: Use the "Edit" option to modify the details. (Tip: Sub-users cannot change the email address; only the main user has full editing capabilities.)
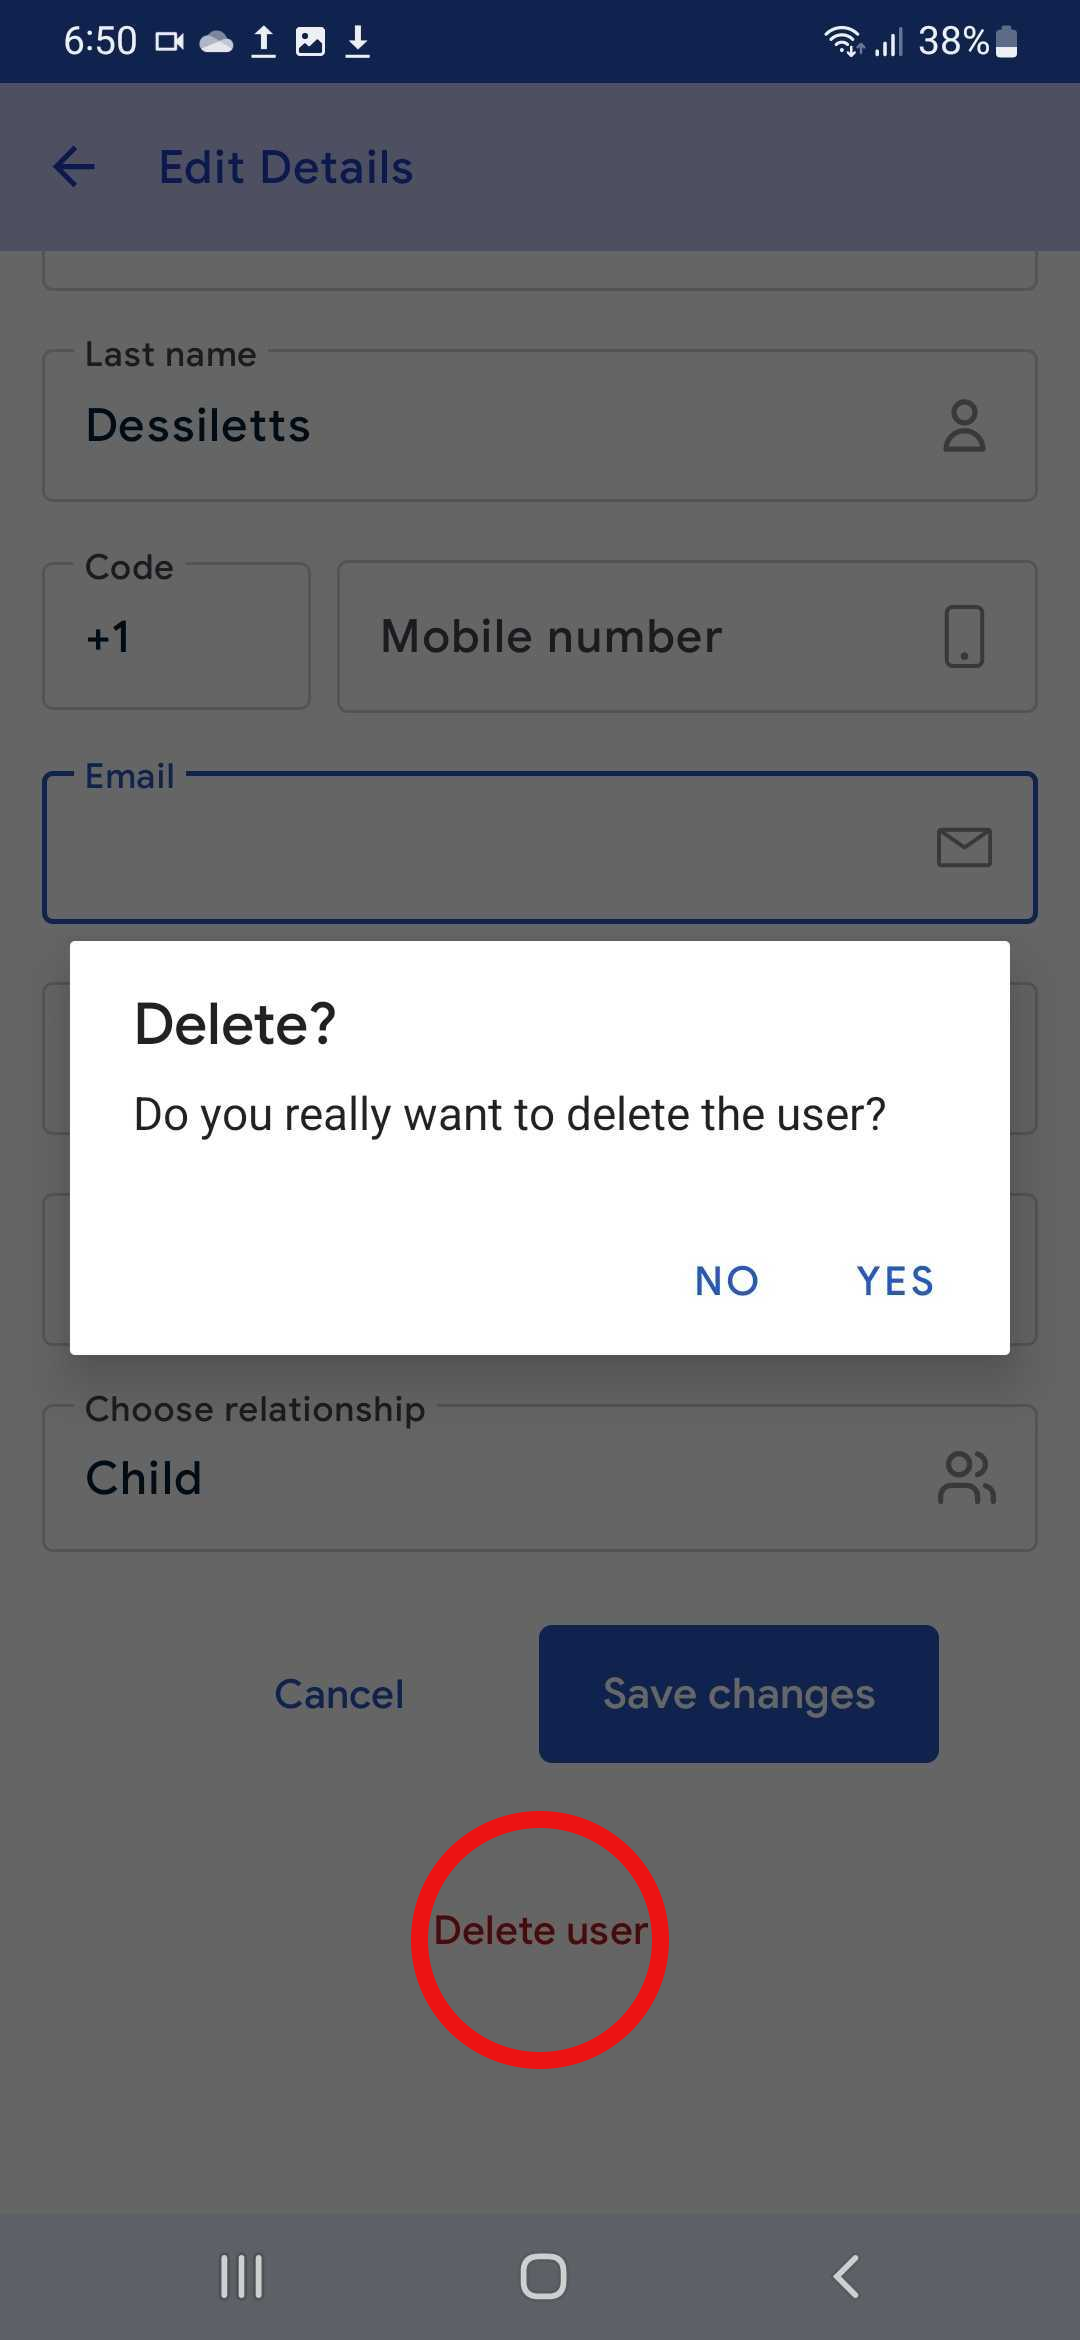
Step 4: To delete a user, tap on the "Delete User" button.
Dental & Professionals
Create Profile
Create a new account by providing your First name, Last name, Mobile Number, Email, Password, Gender, DOB
Verify Your Email Address
Check your email inbox to find the verification email with the activation link. Click the activation link to verify your email
Once you clicked on the link, it will redirect you to the Play Store or App Store
Login to Your Account
Use the registered email and password to log in
Connecting Your Wireless Camera
Step 1: After clicking the capture button, you will be given the option to connect with the Wi-Fi camera. To do so, please switch on the intra-oral camera by pressing the button on the device as shown in the image. You will know the camera is on and ready to pair when you see a green light blinking.
Step 2: Choose a user profile to enable the image/ video recording to save captured images/ videos under the particular user profile
Step 3: Make sure the green light on the MouthCAM device is glowing, indicating that the device is powered on.
Step 4: After connecting the device, the ‘Wireless Camera’ option will be available on the list
Step 5: Click on ‘Next’ to begin capturing images or videos.
Tips: You can also use the button on the MouthCAM device for capturing. A single press will capture an image, while a double press will start or stop video recording.
Step 6: You can find all the captured images and videos here at the Local Gallery. Here, you can view or delete the unwanted images and videos.
Using Your Camera
You will find three buttons at the bottom of the preview page. The first button will take photos on every click. The second button will record up to two minutes of video and audio. The third button will take you to the gallery view to preview the images and videos you have captured.
Taking and Deleting Pictures
To start capturing images, click the capture button. You can preview or delete each image by clicking the delete button on the bottom right corner of the image.
Syncing Your Gallery
Step 1: Navigate to the "Local Gallery" section on the dashboard.
Step 2: Tap the ‘Sync now’ in the dialogue box to sync all your images/ videos to cloud storage
Step 3: You can tap ‘Skip for now' if you wish not to sync images/ videos
Step 4: Once you click on the sync button the images and/or videos will start syncing. It will show "Syncing in Progress."
Step 5: Once you sync the items you will get the “The gallery is empty” message in the Local gallery.
Tips: You can also sync the gallery by tapping on ‘All’ on the ‘Selected profile’ available on the Local gallery.
Step 6: Before syncing, you can delete any unwanted images or videos by long pressing to select the image or video you do not need.
Step 7: If you want to deselect images or videos, tap on the ‘Clear’ button.
Step 8: Tap on the online gallery to check the images or videos reflected from the Local Gallery.
Image Management Options
You have the option to perform various actions on multiple selected images, including copying, deleting, moving, sharing, adding to favorites, and downloading.
Sharing Images Securely
A: Select an image first
B: Click on the share button to open a pop-up window (as show in Image 22)
C: Create a secure password (as shown in Image 22)
D: Retype the password
E: Enter the email address or phone number of the recipient, or select a dentist from your list to share the image with
F: Agree to the Teledentistry consents and click send
G: The recipient will receive an email or text message with a link and secure password to view the file securely through our HIPAA-compliant platform
Set password
Click on the "To Dentist" option to share it with one of Dentulu's network of dentists. Enter a password that is at least six characters long and contains a letter, number, and special character (e.g., abc12@). Then click "Generate and Send."

Create Profile
Create a new account by providing your First name, Last name, Mobile Number, Email, Password, Gender, DOB
Verify Your Email Address
Check your email inbox to find the verification email with the activation link. Click the activation link to verify your email
Once you clicked on the link, it will redirect you to the Play Store or App Store
Login to Your Account
Use the registered email and password to log in
Connecting Your USB Camera
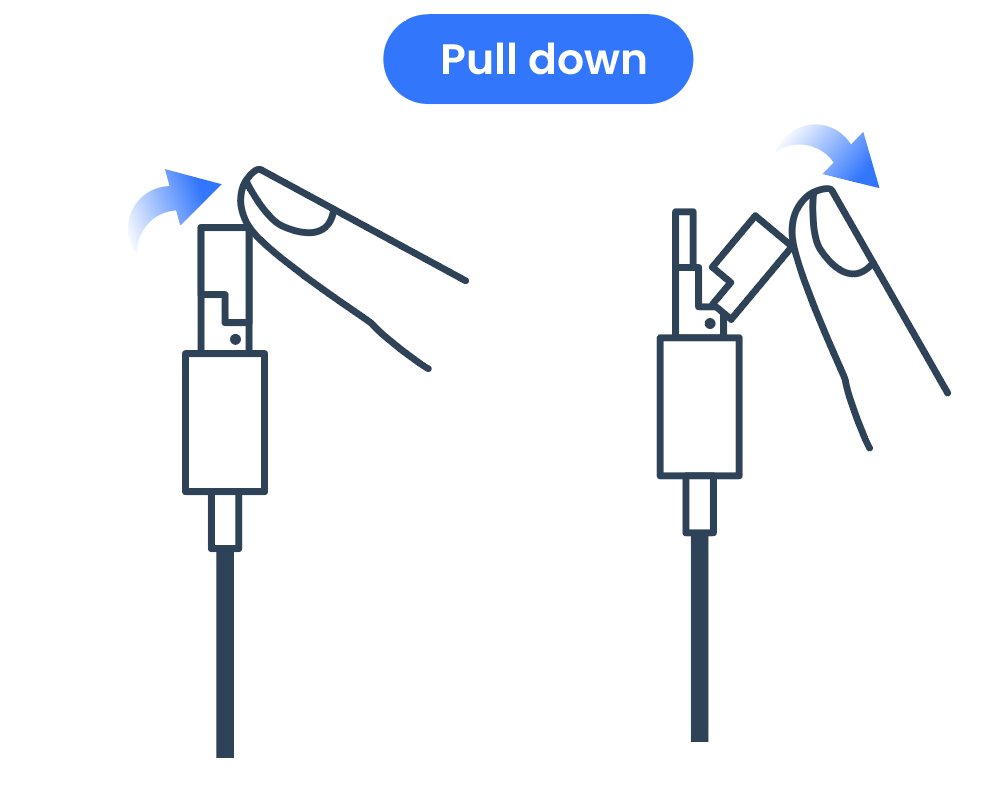
Step 1: Connect your MouthCAM device to your smart device (Use Type C or micro USB for Android mobile devices, use USB for laptops and computer systems). **not compatible with iPhone
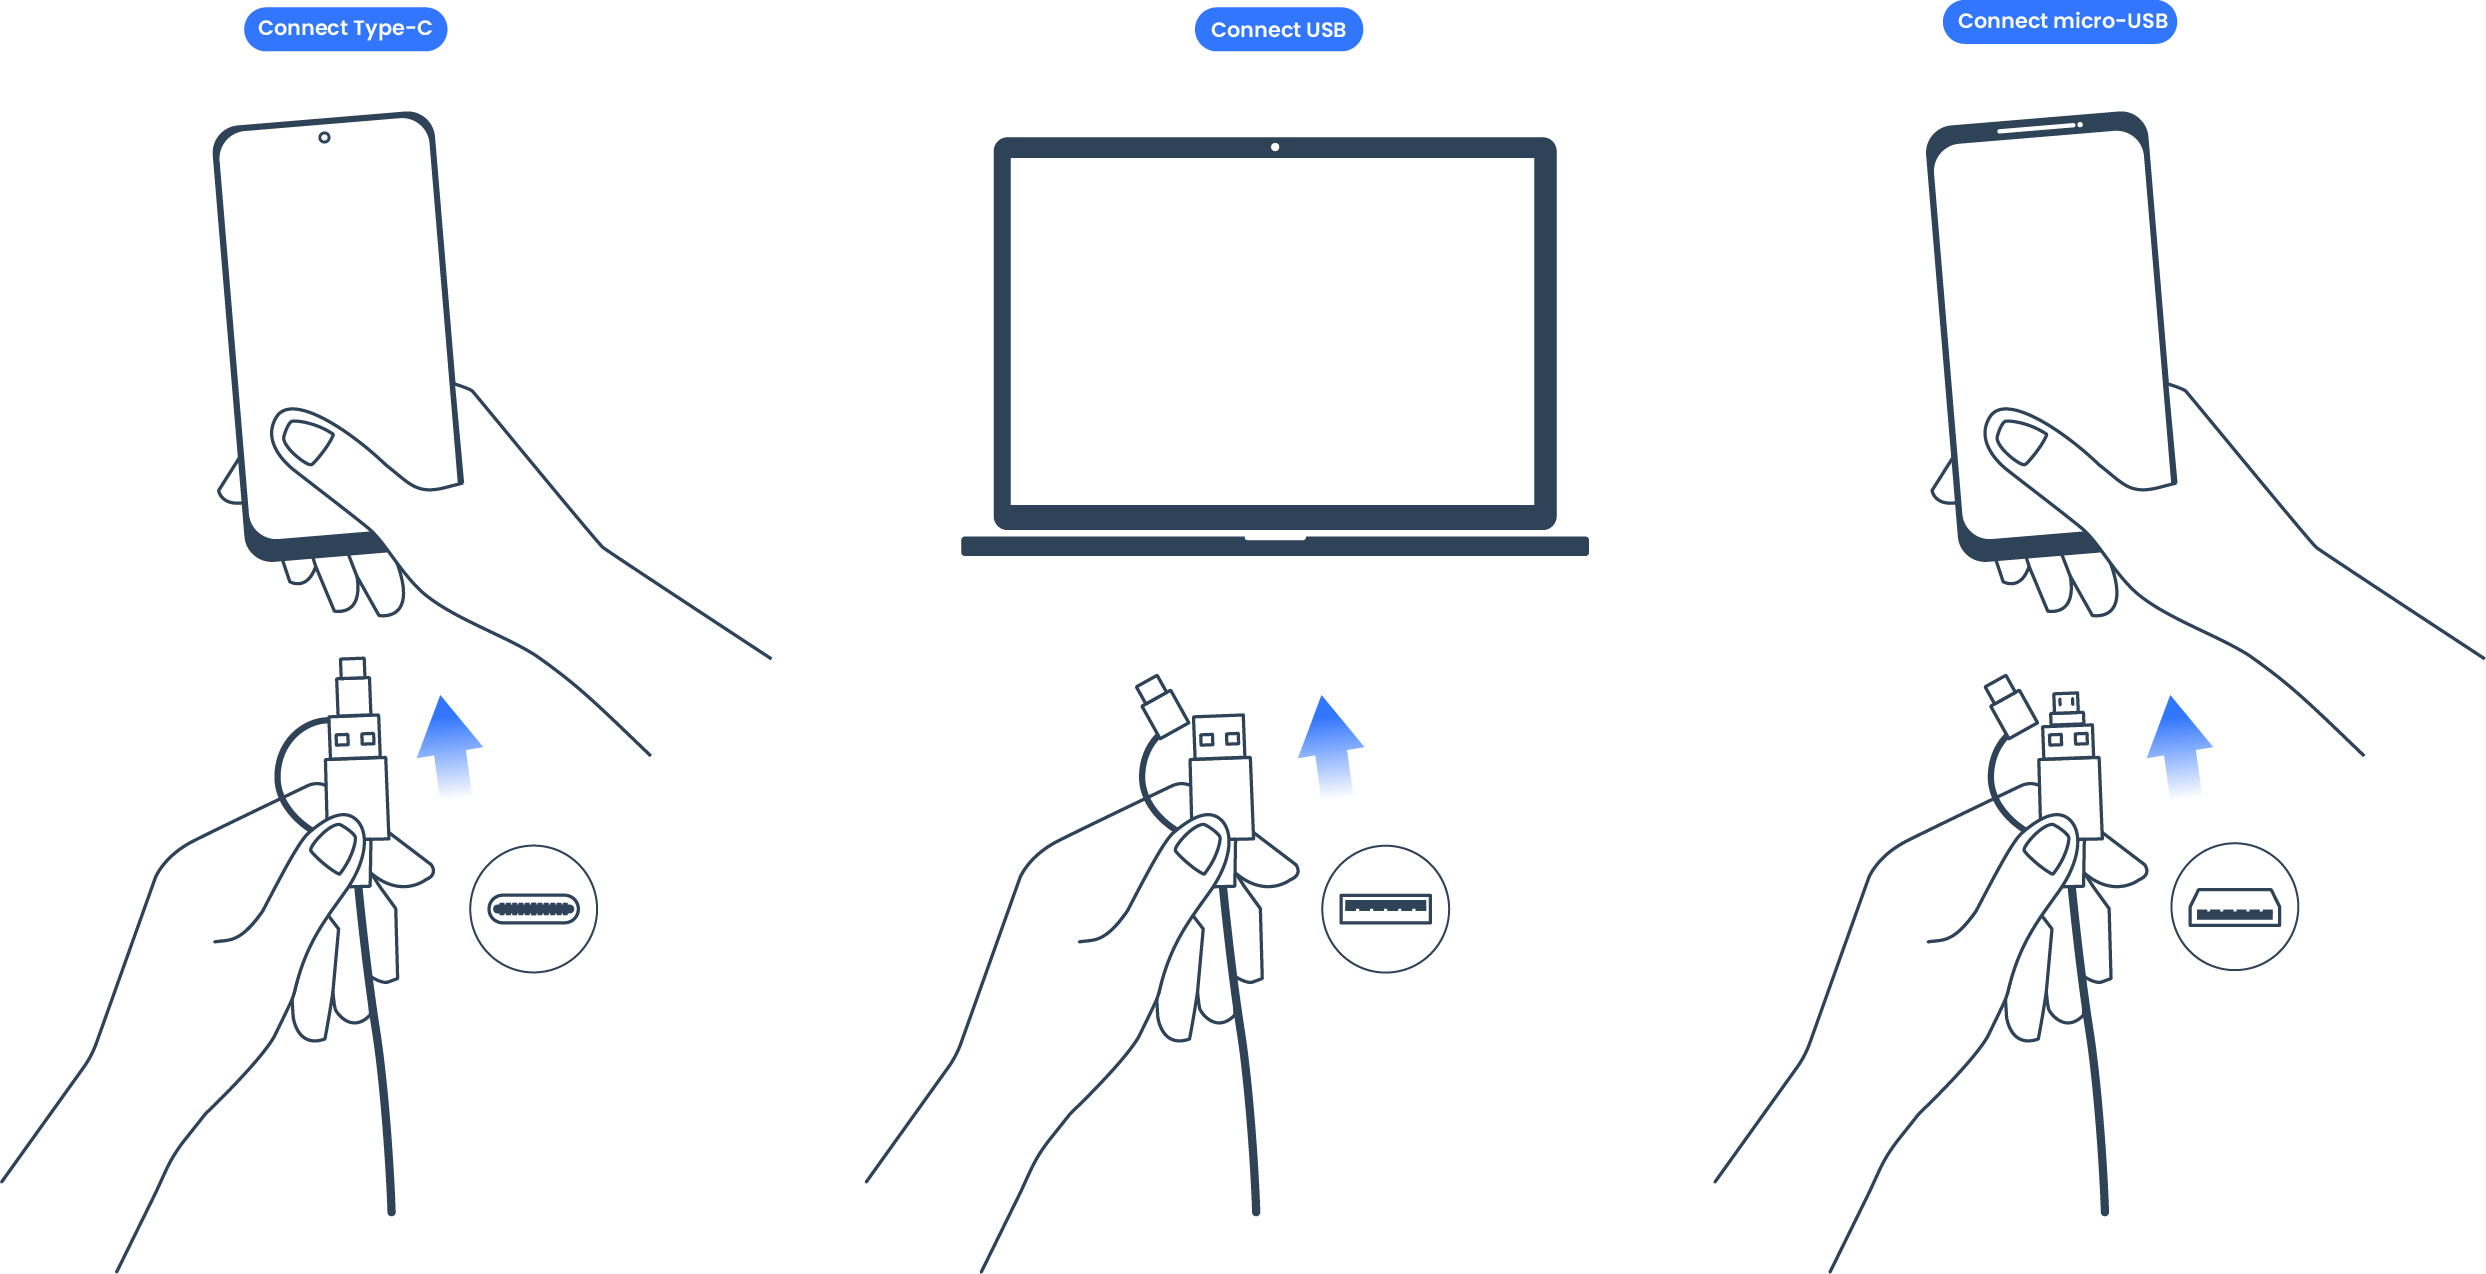
Step 1.1 In case if you are connecting your device with micro USB, pull down the pin as shown in the image below
Step 2: Choose a user profile to enable the recording feature to save captured images and videos under the particular user profile.
Step 3: Make sure MouthCAM is connected by checking the device lights
Step 4: Please check for the USB camera on the list as shown in the image below.
Select the Wired USB Camera and click on ‘Next’ and start capturing images and videos.
Syncing Your Gallery
Note: To ensure that you are never at risk of losing your images or videos, Dentulu has enabled a feature that allows you to sync your content to your cloud!
Step 1: Enter the Local gallery in the dashboard
Step 2: Tap the ‘Sync now’ in the dialogue box to sync all your images and/or videos to cloud storage.
Step 3: You can tap ‘Skip for now’ if you wish not to sync images or videos.
Step 4: Once you click on the sync button the images and videos will start syncing and it will show ‘Syncing in progress'.
Step 5: Once you sync the items you will get the “The gallery is empty” message in the Local gallery.
Tips: You can also sync the gallery by tapping on ‘All’ on the ‘Selected profile’ available on the Local gallery.
Step 6: Before syncing, you can delete any unwanted images or videos by long pressing to select the image or video you no longer need.
Step 7: If you would like to deselect an image or video, you can tap on the ‘Clear’ button.
Step 8: Tap on the online gallery to check the images and videos reflected from the Local Gallery.
Sharing Images Securely
Step 1: Enter into the ‘Online gallery’ to access the images and/or videos on the cloud storage.
A: Select an image first
B: Click on the share button to open a pop-up window
C: Retype the password
D: Enter the email address or phone number of the recipient, or select a dentist from your list to share the image with
E: Agree to the Teledentistry consents and click send
F: The recipient will receive an email or text message with a link and secure password to view the file securely through our HIPAA-compliant platform.
Step 3: Once the files are successfully shared you will receive a pop-up notification saying ‘File(s) shared successfully’.
Editing User Details
Step 1: You can see the user details where the section display the name, date of birth, email, mobile number, and gender (if viewing other profiles, you can see the user's relationship with you).
Step 2: Click on view details to view the full user details
Step 3: Use the edit option to edit the details (Tip: The sub-users cannot change the email, whereas the main user can edit user details fully.)
Step 4: You can delete users by tapping on the ‘Delete user’ button.
Dental & Professional
Create Profile
Create a new account by providing your First name, Last name, Mobile Number, Email, Password, Gender, DOB
Verify Your Email Address
Check your email inbox to find the verification email with the activation link. Click the activation link to verify your email
Once you clicked on the link, it will redirect you to the Play Store or App Store
Login to Your Account
Use the registered email and password to log in
Connecting Your USB Camera
Step 1: Connect your MouthCAM device to your smart device (Use Type C or micro USB for Android mobile devices, use USB for laptops and computer systems). *PLEASE NOTE THAT THIS DEVICE IS NOT COMPATIBLE WITH IPHONE.
Step 1.1 In case if you are connecting your device with micro USB, pull down the pin as shown in the image below
Step 2: Choose a user profile to enable the recording feature to save captured images and videos under the particular user profile.
Step 3: Make sure MouthCAM is connected by checking the device lights
Step 4: Please check for the USB camera on the list as shown in the image below.
Select the Wired USB Camera and click on ‘Next’ and start capturing images and videos.
Syncing Your Gallery
Step 1: Navigate to the "Local Gallery" section on the dashboard.
Step 2: Tap the ‘Sync now’ in the dialogue box to sync all your images and/or videos to cloud storage.
Step 3: You can tap ‘Skip for now’ if you wish not to sync images or videos.
Step 4: Once you click on the sync button the images and videos will start syncing and it will show ‘Syncing in progress'.
Step 5: Once you sync the items you will get the “The gallery is empty” message in the Local gallery.
Tips: You can also sync the gallery by tapping on ‘All’ on the ‘Selected profile’ available on the Local gallery.
Step 6: Before syncing, you can delete any unwanted images or videos by long pressing to select the image or video you no longer need.
Step 7: If you would like to deselect an image or video, you can tap on the ‘Clear’ button.
Step 8: Tap on the online gallery to check the images and videos reflected from the Local Gallery.
Sharing Images Securely
Step 1: Enter into the ‘Online gallery’ to access the images and/or videos on the cloud storage.
A: Select an image first
B: Click on the share button to open a pop-up window
C: Retype the password
D: Enter the email address or phone number of the recipient, or select a dentist from your list to share the image with
E: Agree to the Teledentistry consents and click send
F: The recipient will receive an email or text message with a link and secure password to view the file securely through our HIPAA-compliant platform.
Step 3: Once the files are successfully shared you will receive a pop-up notification saying ‘File(s) shared successfully’.
Editing User Details
Step 1: The user details section displays the name, date of birth, email, mobile number, and gender. If you are viewing other profiles, you will also see the user's relationship with you.
Step 2: Click on "View Details" to access the full user details.
Step 3: Use the "Edit" option to modify the details. (Tip: Sub-users cannot change the email address; only the main user has full editing capabilities.)
Step 4: To delete a user, tap on the "Delete User" button.